I was being cheerfully optimistic when I named my previous counterfeiting tutorial
CHA Fakery #1, hoping that I'd find time to blog some further how-tos for the items that I counterfeited for my
September Counterfeit Kit but not entirely sure that life would let me. So far this month, the scrapping gods have smiled upon me and so here's a very quick and simple tutorial to share - forging the lovely flag tags made by
Jenni Bowlin Studio:
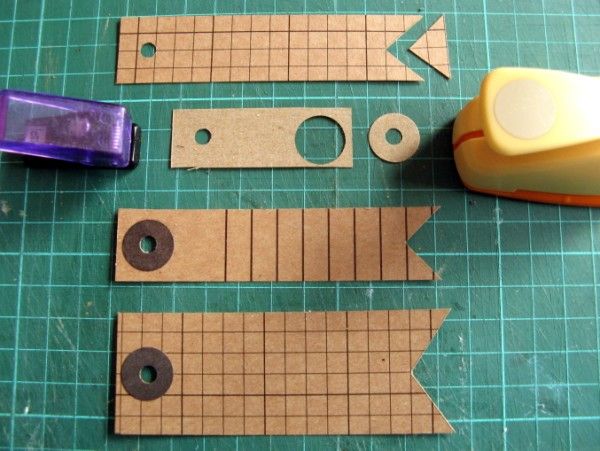
- Cut a rectangle from (kraft) cardstock, punch a hole in the centre of one end and snip out a triangle from the other end
- Punch a hole in a scrap of (kraft) cardstock and then use a small (¾") circle punch to fake a ring-reinforcer {Tip: turn the circle punch upside down to help centralise the small hole}
or use a small coin as a template if you don't have such a tiny punch and punch the centre hole afterwards
or just grab a ring-reinforcer from your stationary supplies!
- Colour it with inks/pens if required and adhere to your rectangle over the punched hole
Easy, peasy, lemon squeezy, eh?! Which means that you can then start playing around:
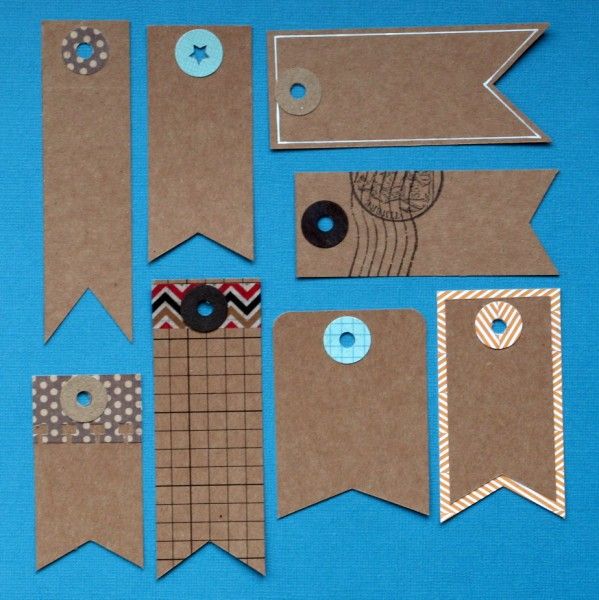
- use patterned paper instead of cardstock for your ring-reinforcer
- use a different shaped punch for the hole
- use a pen to add a border around your tag
- add some stamping to a plain tag
- add some patterned paper or washi-tape at the hole end of the tag
- round some corners
- layer up a tag onto patterned paper
And all for free :o)
I love tags! And, you're right, they are really easy to recreate on your own.
ReplyDeleteRinda
These are AWESOME!! I definitely need to make some! Pinning for sure!
ReplyDeleteThese look so great...I do up things like this too...so economical and you can customize them to match your page! Yay!
ReplyDeleteI am IN LOVE with these!! I believe they will be showing up on a LO very soon!!
ReplyDeleteBrilliant ideas there, thank you so much!
ReplyDeleteGreat list of things to try for such cute tags.
ReplyDeleteThese are fab, I might have to pinch that idea :)
ReplyDeleteOh, these are fabby indeed :) Love them!
ReplyDeleteWOW! These are amazing!!!
ReplyDelete**applause**
ReplyDeleteWhat great tags! These would be great for using up scraps and for dusting off my stamps (ahem!). Way to go!
ReplyDeleteWhat superb ideas! I've jotted down your instructions for future use - these tags look great. I'm thinking presents ...
ReplyDeleteI LOVE these!!!! I am sooo copying these!!!
ReplyDeleteOne of the nicest thing about being absolutely swamped at the moment is I've not looked at any CHA hints/reveals whatevers... but keep seeing tutorials on how to fake 'em ;)
ReplyDeleteLovely!
You do a great job here of showing the steps in the first photo. Being a visual learner, this works well for me. Now off to find me a 3/4" punch.
ReplyDeletewow look at the tags on that, nice work
ReplyDeleteOoh, liking the idea of using patterned papers for the ring re-enforcers - what a great way to use up little scraps!
ReplyDeleteI LOVE these tags! Very cute and creative, and I love the kraft! Thanks for sharing!
ReplyDelete