Showing posts with label Instructions. Show all posts

Monday, 4 July 2016

Bee-ing Busy

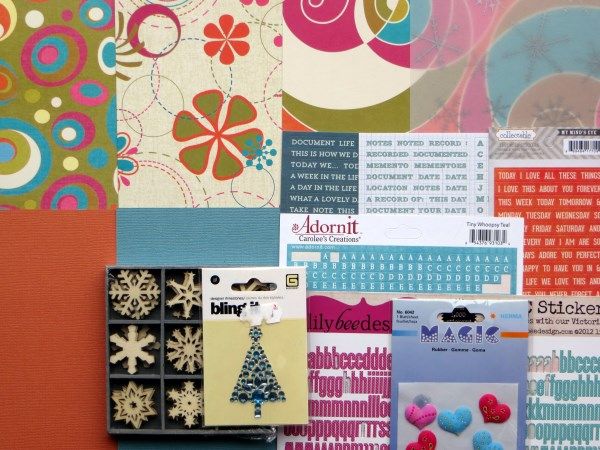
Every month at the CKCB we counterfeit the Kit-to-Copy by choosing similar papers and embellishments and sometimes make our own versions when we don't have anything appropriate to hand.

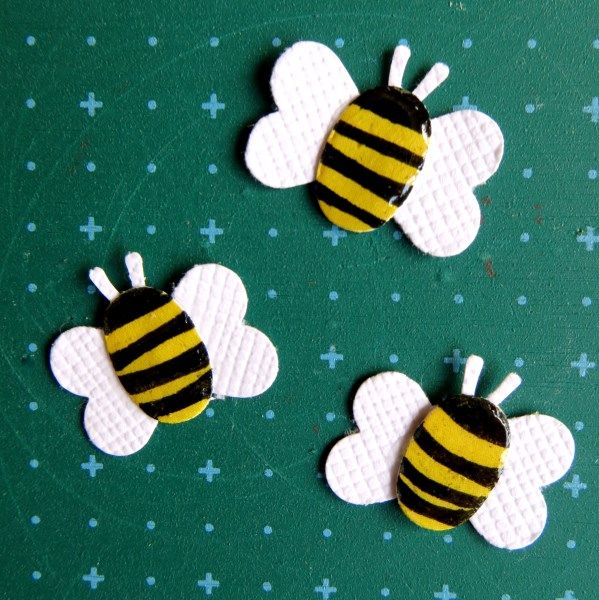
When I first looked at the this month's inspiration from Scrapbook & Cards Today I almost missed the cute bee stickers - but when I spotted one in use on this lovely card from Amy Sheffer, I thought "I can make that!" and got to work!!

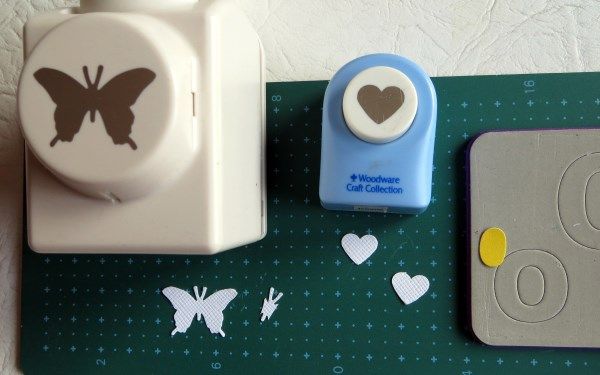
I grabbed two punches and an alphabet die ...


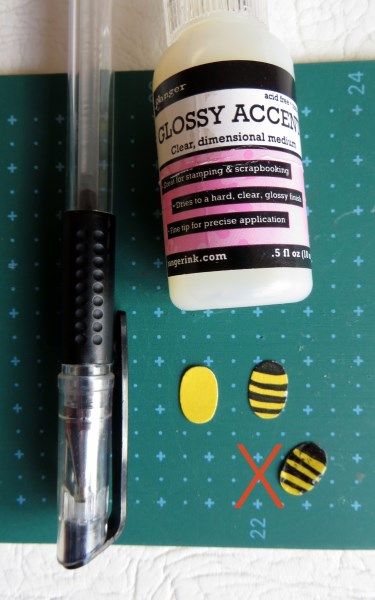
I discarded the butterfly wings as I was only interested in the antennae ... and punched two replacement wings with a heart punch.  The bee's body is made from yellow card and the centre of an "o" die!  A black pen was all that was needed for some stripes and the "head", followed by some Glossy Accents to give the body a shiny sticker-like surface.


BUT ... leave time for the ink to dry before applying the liquid glaze or you'll end up with smudgy stripes!  And of course set the body aside for at least an hour to allow the glaze to dry fully before assembly:


There will be lots more ideas for forging this month's Kit-to-Copy in our Fogeries on the Fourth Post today.  Why not have a go yourself?!

Monday, 7 December 2015

December Documented with the CKCB

Over at the Counterfeit Kit Challenge Blog, the Master Forgers are sharing kits to help document December in various ways.  I showcased my kit yesterday ...

Jimjams - CKCB Document December Kit

... and today I am sharing my project ...

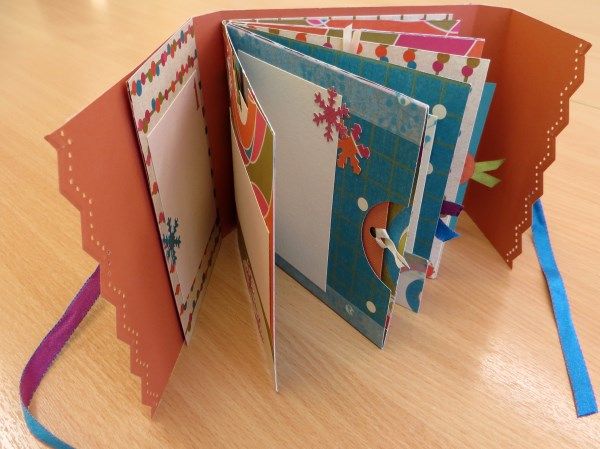
Jimjams - 25 Days of Christmas Lean Mean MAXI-book

It's based on my original Lean Mean Maxi-Book, but with an added half-sheet of patterned paper to extend it and allow for 25 photos or snippets of journalling.

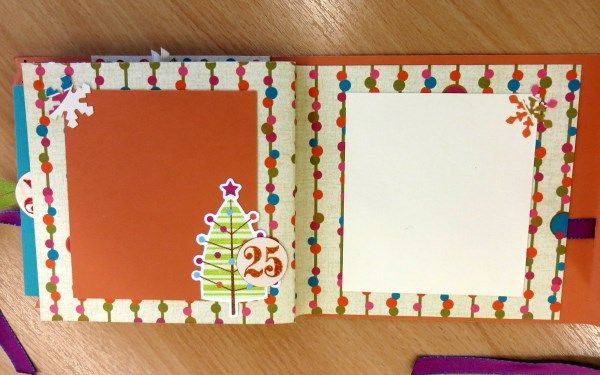
A standard Lean Mean MAXI-book needs 2½ sheets of good quality patterned paper for the inner pages (instructions here) and one sheet of cardstock for the cover (instructions here).  My extended version needs 2½ sheets of patterned paper plus an extra ½ sheet (mine was the same pattern as one of the full sheets I'd used for the last half of the book which allowed me to make a double page spread for Christmas Day):

Jimjams - 25 Days of Christmas Lean Mean MAXI-book - day 25

Simply make up the cover and inside pages - but don't stick them together yet!.  Measure the depth of the spine of the inner pages - mine was 3/16".  Cut a 5"x12" strip from the extra ½ sheet of patterned paper.  Score the strip 5" away from the right hand edge of the strip and make a second score line, to the left of this, that is the smae as the depth of your inner pages spine.  Trim the strip 5" beyond this second score line.  Punch a semi-circle half-way along the top edge of the left-hand 5" section.  Adhere the other three sides of the left hand 5" section to the front of your inner pages to make a pocket for a tag.  The right-hand 5" section of the extra strip of paper is now stuck down onto the centre section of the cover, over the ribbon tie (see the cover instructions).  Finish off the cover construction, decorate and you are ready to Document December!

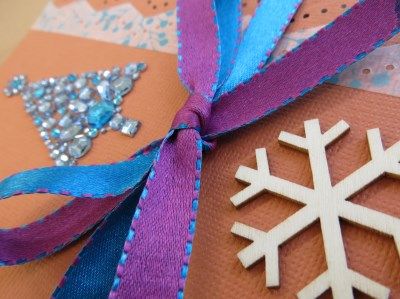
Jimjams - 25 Days of Christmas - cover detail

All of the inner pages are shown on the CKCB today.
In fact there's inspiration every day of December on the Counterfeit Kit Challenge Blog; please join us and share your creations on our Mr Linky page.

Wednesday, 4 November 2015

Socially Acceptable

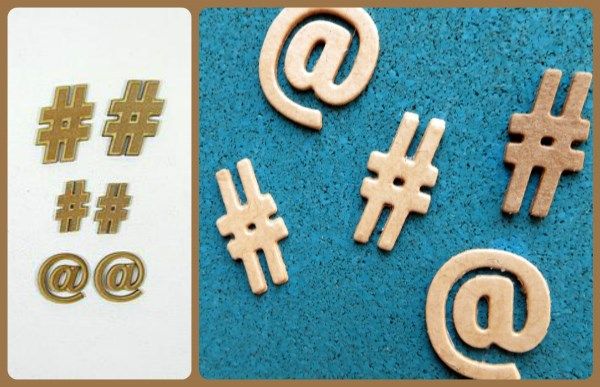
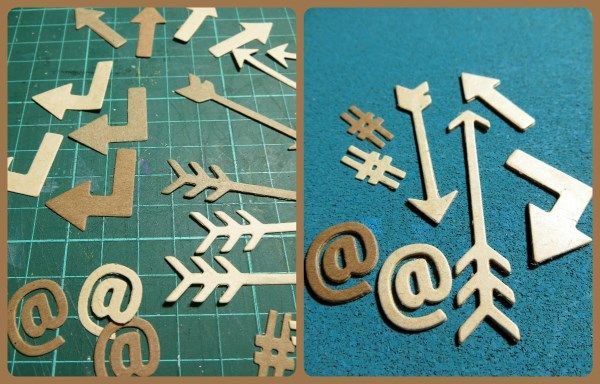
Today the Counterfeit Kit Challenge Blog is sharing their regular Forgeries on the Fourth post and this month several Master Forgers have been counterfeiting add-on embellishments for their November kits.  I chose to recreate the social media wood veneers from Grapevine Studio ...

Jimjams - forging wood veneers

... using various shades of kraft cardstock!  Simply cut several layers of  the same die-cut or punch and glue them together to recreate the dimension of the wood veneer.

Jimjams - forging wood veneers

I found that three or four layers were enough to give me a decently solid shape.  You can see how the un-layered hashtags above are so much less substantial than the @ signs.  As I'd packed some arrow dies in my November kit I made goood use of them as well.

Check out the other tutorials and tips on the CKCB today - there's sure to be plenty more inspiration there.

Sunday, 4 January 2015

Stamped With Heart

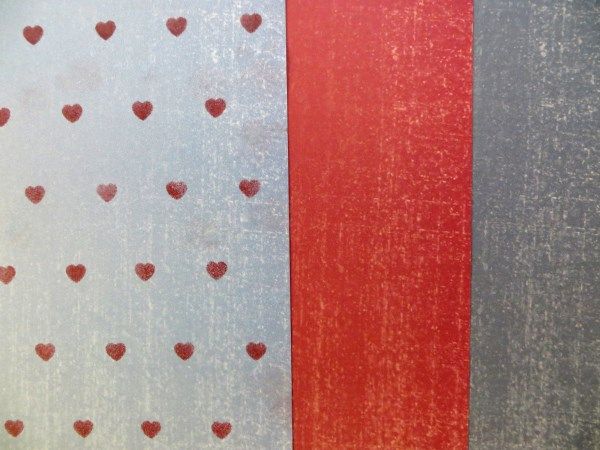
Did you spot the Amy Tangerine Stitched Applique heart patterned paper in this month's Kit-to-Copy over at the Counterfeit Kit Challenge Blog? 

I knew I could forge a regular heart pattern ... but how to do it in a time-saving way? 

Stamping it out perhaps?  Yes, but hard to get a regular grid ...

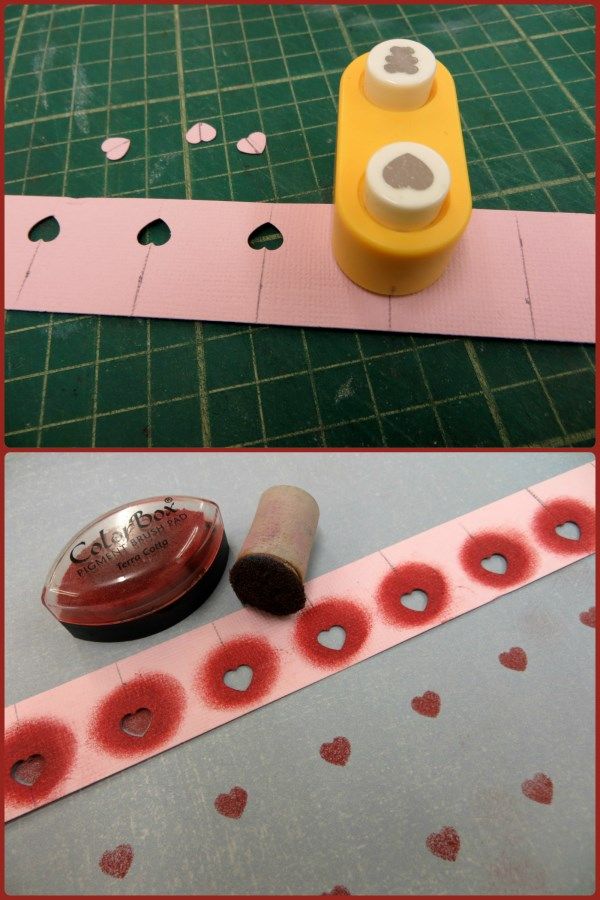
What about punched holes for stencilling?
That would work reasonably well:

I marked out 1" lines across a strip of scrap cardstock (starting ½" in from the edge) and punched a heart out at each line, taking care to place the cardstock fully into the punch slot (and lining up the lines with a small pencil mark I'd made on the punch).


Then I used the strip as a stencil and inked out 11 hearts at once!  I was fairly lazy and spaced my lines of hearts quite far apart, but by varying the placement of punched shapes and the strip as a whole you can get a variety of effects.

There are more counterfeiting ideas from my fellow Master Forgers over at the CKCB today.

Monday, 8 September 2014

Corking Chipboard Embellishments

Jimjams - Counterfeited cork embellishments
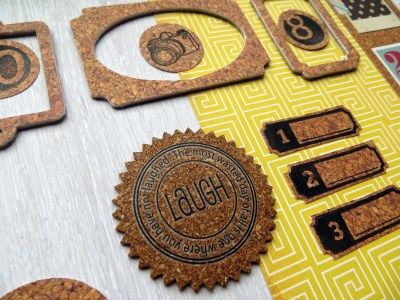
Scrapbook Circle have exclusive cork chipboard die cuts in their August kit, being counterfeited by the CKCB this month.

I had just ONE cork embellishment - a plain pinked cork circle.
But I did have some chipboard frames, some cork patterned paper (from the Simple Stories 24/Seven 6x6 pad), some stamps and a few rub-ons ...

AND

... now I have my own set of exclusive "cork" embellishments!

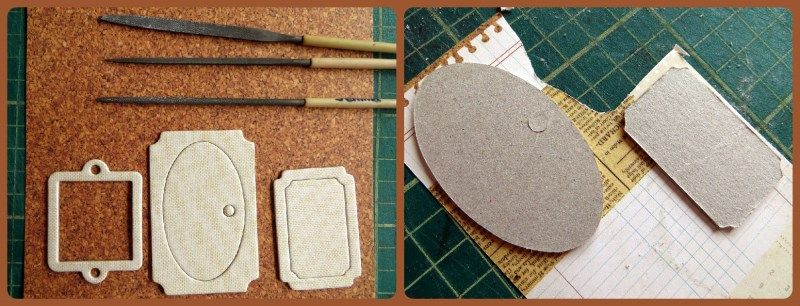
Some are simply designs (stamps or rub-ons) added onto the cork paper and carefully cut out.  However to give them some depth I decide to cover some chipboard with the cork patterned paper.  It's really easy to do, especially if you have some precision files (mine are Basic Grey, but they are also sold very cheaply in DIY shops too) but sandpaper or an emery board will work for simple shapes:

Jimjams - "cork" covered chipboard

Jimjams - filing chipboard
Stick the chipboard face down onto the back of your cork patterned paper, making sure that the glue goes right to the edge of the chipboard.

Roughly cut away excess paper, leaving a little overhanging the edge of the chipboard.  Using fine sandpaper or a file/emery board, use downward strokes from the patterned side at an oblique angle along the edge of the chipboard (see photo). This will push the edge of the paper onto to the edge of the chipboard making a good seal and reveal the core of the patterned paper, softening the edge of the chipboard shape.

Jimjams - "cork" covered chipboard
Use a precision file or folded-in-half-sandpaper to work on tight spaces where an emery board will not fit, remembering to keep filing down against the edge of the chipboard.  My precision file set has a round file which is perfect for the inside of curved edges and the inside of holes! Unfortunately, you  make an incredible dusty mess of paper filings but the results are worth it:

Jimjams - "cork" covered chipboard

Back in 2010, I did a charity retreat class on several ways to decorate chipboard - the handout for which can be downloaded via a link at the bottom of this post.  Have fun!

There are more tutorials to help you counterfeit this month's kit over at the CKCB today.


Saturday, 9 August 2014

Tagxedo Theme Tones

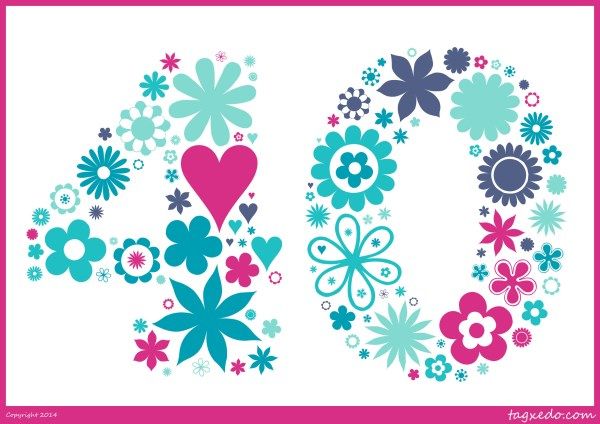
A reader recently contacted me to ask if I had some pointers for personalising a Tagxedo colour theme.  To get the techniques straight in my head I decided to make a flowery 40 for a friend's birthday card following my own Tagxedo tutorial on using flowery fonts:

Jimjams - Tagxedo Themes - Blulola

To save you clicking back to 2012, here are the steps for making the card design before I address the colours:

Download Sarus's Flower Ding Font to the computer, then click on Font ► and use Add Fonts ... to load it onto Tagxedo.  The flowers will appear (in red) on the list of fonts.  Click on it to select it.

Click on Shape ► and use Add Words ... to create a "40" in ChunkFive (a nice chunky font to fill with flowers) and click Accept.

Choose Orientation ► Any so that the flowers can be at any angle and then lock the three padlocks.

Load a variety of letters, corresponding to pretty flowers, as the text and click Submit:
♥:50:@0
A A A B B B B B B B B B B C C C C D D D D D
G G G G G G G G H H H H H H H H H I I I I I I I I L L L L L L L L
M M M M M O O O O O O O O O V V V V V V V V V V V V V W W W W W W
X X X X X X X X o o o o o o o p p p p p x x x x x x x x x y y y y y y
The 50 forces the ♥ to be the most frequent character and the @0 forces it to be horizontal.

Worryingly at this point, the image disappears!!!  A few settings need tweaking to get it back:

Select these Word Options, press Accept when done:
Punctuations = Yes (this allows the to show)
Remove Common Words = No (this allows the individual letters flowers to show)
Select these Layout Options, press Accept when done:
Max Word Count = 150 (stops the flowers getting too small - but make sure that the shape is still filled)
Tightness = 150% (fills the shape as much as possible, but slows Tagxedo down)
Normalize Frequency = Yes
Hard Boundary = Yes (makes the shape seem more defined)
Allow Replication = Yes (so that there are enough words flowers to fill the shape)
Font Preference = Any 1 (only the red flowers should be selected in Font ►)
This produced a chunky 40 filled with flowers in the default colour theme "Quiet Morning".

Jimjams - Tagxedo Themes - Quiet Morning

To choose another of Tagxedo's colour themes simply click on Theme ► and choose a different one e.g.  "Elephant In The Room"

Jimjams - Tagxedo Themes - Elephant In The Room

Re-spinning Colour will change the colours of the individual flowers, keeping within the current theme:

Jimjams - Tagxedo Themes - Elephant In The Room

It's worth re-spinning Colour (and possibly Layout) several times before choosing the one you like best from the History ...

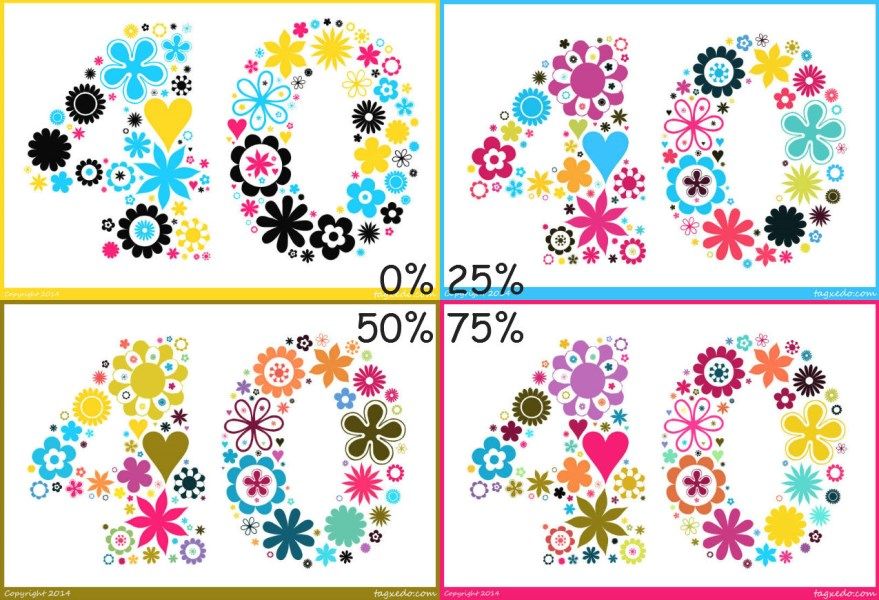
Tagxedo allows some variation from the colours shown in each theme (normally 50%) but you can change this to 0% to use ONLY the specified colours ("Fallen In Love" has just 4 shades: black, turquoise, hot pink and yellow) or increase it to 100% for maximum colour variation within the theme:

Jimjams - Tagxedo Themes - Fallen In Love

Finally, if none of Tagxedo's colour themes float your boat, you can create your own:

Click on Theme ► and use Add Themes ... to see a sample colour theme called "Blue Meets Orange" with six strings of numbers and letters afterwards (000000 007080 4080a0 f0f0f0 d0a030 c06010).  These are the RRGGBB (red, green, blue) codes for various colours where 000000 is black and FFFFFF is white.

You can change the name*¹ to something sensible e.g. "Mauritius Flag" and then replace the RGB codes with the RGB codes for the colours*² you prefer e.g. ff0000 000066 009900 ffcc00 before clicking Submit.

Your new colour scheme will appear below as blocks of colour with a border representing the background.  Auto chooses one of the colours as a background, but you can change the background colour e.g. click Bright for the brightest of your colours, click First for the first colour in the list or even select Black or White.  Edit the RGB strings to change/add/delete colours and click Submit to make new themes.  When you find one you like click the Add to the left of it and X to get rid of the Add Themes ... box.  Now you can select your newly named theme (with or without colour variation):

Jimjams - Tagxedo Themes - Mauritius Flag

My thanks to Lynn for her query.  I hope this helps a little.  Have fun!

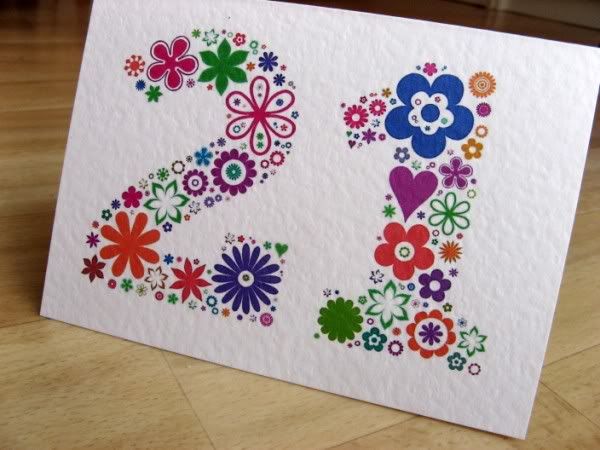
Jimjams - Card - 21st Birthday Card with Tagxedo flowers
I can't show the 40th card yet, but here's one I made earlier (using "Happy Brights")
*¹ Unfortunately when you have finished with Tagxedo for the day it doesn't save anything ... neither your shape, your extra fonts, your settings nor your colour themes will be there next time you play ... so don't stress about what you call your scheme! 

*² Try Colour Picker, Design Seeds  (hold your mouse over the side colours to see the codes), or Colour Palette Generator to choose colours and find out the required RGB codes.

Tuesday, 8 July 2014

Counterfeit It Up

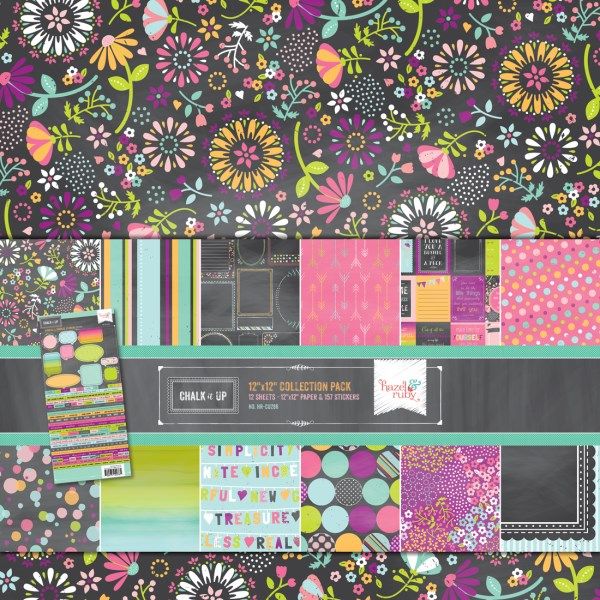
Hazel & Ruby Chalk It Up CollectionI loved the Hazel & Ruby papers and stickers in the Noel Mignon Balboa Kit being counterfeited this month at the CKCB and thought that they might be fun to forge!


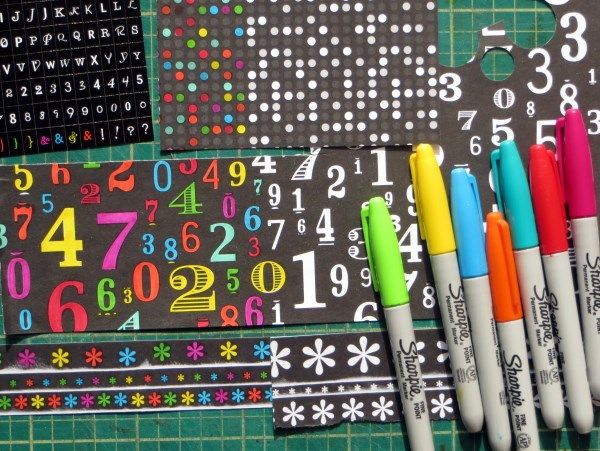
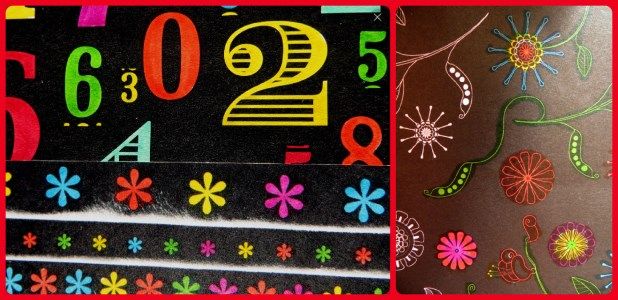
I have a load of (scraps of) old black and white patterned papers and got to work with brightly coloured Sharpies.  Some black & white mini-alpha stickers got the Sharpie treatment too:

Jimjams - forged papers & stickers

Pretty good effect and easy to do.  I only experimented on a couple of punctuation stickers because I will colour the exact letters required as and when I need them.

Looking back at the originals I decided to try with other black & white patterns ... but this time the background showed rather more of my poor colouring in skills!  The papers on the left barely show the Sharpies' colours spilling over onto the black, but the paper on the right only works from a large distance with half-closed eyes!

Jimjams - forging papers - fail!

It's just as well I was experimenting with scraps!

Other Master Forgers have been busy over at the Counterfeit Kit Challenge Blog today - check out their forgeries here :-D

Monday, 24 March 2014

How Many Posts?!?!?

Welcome to the final post of the March CKCB Members' Blog Hop; if you didn't reach me from Cindy then you might want to start at the beginning with Lisa.  This month we had a choice of three challenges to use for the hop (#1 Use Watercolour Techniques, #2 Be Inspired By Jennifer and #3 Add Texture To Your Background).

I had a page all ready for the texture challenge, but then I realised that today I'd also celebrating blog post No:

Jimjams - Tagxedo - 400th blog postso I decided to combine texture with my favourite on-line tool: Tagxedo.

As you can see from the image, it's possible to load up  your own text to be used as the outline rather than use the pre-defined shapes (here I selected Shape ► and Add Words ... and typed the characters "400", chose ChunkFive font and then inverted the shape.

It's also easy to upload special fonts to use instead of the standard ones: my 200th blog post explains how I used Saru's Flower Ding Font, available free from dafont here.  Any special font has to be already downloaded onto your computer and then uploaded into Tagxedo by selecting Font ►and Add Fonts ...

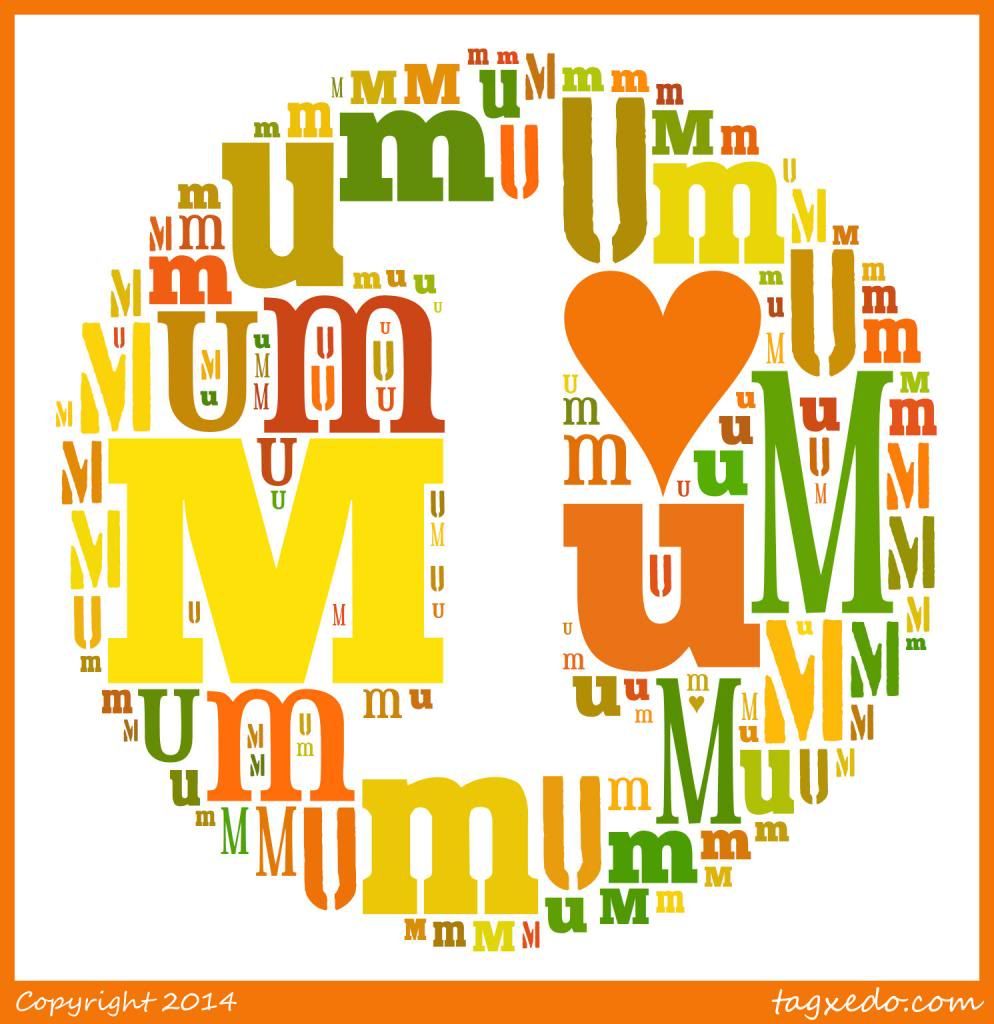
Mothering Sunday is approaching (in the U.K.) so I thought I'd see if I could combine these two actions and make my outline shape from the character set of an added font.  I loaded Wingdings2 into Tagxedo first, then made my shape the letter "u" in Wingdings2 to give me ❶ (I generally copy & paste from the Windows Character Map to select characters in weird fonts as it's impossible to remember all the character equivalents ... this sheet is useful for quick reference though). 

Jimjams - Tagxedo - No.1 Mum

My Tagxedo text was simply the letters "M", "u" and "m" rather than the word "Mum" plus a ♥.  I forced the ♥ to be artificially large using ♥:150 and the letters were repeated 40 times (for some reason it's necessary to type in the letters individually rather than use "M:40 u:40 m:40" but I have NO idea why).

I used the defaults for everything else except:
Theme = Pi Palette
Font = a few of the ones I like best (deselect unwanted ones, including Wingdings2!)
Orientation = Horizontal
My Word Options were:
Remove Common Words = No (for small words like “a”, “is” and “it” ... and "m" and "u"!!!)
Combine Identical Words = No (so that "M" and "m" aren't treated as one item)
My Layout Options were:
Max Word Count = 150 (stops the letters getting too small - for printing out reduce it further)
Allow Replication = Yes (to fill the shape without typing "M", "u", "m" repeatedly)
Font Preference = All (the ones I have selected)
I messed about with  Layout, Colour, and Font Respins until I found a combination that I was happy with - utilising the History to see thumbnails of the variations - before using Save ... to get an image onto my computer.

And here's the finished card:

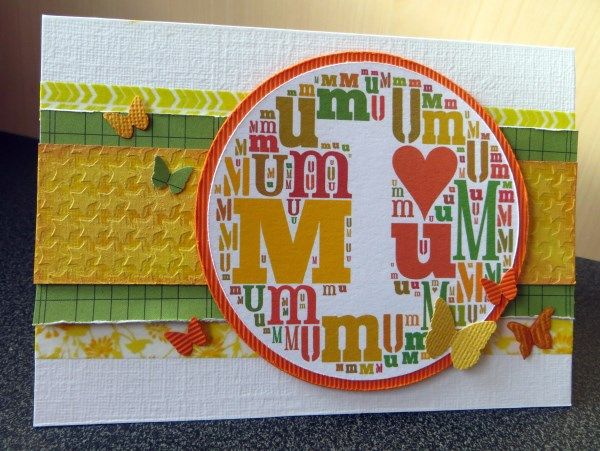
Jimjams - Card - No.1 Mum

My Coluzzle circle templates were dusted off to cut out the Tagxedo image and mat it onto a scrap of textured orange card before scissor distressing the edges.  The starry strip is made with a 6x6 Crafter's Workshop punchinella stencil and some texture paste which was coloured once dry.  The rest of the supplies (washi, butterflies, ledger paper scraps) are from my March Counterfeit Kit.

I've just had the Tagxedo image printed onto a mug for a matching gift ... Aldi have free postage on gifts at the moment with the code EASTER3 ... hope it arrives in time!

Well, that's it for the CKCBMBH today - if you missed anyone you can see the whole blog hop listed here. If you fancy joining in yourself next month, just drop the CKCB a mail - everyone is welcome.

P.S. If you're new to Tagxedo, please check out some of my other Tagxedo posts for more tips & tricks.

Saturday, 8 March 2014

Counterfeited Stitching

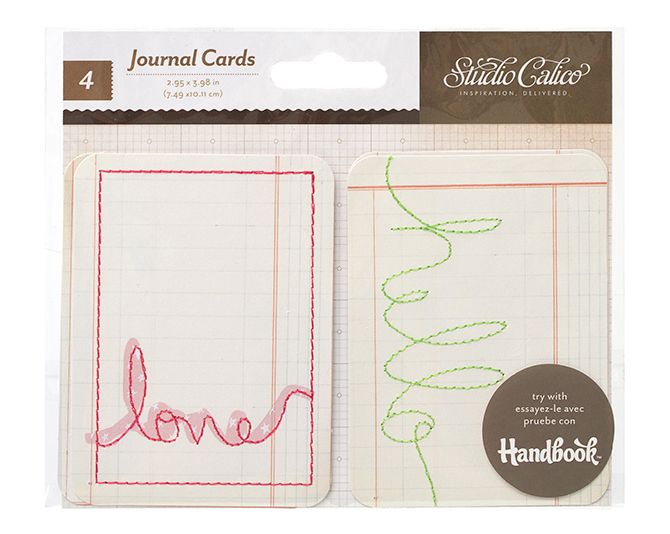
One of this month's kits-to-copy with the Counterfeit Kit Challenge Blog included Studio Calico stitched journalling cards.  Regular readers will know that my sewing machine is set up and ready to go sew at the slightest opportunity, so I jumped at the chance to counterfeit these.

First off, I grabbed some scraps of ledger paper and cut them into rectangles that more or less matched some of the journalling cards in my March Counterfeit Kit.  As I'm not a pocket page scrapper I wasn't too bothered by the exact dimensions, but if Project Life is your thing then you need to measure more carefully!

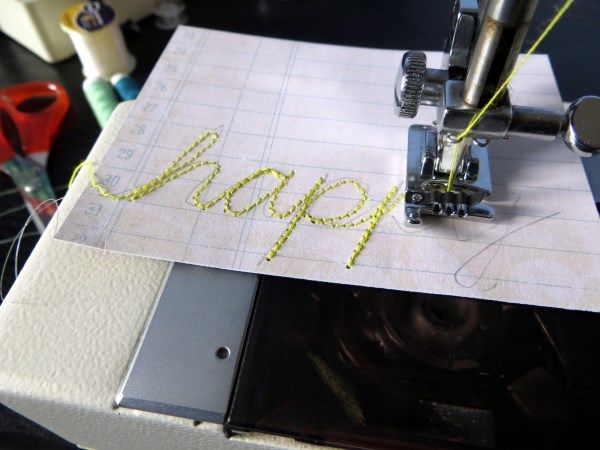
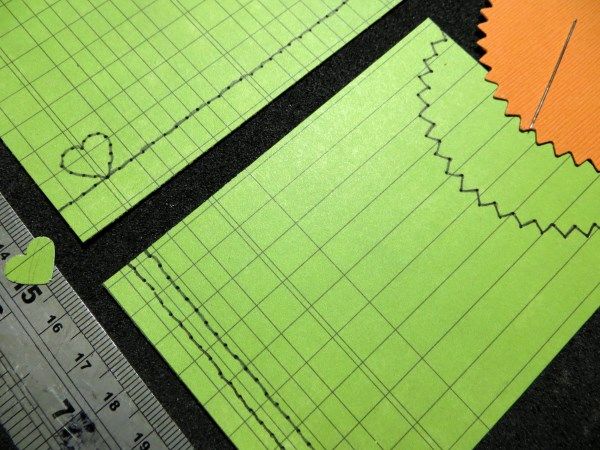
For my first card I lightly pencilled in the word "happy" in a cursive script, keeping to the ledger paper lines.  I slowly, slowly machine-stitched along the pencil lines, exactly as I had drawn them, using a medium stitch length and stopping to rotate the card every few stitches.  A hand sewing machine would be ideal for this.  I alternated between careful pressure on my foot pedal and hand cranking!  When my pencil line reversed direction so did my stitching and I was very careful to match up the stitch holes when over-sewing to avoid shredding the card: paper is not as forgiving of needle holes as fabric is!

Jimjams - Stitching on paper
Not my normal sewing foot: this one gave me best visibility of the pencil line ... I think it's actually for cording!
The thread ends were pulled through to the back of the card and taped down to secure them.  Taping them down thread rather than knotting them means that they remain secure if you decide to trim down the card a little before you use it.

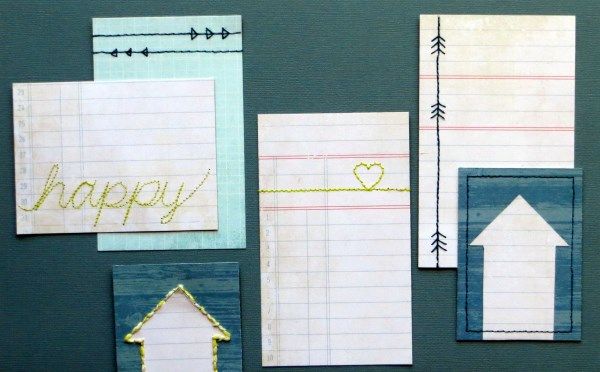
The next three cards were quicker and simpler:  a longer length stitch for a straight line (or two) across each card.  These lines were embellished by pre-piercing holes for triangles, a heart and arrow heads and then hand-sewing in the same thread (see photo below).

Jimjams - Use sewing machine to quickly pierce even holes around paper shapesMy final card started wasn't a resounding success: I decided to add shaped ledger papers to patterned paper from my March Counterfeit Kit and wanted to stitch around the shape using twine from the kit.  made stitch holes with my (un-threaded) sewing machine as that's quicker and more even than hand piercing.

Sewing with bakers twine started well, but as the twine got worn from travelling through multiple holes in the card, it started to fray ... and when I started filling in the stitches to make a solid stitched line, the card began to give way!

Not a good idea to sew with Bakers Twine :-(
{Sewing with fibres is even worse!}
If I'd stuck to (stranded) embroidery thread I'd have been fine.  Rather than carry on hand-sewing, I chopped my card in two, reloaded the sewing machine and quickly framed the arrow card instead.

Jimjams - Counterfeited Studio Calico Stitched Journalling Cards

Now of course you can go one step further and counterfeit the stitching as well.  So in the order to be completely true to my post title, here are a couple of fully counterfeited, counterfeited stitched journalling cards:

Jimjams - quick faux stitchiing

Simply lay your card over an upturned mouse mat, pierce regular holes in a line/around a shape and fill in the gaps with a fine pen.  I still prefer the real thing though!!

Lots more counterfeiting going on today at the CKCB - check it out!

Wednesday, 8 January 2014

Tagxedo Word Art Tips & Tricks

This month's first challenge over at the Counterfeit Kit Challenge Blog was to be inspired by Subway Art in some way.  There are lovely examples on the blog as well as great interpretations from a some of the Master Forgers.  I thought I'd show you what I might be using for my interpretation of the challenge for the Members' Blog Hop later in the month: (regular readers will already have guessed LOL!!)

Jimjams - January 2014 with Tagxedo for Project Life
Tagxedo.com
If I did Project Life I'd make myself a set of these really quickly and easily with Tagxedo.  Here's some help to get you started:

Click on the Create button on the Tagxedo home page to see the default shape (currently Mother Earth in the shape of ... Earth).

Click Load and enter your text into the box then hit Submit.  My text was simple with 3 variations on January, an abbreviation and the year:
January:5
JANUARY
january
Jan
2014:3  
"January", "JANUARY" and "january" will be treated as different words with "January" being 5 times more “important” than the others.  I included the abbreviation "Jan" because Tagxedo works better with a variety of word lengths.
2014:3 is the same as typing 2014 2014 2014 (but less work!)

Choose your Theme ►, Font ► and Orientation ► then lock them by clicking on the padlocks. Pick your Shape ► too.
I chose:
Theme = Blue vs Grey
Font = a selection of the ones I like best (deselect the ones you don’t like)
Orientation = Horizontal
Shape = Oval 
Select these Word Options, press Accept when done:
Punctuation = Yes *
Numbers = Yes (to allow for 2014)
Remove Common Words = No (for words like “a”, “is” and “it”) *
Combine Related Words = No (for words like “day” and “days”, “go” and “gone”) *
Combine Identical Words = No (so the 3 forms of January are all visible)
Select these Layout Options, press Accept when done:
Max Word Count = 75 (reduced to stop the text getting too small)
Tightness = 150% (fills the shape as much as possible, but slows Tagxedo down)
Normalize Frequency = Yes
Hard Boundary = Yes
Allow Replication = Yes (so that there are plenty of words to fill the shape without having to type them in repeatedly)
Font Preference = All (the ones I have selected) 
* Not strictly necessary for my text, but you might wonder why certain words or characters disappear from your own!  Equally, if you are using phrases in your Word Art and you want to keep some words together then you need to know that the tilde (~) character has special powers: if I wanted "Jan" and "2014" to appear together I would load "Jan~2014" into the text box.

To change the colours within your theme click on the Colour Respin:

Jimjams - January 2014 with Tagxedo for Project Life

Vary the position of the words by clicking on the Layout Respin:

Jimjams - January 2014 with Tagxedo for Project Life

Click on History to see thumbnails of the variations so far - pick your favourite or keep re-spinning or fine-tuning your options and choices until you are happy.  For example you can try out a different shape:

Jimjams - January 2014 with Tagxedo for Project Life

That one might be better with different text and colours for a February page!  What about a circle instead?

Jimjams - January 2014 with Tagxedo for Project Life

The shape-text combination didn't seem to allow for "January" to be the biggest word so some fine-tuning was needed: I reduced the frequency of the year by changing it to 2014:2 and hey presto!

Jimjams - January 2014 with Tagxedo for Project Life

Once you have played for hours (or is that just me?) and found a combination that makes you smile, Save it and have fun printing it out for use in your projects!

The images you make can be used in lots of ways: Project Life cards perhaps, a title block, a strip of background paper, a sentiment for a greetings card ... Child No.3 has just used Tagxedo to make a heart shaped image full of words about me to print on a mug as my Christmas gift - clever, creative girl!!
In the past I've even used Tagxedo  to help me plan out Word Art before creating it myself with alphas (take a look here to see what I made).

There are other tutorials from the Master Forgers over at the Counterfeit Kit Challenge Blog today - why not pop over and see.

Tuesday, 24 December 2013

Festive Greetings!

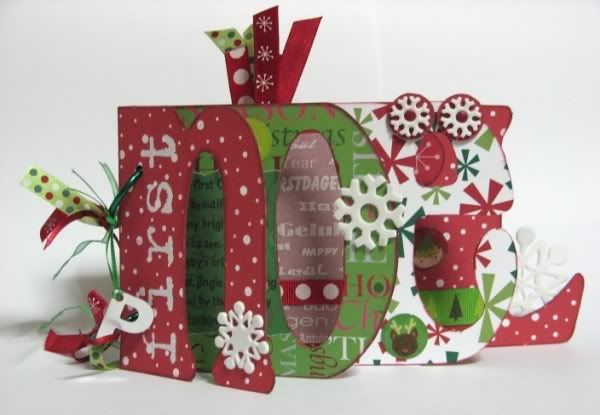
Over at the Counterfeit Kit Challenge Blog today* I've shared a couple of sketches for scrapping some of the many photos we'll be snapping this festive season.  If mini-books are more your thing then perhaps you'd like to give a home-made word book a try ...


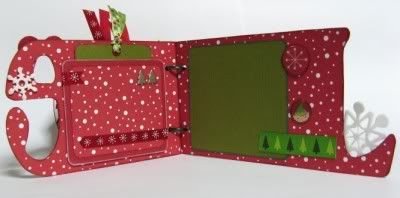
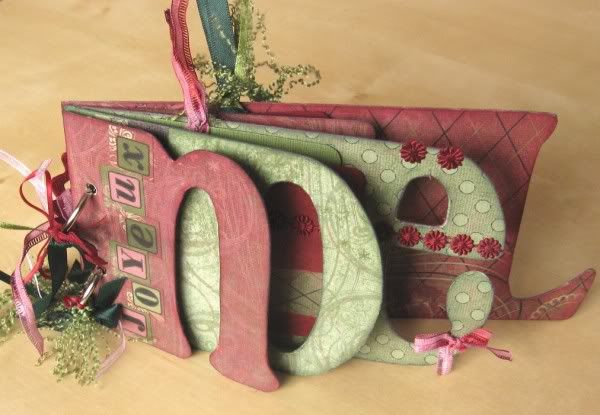
I made that one back in 2008 as a present for a friend's photos of her first grandson's first Christmas. I made another one a couple of years later to fill with quotes and festive photos as a family gift.  It had extra pages between the letters to allow for extra snapshots.


While I was making it I took step-by-step photos and put together a set of instructions - originally published in 2010 on UKScrappers, but you can download them directly here and see some more inside pages here.  The instructions are for the word "NOËL" but they are easy to adapt to "XMAS", "2013" or indeed any other word, long or short!  Let me know if you have a go!

Merry Christmas Everyone!!

* A slight scheduling faux pax on my part means that this post went live 2 days early - so that CKCB post isn't there until Christmas Eve! Sorry!

Saturday, 14 December 2013

Tagxedo New Year

Jimjams - Tagxedo Happy New Year cards Today over at the Counterfeit Kit Challenge Blog I have a post about making VERY quick Tagxedo New Year's cards

If you like Tagxedo as much as I do you may want to play around with it to produce something a little more complicated.

I searched for multi-lingual versions of "Happy New Year" and plugged them into Tagxedo to produce this multi-lingual card:

Jimjams - Tagxedo Happy New Year card

Ring the changes with a different colour-way and layout:

Jimjams - Tagxedo Happy New Year cards

Or change the shape:

Jimjams - Tagxedo Happy New Year cards 

I used the following words for all three cards:
Gelukkig~Nieuwjaar Bonne~Année Buon~Anno
Ein~Guten~Rutsch Feliz~Ano~Novo Gott~Nytt~År
Feliz~Año~Nuevo Blwyddyn~Newydd~Dda Onnellista~Uutta~Vuotta
Mutlu~Yıllar Godt~Nyttår
Sretna~Nova~Godina Boldog~Új~Évet

Gelukkig~Nieuwjaar Bonne~Année Buon~~~Anno
Ein~Guten~~Rutsch Gott~Nytt~År
Feliz~Año~~Nuevo

Happy~~~New~Year:20:@0:#ff0000
The tilde (~) characters keeps associated words together, twice (~~) will stop them from being on separate lines, thrice {~~~) will force a line break.  The text in red is the RGB code to make the words "Happy New Year" appear in red!  The 20 forces "Happy New Year" to be the biggest phrase and the @0 apparently forces it to be horizontal (though I'm still not convinced)!

The other settings are the defaults apart from:
Respins:
Shape = Oval / Star
Theme = Pi Palette / Quiet Morning / Citrus Wasabi
Font = Euphorogenic
Orientation = H/V

Word:
Remove Common Words = No
Combine Related Words = No
Combine Identical Words = No

Layout:
Max Word Count = 50
Normalize Frequency = Yes
Hard Boundary = Yes
Allow Replication = No
You do need to respin the layouts and colours a few time to find a design you're happy with - but it doesn't take long to save, crop and print once you've found it.  Have fun!

P.S. Use this link to see all my Tagxedo card ideas 

Wednesday, 4 December 2013

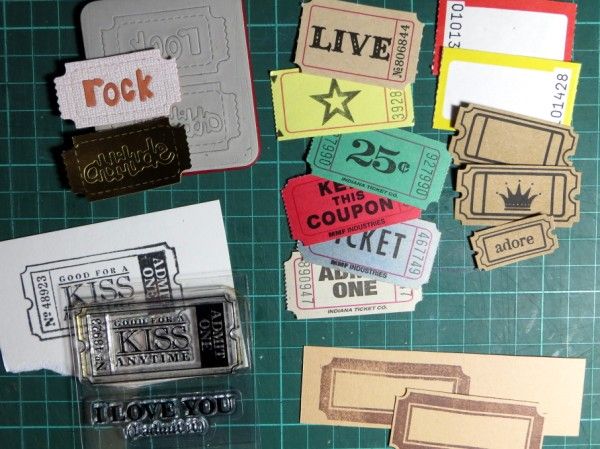
Just The Ticket

Jimjams - Tickets
There is Daily December Inspiration over at the Counterfeit Kit Challenge Blog at the moment and today it's my turn with a post all about embellishment clusters with tickets.

I adore the way you can include tickets in almost any embellishment cluster, adding a sentiment, a symbol, some colour or a date in a subtle way.

I've included some great links to digi & printable tickets over at the CKCB but I also wanted to include a quick & easy tutorial for making your own tickets from scratch over here.


Cut a strip of cardstock 1" (2.5cm) wide and add faint pencil lines it at 2" (5cm intervals).  Using a sewing machine with a large needle (but no thread), sew across the strip along these lines.  A needle, pokey tool, paper percer or tracing wheel will do the job too, but a sewing machine is quick!


Use a longer stitch lenth if you want to keep the ticket strip intact.  Use a shorter stitch length to make it easy to rip the tickets apart.


Using a hole punch take a semi circle out of each edge of the perforated lines.Some tickets have large holes punched half-way up the perforations as well (like the Maya Road adore ticket above).


If you want your tickets to have an inner frame then make a ¾" x 1¾" (2cm x 4.5cm) template to draw around.

Finally, have some fun decorating your tickets!