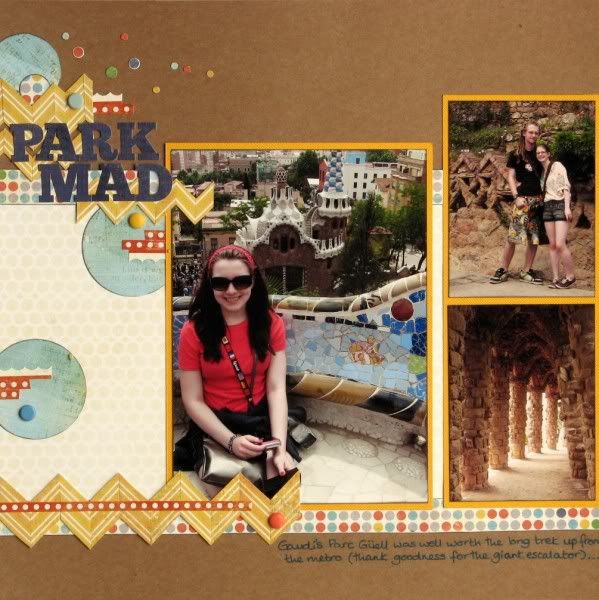
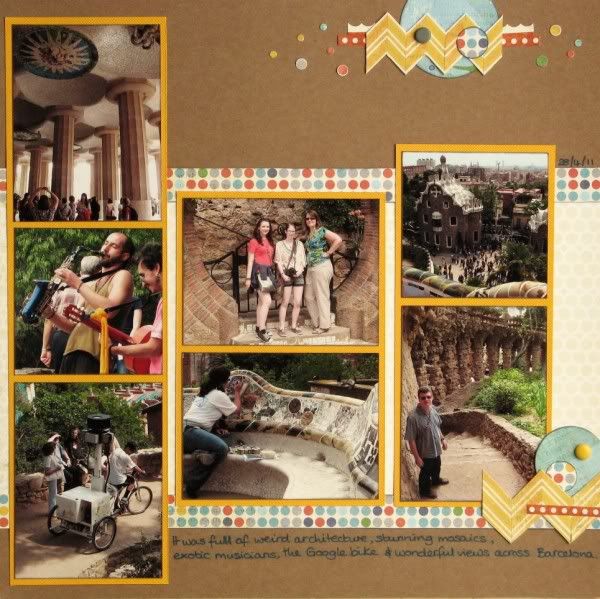
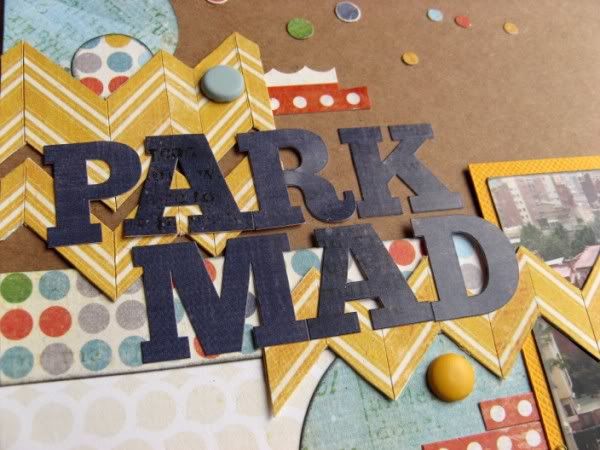
I'm not really here ... this is a scheduled post. I wanted to share some more funky chevrons with you (made like this, but with varying width strips). This was for A Trip Down Memory Lane when I was their Guest Designer back in March 2012. Unfortunately their DT gallery had a melt-down shortly afterwards and they haven't reinstated the pictures from March 2012 or earlier!
ATDML were kind enough to send me a selection of Echo Park About A Boy papers and stickers and I had fun making 5 pages from the supplies, including this double pager about Parc Güell in Barcelona.
We had a lovely day there in the Spring of 2011, celebrating our Silver Wedding with the whole family. We even saw a Google bike surveying the park ... AND it saw us!!
The images appeared sometime this year on the park's Streetview and I can see our group buying earrings at the top-most viewpoint and I'm caught on camera again taking photos of the view further downhill with my (im)patient family in the background about half an hour later!!! Shame that the photos have to have the faces obscured.
I also wanted to remind you that the Counterfeit Kit Challenge Blog's first August challenge is up today. If you fancy joining in with the Member Blog Hop on August 24th - this is the one to look at! I'll definitely be having a go, providing I can get some good photos while I'm on holiday! Hope to see you there!
Showing posts with label ATDML. Show all posts
Sunday, 4 August 2013
Sunday, 1 July 2012
Chelonian Chit-Chat
Welcome to the second half of 2012 - the first Sunday in the seventh month - which means it must be time for a story of sorts.
A story without a proper photograph; from long before I scrapbooked and took careful photos to illustrate our memories; from a time when snaps were just that - snapped fragments of a summer afternoon, with too much physical background, sometimes blurring, even obscuring, the point of the photograph!
I went to my monthly crop yesterday and enjoyed myself immensely: good company, "me" time, yummy cakes, free stash ... my friend Ally had had a clear out and was offloading unwanted papers ... some of which were just perfect for a cute little photo (heavily cropped to get rid of that excess of physical background) of two toddlers chatting together by the garden fence.
These two little tots were actually chatting about "Timmy" the tortoise just the other side of the fence. You can't see him though - but I know he was there. Furthermore we don't have any photos of him - he was a pet at their grandfather's for over 30 years - just part of the (garden) furniture! Timmy had travelled from Spain to the UK with my father's young family. He was available for feeding with lettuce, cucumber and dog food (!) every summer visit; somethingone to hunt for whenever he escaped; an exciting box to unpack from the attic during mild Easter holidays ... both for my (half-)siblings and I and latterly our own children. But of course, this story is being told in the past tense: a couple of years ago Timmy did not come out of his attic box as usual. It wasn't too cold for him. It was simply time. Although Timmy never seemed to make it to centre stage in any of my photos, we'll miss him.
Have you got a tale to tell? Why not pop over to High In The Sky and share it so that the rest of the Sunday Storytellers can come and read.
A story without a proper photograph; from long before I scrapbooked and took careful photos to illustrate our memories; from a time when snaps were just that - snapped fragments of a summer afternoon, with too much physical background, sometimes blurring, even obscuring, the point of the photograph!
I went to my monthly crop yesterday and enjoyed myself immensely: good company, "me" time, yummy cakes, free stash ... my friend Ally had had a clear out and was offloading unwanted papers ... some of which were just perfect for a cute little photo (heavily cropped to get rid of that excess of physical background) of two toddlers chatting together by the garden fence.
| {This page was actually done with a challenge in mind: ATDML asked us to scraplift their DT, I chose Karen's page here, but life has got in the way and I missed the uploading deadline *sigh*} |
Have you got a tale to tell? Why not pop over to High In The Sky and share it so that the rest of the Sunday Storytellers can come and read.
Wednesday, 20 June 2012
Things To Do
Summer's here - and for once it is sunny with blue skies, white fluffy clouds and a gentle, warm breeze! Child No.3 had her last exam yesterday and we can all now relax for ten days until No.1 Son's results are known!
There's plenty to do though - gardening while the weather permits, de-cluttering in advance of No.1 Son's return with ALL his "stuff" after four years away - eek!!! - and several interesting crafty things to occupy me.
First off there's Rinda's Summer Scavenger Hunt which starts today. I looked on in awe and envy last year while blog friends collected a diverse and eclectic series of photos during the summer months. This year I shall be having a go too :o)
Then this weekend there's a Cyber Crop at one of my favourite on-line scrappy shops, A Trip Down Memory Lane. There are already class lists and a timetable posted but the fun starts in earnest on Friday night here on their blog.
And, as if that wasn't enough, the following weekend there's also a fun-looking event planned over at Jennifer's Jumbles which will help me get organised.
I had to take a break from the Counterfeit Kit Challenge Blog this month due to my operation, but I'll be back in action with July's kit soon.
![]() |
| I wish my blog had smell-o-vision so that I could share this paeony properly! |
First off there's Rinda's Summer Scavenger Hunt which starts today. I looked on in awe and envy last year while blog friends collected a diverse and eclectic series of photos during the summer months. This year I shall be having a go too :o)
Then this weekend there's a Cyber Crop at one of my favourite on-line scrappy shops, A Trip Down Memory Lane. There are already class lists and a timetable posted but the fun starts in earnest on Friday night here on their blog.
And, as if that wasn't enough, the following weekend there's also a fun-looking event planned over at Jennifer's Jumbles which will help me get organised.
I had to take a break from the Counterfeit Kit Challenge Blog this month due to my operation, but I'll be back in action with July's kit soon.
Labels:
ATDML,
CKCB,
Photos,
Scavenger Hunt
Sunday, 18 March 2012
Sketching with A Trip Down Memory Lane
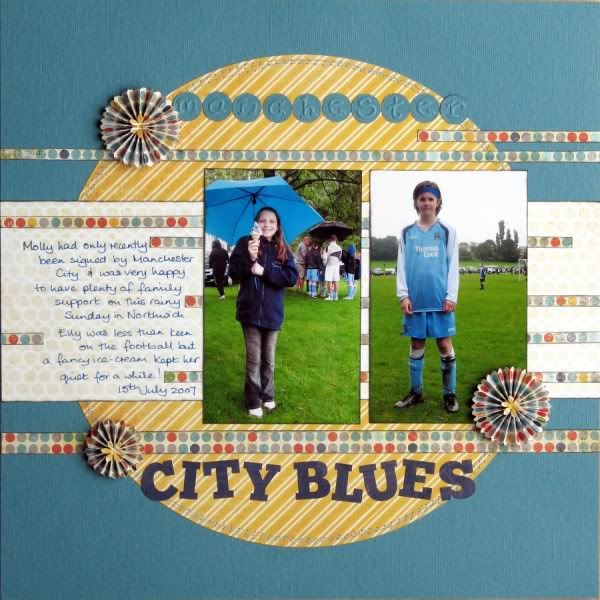
I recently joined in with the Sketch Challenge over at A Trip Down Memory Lane's blog ... Created by ATDML and used up a couple of old, old photos from 2007: Child No.3 and her cousin who plays for Manchester City Girls. My goodness it's not much fun watching hours of footie in the pouring rain!! The players had fun though and the ice-creams were great!
ATDML supplied me with some lovely doubled sided papers and alpha stickers from Echo Park's A Boy's Life (Adventurer - the circle, Scholarly - the central strip, and Rambunctious - the strips and rosettes) and I added a few alphas cut & embossed with Pink Lemonade Sizzlits dies.
Fancy joining in with the sketch challenge? Take a look here for the original sketch, some other ideas on how to interpret it and link your own page or card up too :o}
P.S. ATDML have another fun challenge on their blog at the moment ... with a £10 prize up for grabs ... take a look here ... you have until 8:30pm on March 31st to submit an entry (may only be UK residents though ... not 100% sure).
ATDML supplied me with some lovely doubled sided papers and alpha stickers from Echo Park's A Boy's Life (Adventurer - the circle, Scholarly - the central strip, and Rambunctious - the strips and rosettes) and I added a few alphas cut & embossed with Pink Lemonade Sizzlits dies.
Fancy joining in with the sketch challenge? Take a look here for the original sketch, some other ideas on how to interpret it and link your own page or card up too :o}
P.S. ATDML have another fun challenge on their blog at the moment ... with a £10 prize up for grabs ... take a look here ... you have until 8:30pm on March 31st to submit an entry (may only be UK residents though ... not 100% sure).
Tuesday, 13 March 2012
Getting Cold Feet?
I don't know about you, but one of the things I've hankered after with my scrapping is to be asked to work on a Design Team. It's one way of being acknowledged for your scrapping ... my family love my pages, my scrapping friends like them and everyone else ... thinks I'm a bit mad to spend so much time and effort turning one or two 6x4 photos into a 12x12 page in an album! So the extra validation of "working" at the hobby I love has always been attractive.
I've done the odd guest post here and there and been on the creative team at the Counterfeit Kit Challenge Blog for a year now - all great ways of using up my supplies, but the thought of getting free modern stash to work with (I'm a bargain hunter when I shop and rarely get current products) plus somewhere special to show off is still a draw. I was delighted, therefore, to be successful when on-line shop A Trip Down Memory Lane put out a guest designer call on their blog last year ... I waited patiently for my turn and then all of a sudden they sent me some Echo Park papers and stickers to work with. Of course no sooner had the pizza box of goodies arrived, than I ran out of ink for the printer and couldn't print any photos!!! At moments like that you begin to question the need for public recognition ... I was havingsecond third thoughts about over-committing and under-preparing myself by the time the ink cartridges arrived a week later!
ATDML's March gallery has just gone "live" here and 4 of the 5 pages I made are in there along with lots of other great Echo Park projects from the regular designers for ATDML. I loved working with the double-sided papers - if one side was no good for a particular photo, you could make the reverse work instead.
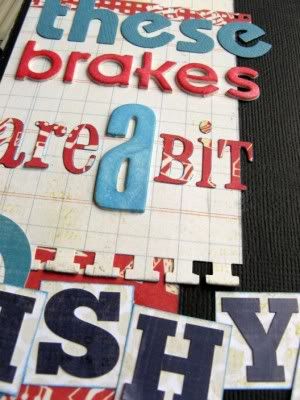
This is my final page of the five, using up all the scraps from the kit with a sheet of black card and a few chipboard alphas that I added. And here's a sneak of the double page spread I made for the gallery too:
My thanks to Mel and Jill for a chance to try out Echo Park papers, I think I'll be keeping an eye out for them in the future!
I've done the odd guest post here and there and been on the creative team at the Counterfeit Kit Challenge Blog for a year now - all great ways of using up my supplies, but the thought of getting free modern stash to work with (I'm a bargain hunter when I shop and rarely get current products) plus somewhere special to show off is still a draw. I was delighted, therefore, to be successful when on-line shop A Trip Down Memory Lane put out a guest designer call on their blog last year ... I waited patiently for my turn and then all of a sudden they sent me some Echo Park papers and stickers to work with. Of course no sooner had the pizza box of goodies arrived, than I ran out of ink for the printer and couldn't print any photos!!! At moments like that you begin to question the need for public recognition ... I was having
ATDML's March gallery has just gone "live" here and 4 of the 5 pages I made are in there along with lots of other great Echo Park projects from the regular designers for ATDML. I loved working with the double-sided papers - if one side was no good for a particular photo, you could make the reverse work instead.
This is my final page of the five, using up all the scraps from the kit with a sheet of black card and a few chipboard alphas that I added. And here's a sneak of the double page spread I made for the gallery too:
My thanks to Mel and Jill for a chance to try out Echo Park papers, I think I'll be keeping an eye out for them in the future!
Wednesday, 15 February 2012
Half-Term Hiatus Here
Our plans to go travelling this half-term holiday went out the window, but there are a million and one other things that have been occupying Hubby, Child No.3 and myself - DIY, revision, cinema trips, shopping, clubs, sleepovers, cake-making, reading, de-cluttering, appointments - but sadly not as much crafting as I would have liked. Hopefully there will be some time for that in the next day or two. In the meantime here is a page I made earlier:
The photos are from Child No.3's sketch sitting on Las Ramblas in Barcelona last Easter - at least she had a chair to sit on (and an umbrella to shelter under) - Hubby and I had to stand there for nearly two hours while we first queued for the artist she'd picked out and then watched in fascination as her portrait took shape on the paper. Made with various papers from my February Counterfeit Kit, with the addition of a scrap of red card and Boys Will Be Boys Sizzlit dies, for a sketch-based challenge over on UKScrappers but also tying in with ATDML's Thirsty Thursdays T challenge for Turquoise and the passage of Time :o)
Sunday, 22 January 2012
All That Glitters
Welcome to the second of January's challenges for the Counterfeit Kit Challenge Blog. This one was to add glitter, bling, sparkle, pizazz to your project! But I had nothing glittery in my January kit - so I had to improvise in the way that we counterfeiters do LOL!
I took some unloved brads, and a beautiful, but not-the-right-colour star-shaped brad from Susanne's swap packaging and got busy with VersaMark ink, some glittery embossing powder and my heat gun:
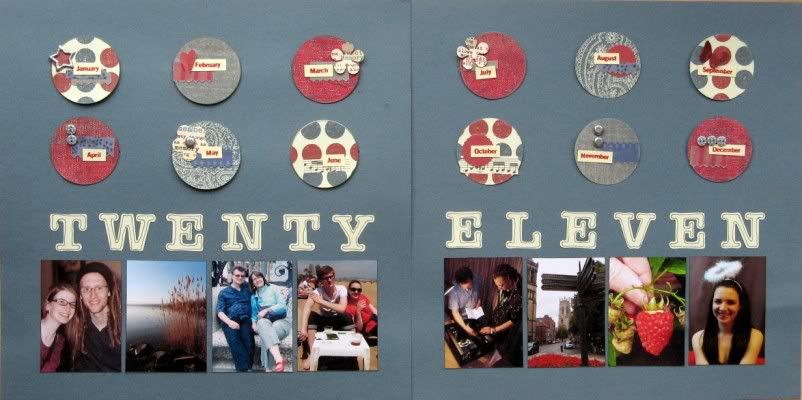
Transformation complete, I set to work on my page. Remember how I failed on my JYC? Well I also gave up on my 2011 Project 12 after only 2½ months! Which was a shame as I love my Project 12 album from 2010, and I love the year in review hidden tags I did for JYC 2009 and JYC 2010. So I decided that I'd do a double page summary for the year, based on a lovely sketch over at Scrap365 magazine's website.
The year was a bit hit and miss with photos (hence the Project 12 fail so early in the year) so I couldn't find one decent photo for every month. Instead I made sure we were all on there with a couple of feature photos representing some of our year's activities.
I had fun decorating each of the circles at the top of the tags - with snippets of my counterfeited Pink Paislee Mistable Ribbons, some of the contents of my counterfeited October Afternoon Flower Sack, a few buttons and the glitterfied brads. My month names are stamps from a Scenic Route set and the free font is Veggieburger.
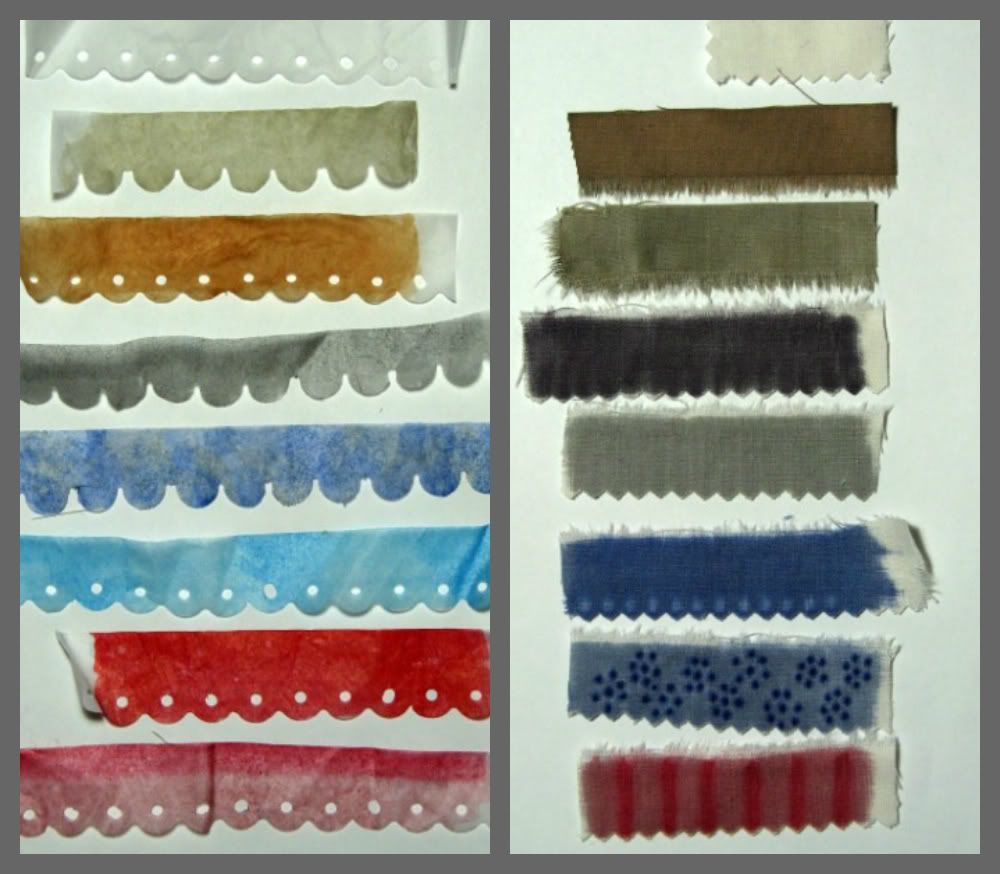
In my January kit I had two ways for counterfeiting the mistable ribbons - fabric (strips torn from an old sheet) and paper (border punched tissue paper) - and I promised to let you know how I got on with them.
I haven't tried actually misting on them (no mists LOL), but started by colouring them with two shades of Fiberscraps Tintz: dabbers which dispense a colour-wash a bit like very watery paint. Both took the colour well, but the tissue paper distorted and crinkled really badly as it dried. It took a while for the fabric to dry, but I used some of it on my 2012 goals page for the first CKCB challenge.
Then I tried Child No.3's Promarkers out on them with much better results: a great range of colours with plenty of decorative potential using the blending pen and contrasting shades. Being alcohol-based, the ink dried really quickly and the tissue paper didn't crinkle at all. It does crease though - I'll have to get the iron out before using any of it! The fabric has taken on a starchy stiffness after colouring with the Promarkers - very different to the untreated or colour-washed samples.
On balance the fabric has worked better and if I had a die-cutting system that could cope with fabric my counterfeiting would be complete!
P.S. I haven't joined in with a Thirsty Thursday Challenge from A Trip Down Memory Lane for a while, but I reckon I've covered P for Polka-dot, Portrait Photos and Parents (that's us!) pretty perfectly ... as well as R for Red and Review!
I took some unloved brads, and a beautiful, but not-the-right-colour star-shaped brad from Susanne's swap packaging and got busy with VersaMark ink, some glittery embossing powder and my heat gun:
Transformation complete, I set to work on my page. Remember how I failed on my JYC? Well I also gave up on my 2011 Project 12 after only 2½ months! Which was a shame as I love my Project 12 album from 2010, and I love the year in review hidden tags I did for JYC 2009 and JYC 2010. So I decided that I'd do a double page summary for the year, based on a lovely sketch over at Scrap365 magazine's website.
The year was a bit hit and miss with photos (hence the Project 12 fail so early in the year) so I couldn't find one decent photo for every month. Instead I made sure we were all on there with a couple of feature photos representing some of our year's activities.
I had fun decorating each of the circles at the top of the tags - with snippets of my counterfeited Pink Paislee Mistable Ribbons, some of the contents of my counterfeited October Afternoon Flower Sack, a few buttons and the glitterfied brads. My month names are stamps from a Scenic Route set and the free font is Veggieburger.
In my January kit I had two ways for counterfeiting the mistable ribbons - fabric (strips torn from an old sheet) and paper (border punched tissue paper) - and I promised to let you know how I got on with them.
I haven't tried actually misting on them (no mists LOL), but started by colouring them with two shades of Fiberscraps Tintz: dabbers which dispense a colour-wash a bit like very watery paint. Both took the colour well, but the tissue paper distorted and crinkled really badly as it dried. It took a while for the fabric to dry, but I used some of it on my 2012 goals page for the first CKCB challenge.
| From top to bottom: un-touched original tissue or sheet strip 2 samples with Tintz 5 samples with Promarkers |
On balance the fabric has worked better and if I had a die-cutting system that could cope with fabric my counterfeiting would be complete!
P.S. I haven't joined in with a Thirsty Thursday Challenge from A Trip Down Memory Lane for a while, but I reckon I've covered P for Polka-dot, Portrait Photos and Parents (that's us!) pretty perfectly ... as well as R for Red and Review!
Labels:
ATDML,
CKCB,
DLO,
Instructions,
Layouts,
Project 12,
Project 12-2011,
Scrap365
Sunday, 20 November 2011
Xmas Preparations
but there was another thing that I had to get done before December started: my prep for my third year of Journal Your Christmas!
I was lucky enough to win a prize from the Kaisercraft blog earlier this year and what better stash to use for a December journal than their Silly Season Range?! A lovely mix of red, white, green and pink papers with matching rub-ons, die-cuts, gems as well as stamps and journalling tags.
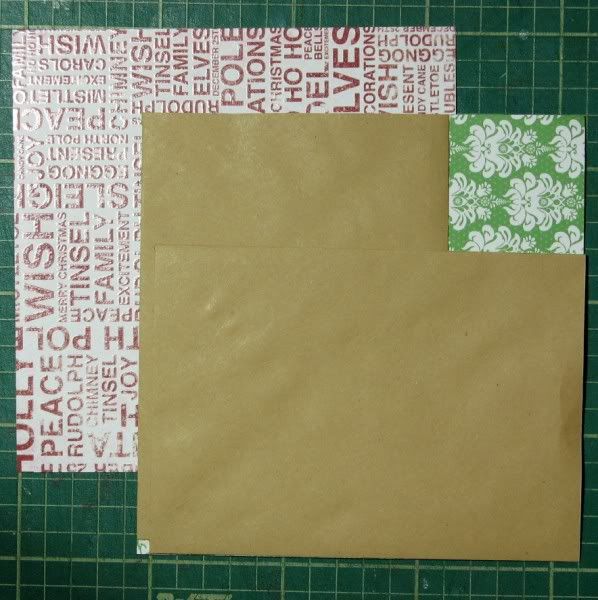
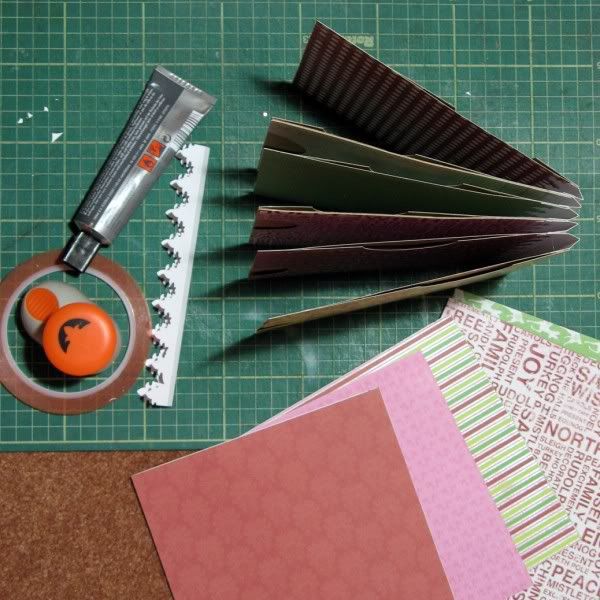
This year I decided to base my album on tags and wanted to use manilla envelopes to make pockets behind the pages from the pad of paper. I thought it was 6"x6" but after a page or two of preparation when nothing quite worked I realised that the pad is actually 6½" square (!) That's a new one on me!
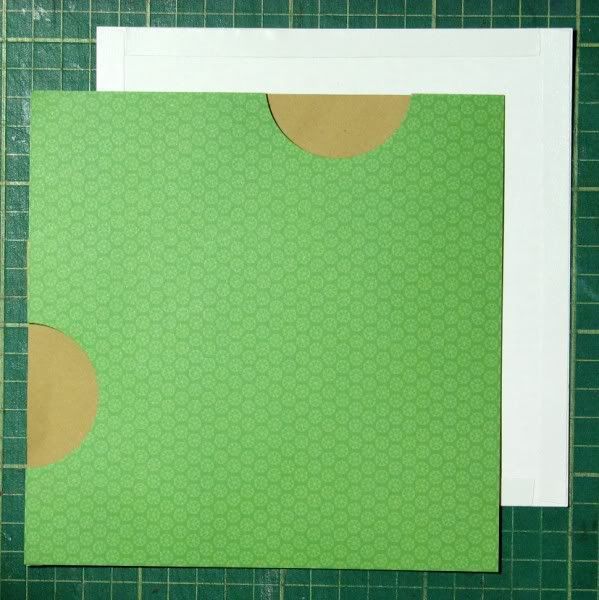
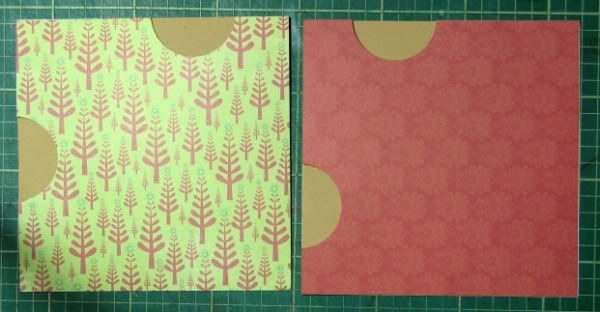
For each page of the album I sealed two envelopes and sliced ⅛" off one short end to open up each envelope again. I layered the envelopes onto the back of one piece of patterned paper and covered them with a second sheet. Semi-circles cut out with a 2" punch give me access to the pockets:
By varying the placement of the envelopes I have varied where the pockets appear - left, middle or right along the top of the page, or top, middle or bottom of the side.
I have joined the pages together with strips of white card punched with my X-cut border punch ... I think I may yet have to sew the spine to the cover if the pages start to sag ... I'll have to see what happens once all the tags are in place, let alone photos, journalling spots and embellies!
If I was starting this project from scratch (don't you just love hindsight!) I'd have prepared the spine before sticking each pair of patterned pages together - no border punching would have been necessary as the edges would have been concealed.
As you can see, I'm not done yet - and the cover needs to be made too. I'm going to a Blogger's Retreat next weekend ... meeting several fellow bloggers, including, Mel, Julie, Alexa and Lizzie for the very first time ... so I'm hoping to put the finishing touches to this then.
In the meantime, here's a sneaky peek at some more Christmas preparation I've been doing!
| ETA - revealed here! |
P.S. That's ATDML's Thirsty Thursday K for Kaisercraft, JYC Kit and
Labels:
ATDML,
JYC,
Kaisercraft
Thursday, 17 November 2011
Musical Mini-Book
A little while ago I attended a scrapbooking retreat with my UKS house-mates (the Green Buttons) down near Birmingham and had a fabulous time. There was plenty of chocolate, chat and creativity as well as a few challenges and some classes. I prepared a class too, which I called my "Teeny Tiny Envelope Album". It was made from those tiny kraft money envelopes you can buy for wage slips or lunch money or whatever, but can just as easily be made with larger envelopes too!
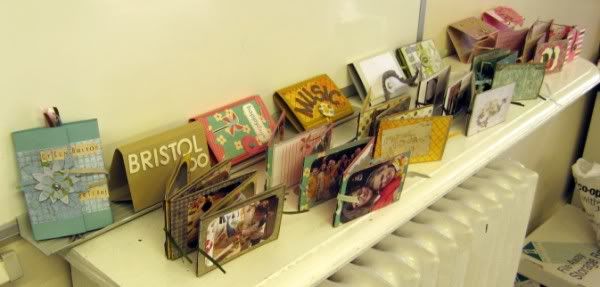
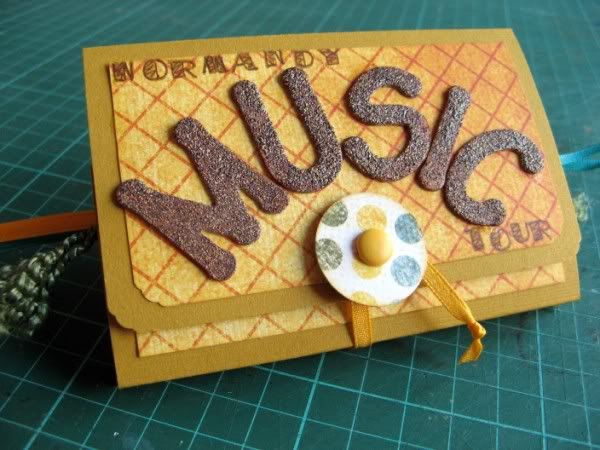
Here are some of the albums completed that weekend - each made unique thanks to different patterned papers, photos, ribbons and embellishments. I made one that weekend too ... using my September Counterfeit Kit ... to record No.3 Child's school music trip to Normandy this summer.
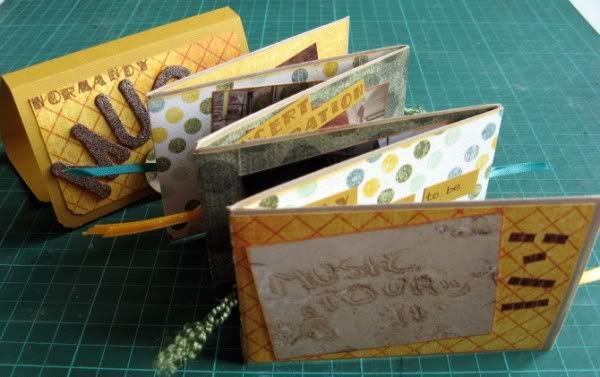
The letters on the front cover have been heat embossed with PSE's "Woven Tapestry" - a lovely textural finish. Inside the cover there is a concertina of six money envelopes, each containing a tag.
The way that it's folded you can "read" it like a book and then turn it around to "read" the other side.
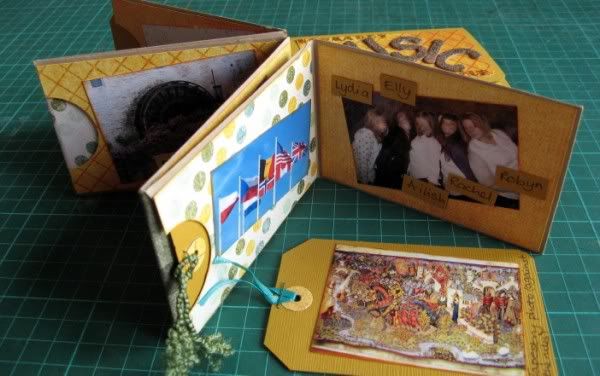
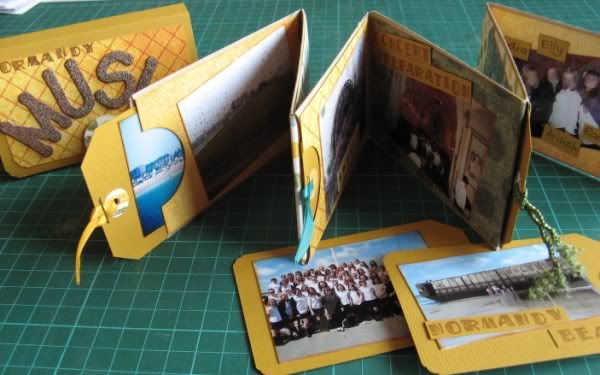
There's plenty of room for lots of small photos and even more space for journalling or extra photos on the tags! Just as well because her camera had about 100 photos from the 4 days! I managed to include 19 in her mini-book.
This would also make a handy little "brag" book for inside a handbag - it measures around 4½" x 3" and the photos are all nicely protected by the cover.
And I'm still playing along with ATDML's Thirsty Thursdays - so this will be for I for Interactive (and inked?). I'll be back this weekend with K for Kit, Kraft & Kaisercraft as I'm just about ready to share my JYC prep!
ETA: Instructions can be found here!
Here are some of the albums completed that weekend - each made unique thanks to different patterned papers, photos, ribbons and embellishments. I made one that weekend too ... using my September Counterfeit Kit ... to record No.3 Child's school music trip to Normandy this summer.
The letters on the front cover have been heat embossed with PSE's "Woven Tapestry" - a lovely textural finish. Inside the cover there is a concertina of six money envelopes, each containing a tag.
The way that it's folded you can "read" it like a book and then turn it around to "read" the other side.
There's plenty of room for lots of small photos and even more space for journalling or extra photos on the tags! Just as well because her camera had about 100 photos from the 4 days! I managed to include 19 in her mini-book.
This would also make a handy little "brag" book for inside a handbag - it measures around 4½" x 3" and the photos are all nicely protected by the cover.
And I'm still playing along with ATDML's Thirsty Thursdays - so this will be for I for Interactive (and inked?). I'll be back this weekend with K for Kit, Kraft & Kaisercraft as I'm just about ready to share my JYC prep!
ETA: Instructions can be found here!
Labels:
ATDML,
Mini Books
Tuesday, 15 November 2011
Hola!
Sometimes there just isn't a photo to go with a story is there? Perhaps the camera was forgotten. Or maybe nobody would cooperate. Or perhaps you were just too caught up in the moment to remember to snap something.
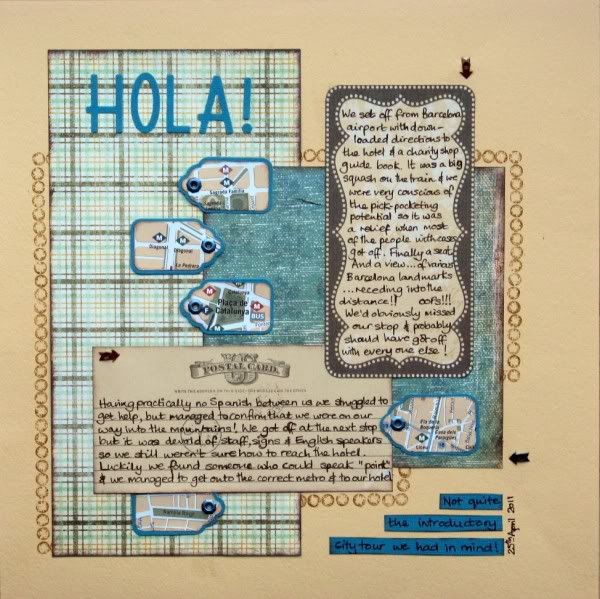
I certainly found myself caught up in the moment back in April when we had just arrived in Barcelona for a few days celebration of our Silver Wedding Anniversary with the offspring and No.1 Son's girlfriend in tow. As usual everyone had left the organising to yours truly ... and I had researched things to do, places to go and methods of transport so that we could pack in lots of fun stuff like a bike tour, a visit to the famous market, etc, etc.
We had a wonderful time ... BUT ... it all went very wrong, right at the beginning! The downloaded instructions for getting to the hotel from the airport didn't quite match up to the map at the back of the charity shop guide book to Barcelona and neither of these matched up to reality. Child No.3, the only one who was studying GCSE Spanish and could say more than "Dos Cervezas por favor", decided that she was unable to read or speak Catalan and consequently clammed up. We watched in horror as famous landmarks receded from view through the train windows and there were fewer and fewer fellow passengers to ask for directions, let alone passengers likely to be able to speak English! We managed in the end though - I am not averse to collaring complete strangers in a foreign land and am pretty fluent in "Point".
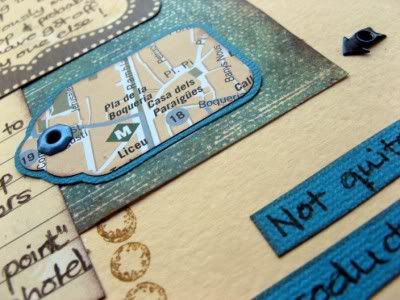
This page was done for the Counterfeit Kit Challenge Blog's Tag Challenge this month ... having no photos, but still in possession of a walking map of Barcelona, I decided to punch out some tag shapes from significant sections and use the page I'd started from this month's Counterfeit Kit here. Like the stamping? LOL! I've used a cross-head screw to fit in with a (forthcoming) challenge over at UKS! And this page will do nicely for ATDML's Thirsty Thursday Challenge with J for Journalling and Journey featuring rather heavily - I love a good multi-purpose page :D
What do you do when there's no photo for a story you want to scrap with?
I certainly found myself caught up in the moment back in April when we had just arrived in Barcelona for a few days celebration of our Silver Wedding Anniversary with the offspring and No.1 Son's girlfriend in tow. As usual everyone had left the organising to yours truly ... and I had researched things to do, places to go and methods of transport so that we could pack in lots of fun stuff like a bike tour, a visit to the famous market, etc, etc.
We had a wonderful time ... BUT ... it all went very wrong, right at the beginning! The downloaded instructions for getting to the hotel from the airport didn't quite match up to the map at the back of the charity shop guide book to Barcelona and neither of these matched up to reality. Child No.3, the only one who was studying GCSE Spanish and could say more than "Dos Cervezas por favor", decided that she was unable to read or speak Catalan and consequently clammed up. We watched in horror as famous landmarks receded from view through the train windows and there were fewer and fewer fellow passengers to ask for directions, let alone passengers likely to be able to speak English! We managed in the end though - I am not averse to collaring complete strangers in a foreign land and am pretty fluent in "Point".
This page was done for the Counterfeit Kit Challenge Blog's Tag Challenge this month ... having no photos, but still in possession of a walking map of Barcelona, I decided to punch out some tag shapes from significant sections and use the page I'd started from this month's Counterfeit Kit here. Like the stamping? LOL! I've used a cross-head screw to fit in with a (forthcoming) challenge over at UKS! And this page will do nicely for ATDML's Thirsty Thursday Challenge with J for Journalling and Journey featuring rather heavily - I love a good multi-purpose page :D
What do you do when there's no photo for a story you want to scrap with?
Monday, 31 October 2011
Extreme Scrapbooking
Ever tried scrapping beyond the page?
I've made cards, a canvas or two, some mini-books and the odd bit of wall art.
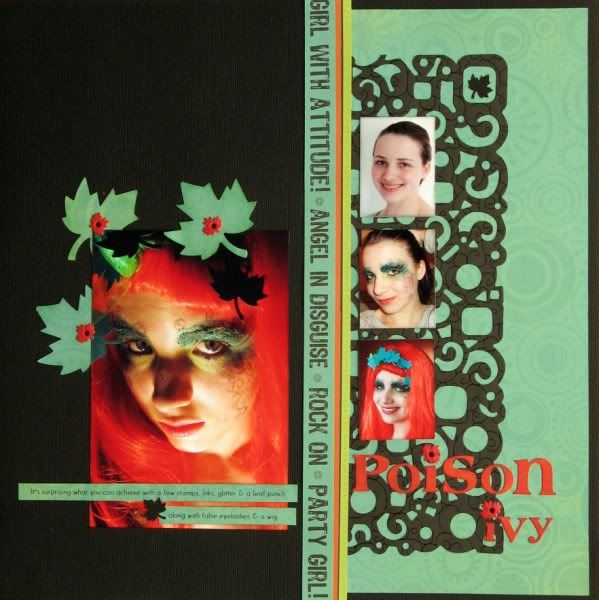
Child No.3 has recently excelled herself with my scrap supplies ... completely off thewall page ... in the name of Halloween fancy dress!
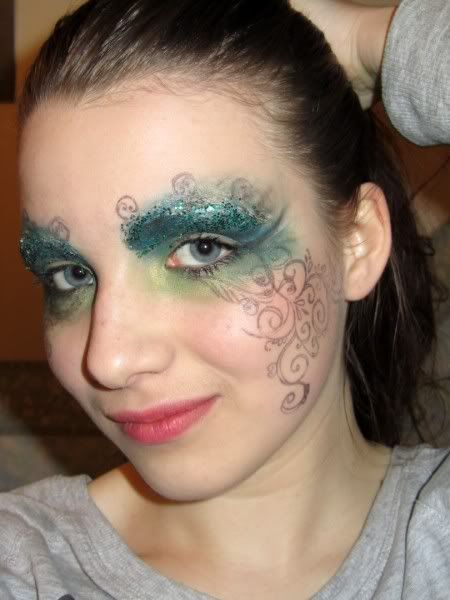
Normally she looks like this ...
... well actually that isn't completely normal as she generally uses a little bit of mascara and wears her hair loose. However, after borrowing some Rhonna Farrer swirl stamps, some black ink, green face paint and a sprinkling of glitter, she looked like this ...
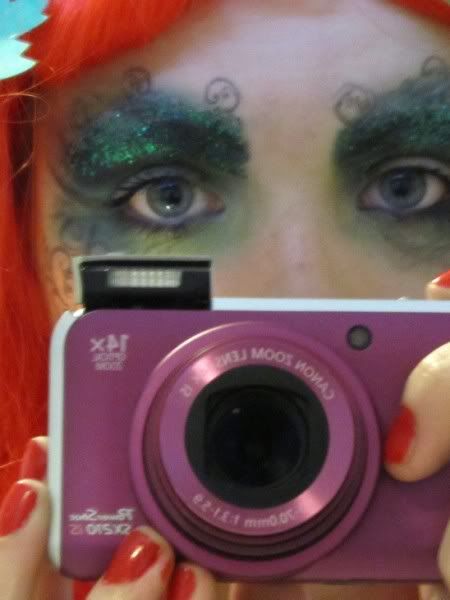
A few punched leaves attached with glue dots to a hair-band and the application of some red false eyelashes and an even brighter wig and she was transformed into ...
Fifty poses in front of her camera later and she had a new Facebook photo :D
Of course I had to make a scrapbook page about it, just in time for Halloween!
I've used a Pagemaps sketch (twisted onto its side) with some more of my October Counterfeit Kit and also scored some points over on UKS for the Weekly Challenge to use some printed journalling, 10 embellishments and something free (the font, Satellite, and those eyelets ... yes, I know that they're probably maple leaves, but I am so glad to get rid of them as they've been hanging around in my original hand-me-down stash from 2006).
Oh and while we're challenge combining, this page fits in with H for Holidays over at ATDML's Thirsty Thursdays.
What's your craziest use of scrapbooking supplies? Are you dressing up for Halloween ... or Facebook?
I've made cards, a canvas or two, some mini-books and the odd bit of wall art.
Child No.3 has recently excelled herself with my scrap supplies ... completely off the
Normally she looks like this ...
... well actually that isn't completely normal as she generally uses a little bit of mascara and wears her hair loose. However, after borrowing some Rhonna Farrer swirl stamps, some black ink, green face paint and a sprinkling of glitter, she looked like this ...
A few punched leaves attached with glue dots to a hair-band and the application of some red false eyelashes and an even brighter wig and she was transformed into ...
... her version of Batman's enemy and eco-terrorist, Poison Ivy!
Fifty poses in front of her camera later and she had a new Facebook photo :D
Of course I had to make a scrapbook page about it, just in time for Halloween!
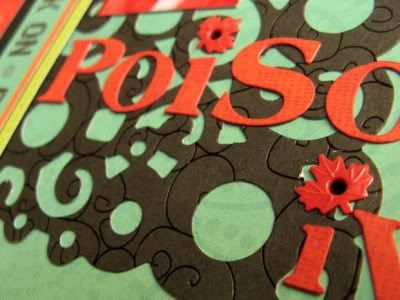
I've used a Pagemaps sketch (twisted onto its side) with some more of my October Counterfeit Kit and also scored some points over on UKS for the Weekly Challenge to use some printed journalling, 10 embellishments and something free (the font, Satellite, and those eyelets ... yes, I know that they're probably maple leaves, but I am so glad to get rid of them as they've been hanging around in my original hand-me-down stash from 2006).
Oh and while we're challenge combining, this page fits in with H for Holidays over at ATDML's Thirsty Thursdays.
What's your craziest use of scrapbooking supplies? Are you dressing up for Halloween ... or Facebook?
Saturday, 15 October 2011
Sweet Scrapping
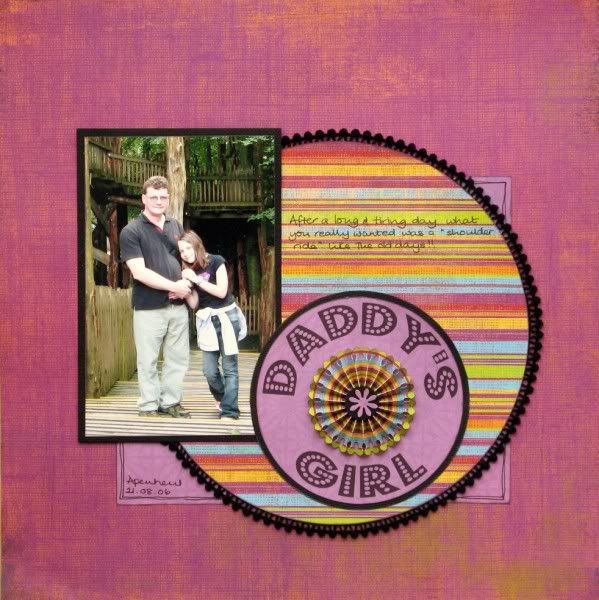
The first challenge over at the Counterfeit Kit Challenge Blog this month is to take inspiration from sweets ... or candy as they say across the pond! I have scrapped about sweets before (chocolate to be specific) but I wondered what edible delight could provide a nugget of creativity for a project with my October Counterfeit Kit. In the end I chose to use some seaside rock as a starting point.
I decided to echo the cross-sectional view of the rock for my title. Using MS WordArt's "Button (Pour)" shape (with a blank middle line) and Budmo Jiggler I printed directly onto the plainer side of some Kaisercraft Allsorts Passionfruit paper. The photo is from our holiday in Holland in 2006 - I actually thought that the album was complete, but I found a few photos in the "reject" stack and decided to make some room for them! Here, Child No.3 is looking a lot more than 5 years younger than she is today (or is it that she now looks more than 5 years older than she was then?). Her legs could barely support her after a long and tiring day out; I think she really wanted to be carried!
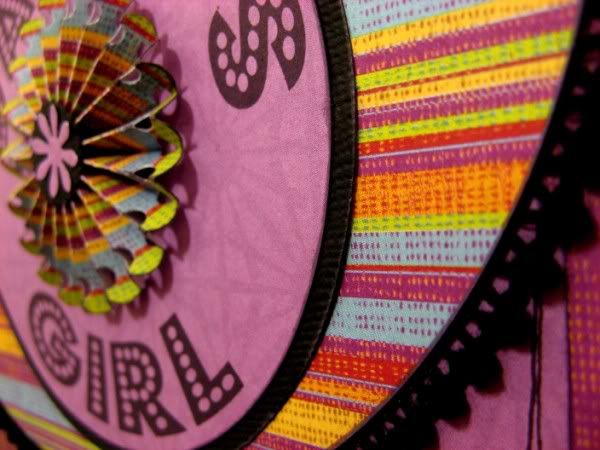
The black bobble trim from my home-made kit was stuck to tape on the back of the striped circle to mimic the way that the seaside rock has a skin of colour. I also took inspiration from the paper rosette post on the CKCB and "altered" the rosette I made with my new Sizzlit die by punching holes on each fold before construction.
P.S. Are you playing along with A Trip Down Memory Lane's Thirsty Thursdays challenges? I am. And I was lucky enough to win a yummy prize last month. Why not pop over there to take part in the challenges from E onwards and you could be in with a chance of a prize. This page fits in with F for Family as well as taking inspiration from a Favourite Food!!!
| No! Not this kind of seaside rock ... |
| ... nor this, although they make a tasty seaside souvenir ... |
| ... yes, it's this sort of sweet, minty goodness ... with letters around the outside, but all the way through the inside too! |
The black bobble trim from my home-made kit was stuck to tape on the back of the striped circle to mimic the way that the seaside rock has a skin of colour. I also took inspiration from the paper rosette post on the CKCB and "altered" the rosette I made with my new Sizzlit die by punching holes on each fold before construction.
P.S. Are you playing along with A Trip Down Memory Lane's Thirsty Thursdays challenges? I am. And I was lucky enough to win a yummy prize last month. Why not pop over there to take part in the challenges from E onwards and you could be in with a chance of a prize. This page fits in with F for Family as well as taking inspiration from a Favourite Food!!!
Thursday, 29 September 2011
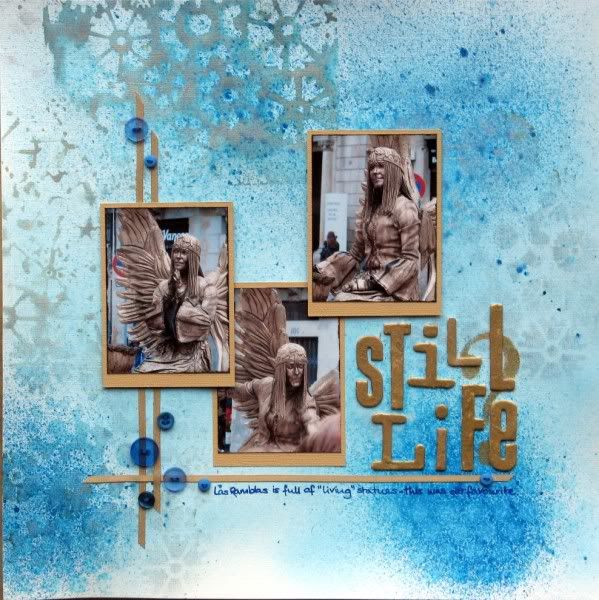
Still Life?
Here's another page from my Green Button Retreat last weekend - from a misting and masking class by Ali. She generously shared dozens of misting inks, masks and templates so that we could all have a few goes with her techniques. This was my third (and final) attempt!!
It was all a bit random and uncontrolled for my mathematically ordered brain - but once I stopped trying to control the spray and allowed myself to "go with the flow" I really enjoyed myself. Thank you Ali for your generosity - perhaps I'll put some mists on my birthday list!
I used Ali's cogs and sequin waste masks plus two colours of blue and a lovely delicate shimmery mist to tone perfectly with No.3 Child's photos of a street artist we'd seen in Las Ramblas in Barcelona.
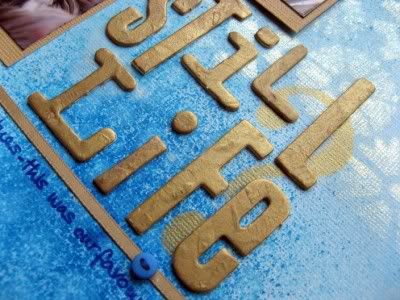
I used gold acrylic paint to stencil through the waste from a chipboard question mark and painted a variety of chipboard letters with a thick and lumpy layer of paint for my title. I don't know what I'd do without chipboard alphas in my supplies - I buy white or plain and cover them with paint, paper, embossing powder to go with my projects - they are so versatile!! Do you like chipboard? Why not check out what other people have been doing with chipboard here at Scrapbookers Anonymous. I'm also playing along with ATDML's A-Z challenge - with C for Cosmic Shimmer!
It was all a bit random and uncontrolled for my mathematically ordered brain - but once I stopped trying to control the spray and allowed myself to "go with the flow" I really enjoyed myself. Thank you Ali for your generosity - perhaps I'll put some mists on my birthday list!
I used Ali's cogs and sequin waste masks plus two colours of blue and a lovely delicate shimmery mist to tone perfectly with No.3 Child's photos of a street artist we'd seen in Las Ramblas in Barcelona.
I used gold acrylic paint to stencil through the waste from a chipboard question mark and painted a variety of chipboard letters with a thick and lumpy layer of paint for my title. I don't know what I'd do without chipboard alphas in my supplies - I buy white or plain and cover them with paint, paper, embossing powder to go with my projects - they are so versatile!! Do you like chipboard? Why not check out what other people have been doing with chipboard here at Scrapbookers Anonymous. I'm also playing along with ATDML's A-Z challenge - with C for Cosmic Shimmer!
Tuesday, 27 September 2011
Shared Stamping
Welcome to my post for the CKCB Master Forgers' Blog Hop - you may have joined me from Kim, or just happened by - in which case, feel free to catch up with previous hops by starting at the Counterfeit Kit Challenge Blog. This month's hopping is sponsored by one of the Master Forgers, Sherri, and her Etsy Shop selling Ippity Stamps.
I've just returned from the most brilliant weekend away: scrapping with friends old and brand new!! My UKScrappers team is part of a "house" and a bunch of the girls from our "house" teams got together for a meet up near Birmingham. A few of us had done classes & challenges to share and the weekend was packed full with creativity, chat and chocolate ... plus 3 meals a day with NO washing up to do! Heaven!!!!
One of the classes was given by my good friend Claire K. I knew in advance that it would be perfect for this post as she was sharing a stamping technique which is surprisingly quick and easy to do and creates a really effective decorative frame for your page! I saved some of my September Counterfeit Kit especially for this and, with Claire's permission, I took photos of my page as the class progressed so that I could share with you.
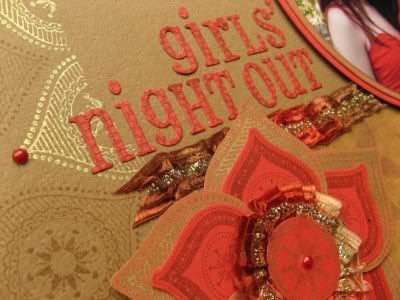
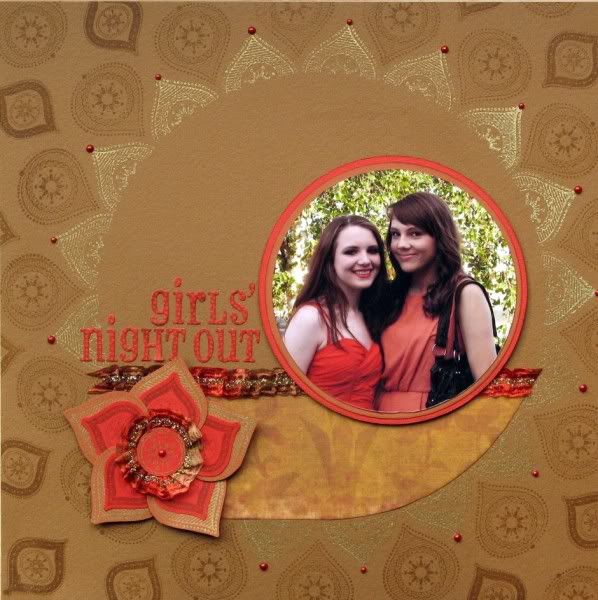
As you can see I got carried away with another bauble stamp on my background and also used it to help make layered petals for my "flower". I toned down the Quickutz Blossom die-cut title lettering by overstamping with an Artemio dotted circle stamp.
Many, many thanks to Claire for a great technique (and allowing me to share it today) and a special thank you to a class-mate, Karelyn, who lent me her circle-cutting system for my photo mats. Aren't scrappers just the best, most generous people?!?!?!
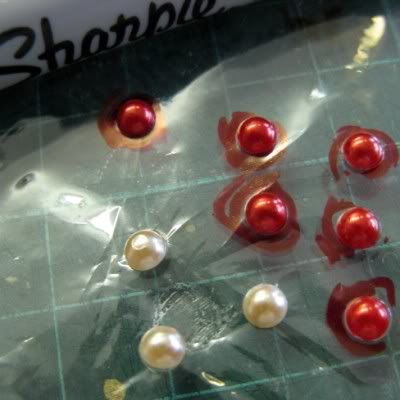
The keen eyed amongst you may notice that I have supplemented my September Counterfeit Kit supplies with red cardstock and fancy ribbon ... but those pearls were in my kit, honest! I just attacked them with a red Sharpie pen!
Oh and I have one more stamping thing to share with you before you hop over to Margie for more stamping surprises ... a free e-zine of The Best of 2010 from Craft Stamper - a seriously lovely UK stamping magazine. Hurry though, as you only have until October 1st to download it!
ETA: Challenge combining as ever .... this is loosely based on Kaisercraft September Sketch #3, ties in with A Trip Down Memory Lane's "D" for Daughter and fits in with Scrapbookers Anonymous' stamping challenge - how many birds have I killed with this page? :P
I've just returned from the most brilliant weekend away: scrapping with friends old and brand new!! My UKScrappers team is part of a "house" and a bunch of the girls from our "house" teams got together for a meet up near Birmingham. A few of us had done classes & challenges to share and the weekend was packed full with creativity, chat and chocolate ... plus 3 meals a day with NO washing up to do! Heaven!!!!
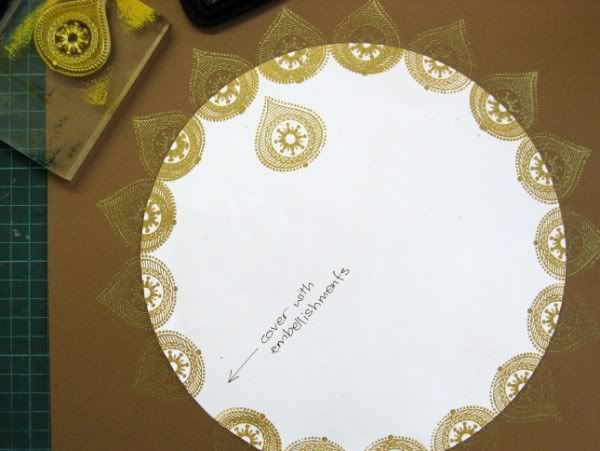
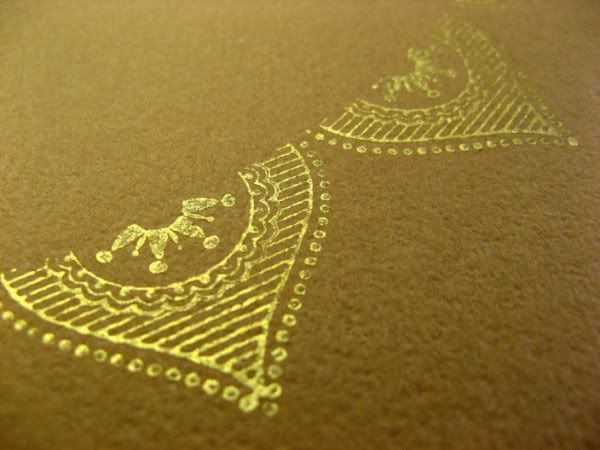
One of the classes was given by my good friend Claire K. I knew in advance that it would be perfect for this post as she was sharing a stamping technique which is surprisingly quick and easy to do and creates a really effective decorative frame for your page! I saved some of my September Counterfeit Kit especially for this and, with Claire's permission, I took photos of my page as the class progressed so that I could share with you.
- Choose a decorative CLEAR stamp, ink, a photo and base card or lightly patterned paper.
- Decide what shape you want your stamped frame to be: circular, square, oval ... or something else entirely??? Cut the shape from scrap paper (I used the back of some unloved old stash but others used the inserts from page protectors).
It's worth practising the next steps on some scrap paper before you try it on your decent stash ... or have a go on the back of your page first!I've used Kaisercraft Christmas Bauble stamps from their Silly Season line
- Lay your scrap paper shape into position and keep it there with repositionable glue/sticky tak/paper clips/magnetic posts/paperweights/a third hand.
- The stamping around the shape will almost certainly leave a gap or an overlap, so work out where you can conceal this with an embellishment cluster, title letters or a journalling block. Start stamping from this point, around the edge of the scrap paper shape - with part of the stamped image on the scrap paper and part on your background paper or card.
- Remove the scrap paper shape to reveal a crisp outline frame.
Gold Stazon (lent by Claire) was really effective on my cardstock - You can now use the paper shape as a template to cut patterned paper to fill the centre of the frame if you wish. (I decide to mix it up and just use a partially curved strip of paper across the bottom of my circle)
- Place photo, title, embellishments journalling blocks etc onto your page, not forgetting to conceal that gap/overlap in the stamped frame.
| I lined up the centre of the bauble along the edge of the circle with adjacent images just about touching. It didn't always work exactly, but nobody but me will really care! |
As you can see I got carried away with another bauble stamp on my background and also used it to help make layered petals for my "flower". I toned down the Quickutz Blossom die-cut title lettering by overstamping with an Artemio dotted circle stamp.
Many, many thanks to Claire for a great technique (and allowing me to share it today) and a special thank you to a class-mate, Karelyn, who lent me her circle-cutting system for my photo mats. Aren't scrappers just the best, most generous people?!?!?!
The keen eyed amongst you may notice that I have supplemented my September Counterfeit Kit supplies with red cardstock and fancy ribbon ... but those pearls were in my kit, honest! I just attacked them with a red Sharpie pen!
Oh and I have one more stamping thing to share with you before you hop over to Margie for more stamping surprises ... a free e-zine of The Best of 2010 from Craft Stamper - a seriously lovely UK stamping magazine. Hurry though, as you only have until October 1st to download it!
ETA: Challenge combining as ever .... this is loosely based on Kaisercraft September Sketch #3, ties in with A Trip Down Memory Lane's "D" for Daughter and fits in with Scrapbookers Anonymous' stamping challenge - how many birds have I killed with this page? :P
Subscribe to:
Posts (Atom)