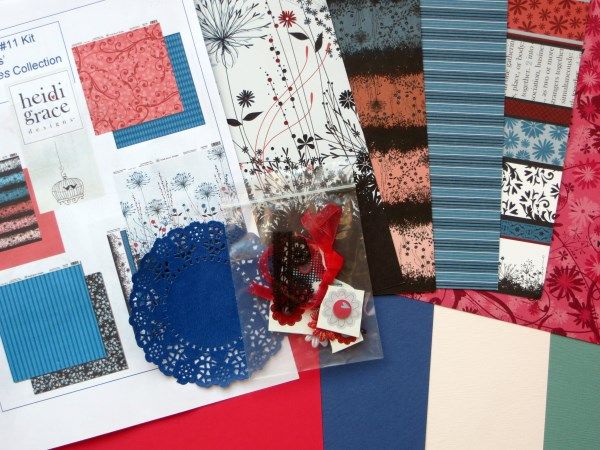
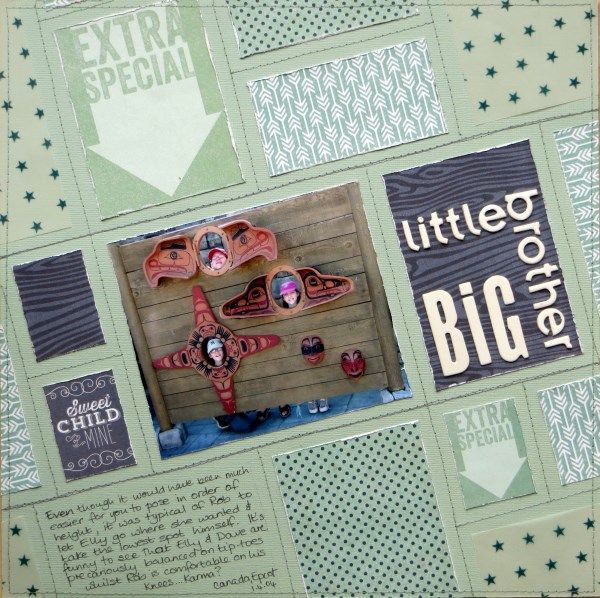
My latest page with my current Counterfeit Kit* fits the final challenge this month over at the CKCB because I have incorporated some vellum. Not just any vellum, but Crate's Boys Rule Starry vellum ... the final scraps. I received a full 12x12 sheet of it with my DT package from S J Crafts back in February and it has featured its loveliness on four or five pages now. It makes me sad that there is none left, but one look at my pages and I am happy, especially when I look at this one:
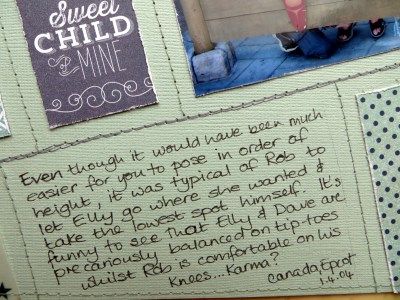
The photo is from our Disney 2004 holiday which was full of photo opportunities and there isn't always much to say about them other than where we were or what day it was. However, when I looked closely I realised that this photo represented No.2 Son's ability to put others first, especially his little sister and I felt that some journalling was required to celebrate his thoughtfulness.
Which also ties in nicely with Merly Impressions current challenge to tell a story on the front of your page.
*I have added a couple of papers from MME's 6x6 Cut & Paste Charm pad allowing me to use smaller versions of the 3x4 cards in my kit and grabbed some white BG Chocolate Chip and Woodware Chippies alphas for a contrasting title.
Saturday, 16 August 2014
Tuesday, 12 August 2014
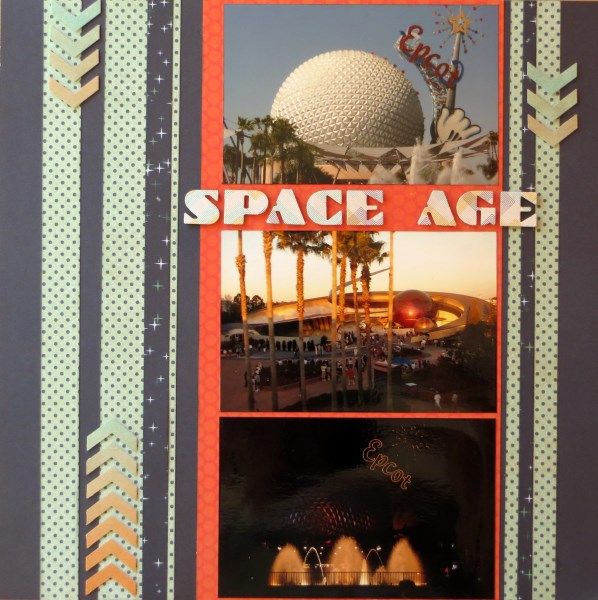
Space Age Scrapping With A Sketch
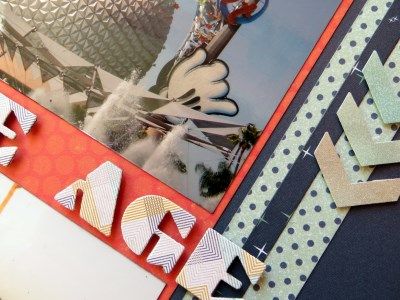
Supplies are from my August Counterfeit Kit with the addition of a couple of toning paper scraps for the title (cut with Sizzlit Man O Man dies) and the chevrons (cut with fellow Master Forger Lesley's lovely chevron punch).
Thanks Lesley!
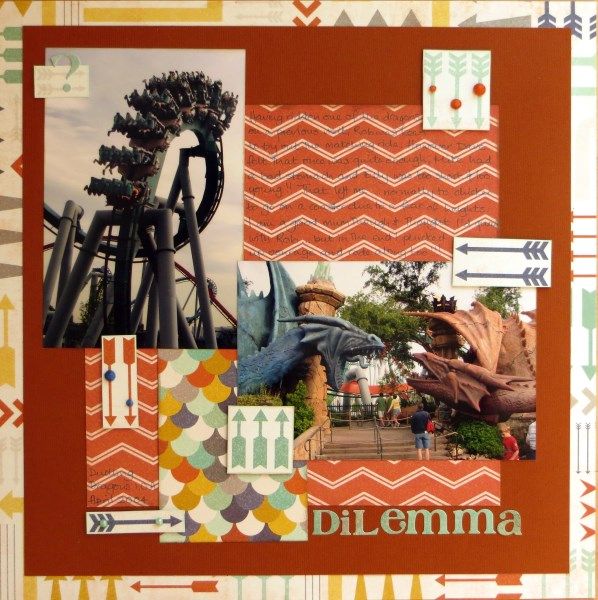
While you're here, let me share the new challenge from S J Crafts blog this month: to scrap a holiday or travel using old and new stash. Being a seasoned kit counterfeiter, I'm constantly mixing old and new supplies in my kits and this month's Counterfeit Kit was no exception, so I chose some more photos from our Disney 2004 trip and got scrapping.
The journalling describes how No.2 Son wanted to re-ride the Duelling Dragons, but his elder brother wimped out and Hubby was sick ... leaving one very-scared-of-heights-mum with a dilemma: disappoint him or keep him company?
.
I rode the coaster!
I've combined new-to-me MME papers from last summer with Basic Grey alphas from their 2009 Marrakech collection and topped it off with some ThermoMorph* dots made by yours truly just last month!
The S J Crafts challenge is open until September 6th if you want to join in and kit counterfeiters are welcome to join our Members' Blog hop - just e-mail the CKCB by August 18th!
*my ThermoMorph review is here ... still working on a post about making the dots though :-D
Labels:
CKCB,
Layouts,
S J Crafts
Sunday, 10 August 2014
Zoom In Zoom Out #32
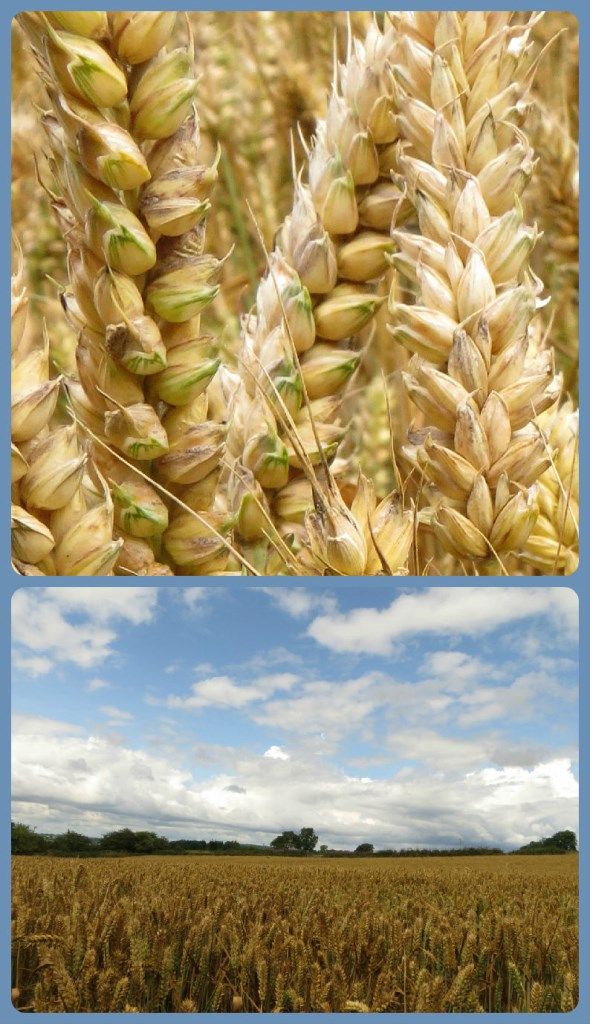
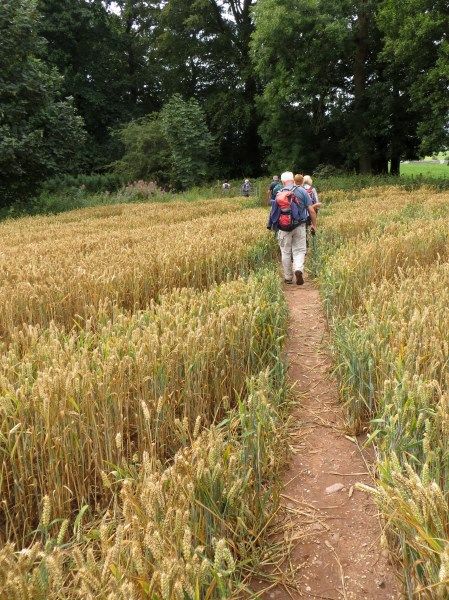
A friend invited me to accompany her on a 7 mile ramble through the countryside. That's twice as far as I normally walk for pleasure or exercise, but I decided to accept the challenge. Had it been weather like we've had this weekend i.e. torrential rain, I might not have managed it. However we were exceptionally lucky and not only did the rain hold off, but the sun shone. The other Ramblers were welcoming and the pace was more like an amble so I had no trouble keeping up. Indeed, it was slow enough for me to take a snap or two too:
I have no idea whether the corn is close to harvesting but the farmer had been kind to us, leaving a footpath free for us to walk down:
Happily joining in with Helena's 32nd Zoom In Zoom Out, why not ramble over there to see what golden items others have spotted.
I have no idea whether the corn is close to harvesting but the farmer had been kind to us, leaving a footpath free for us to walk down:
Happily joining in with Helena's 32nd Zoom In Zoom Out, why not ramble over there to see what golden items others have spotted.
Saturday, 9 August 2014
Tagxedo Theme Tones
A reader recently contacted me to ask if I had some pointers for personalising a Tagxedo colour theme. To get the techniques straight in my head I decided to make a flowery 40 for a friend's birthday card following my own Tagxedo tutorial on using flowery fonts:
To save you clicking back to 2012, here are the steps for making the card design before I address the colours:
Download Sarus's Flower Ding Font to the computer, then click on Font ► and use Add Fonts ... to load it onto Tagxedo. The flowers will appear (in red) on the list of fonts. Click on it to select it.
Click on Shape ► and use Add Words ... to create a "40" in ChunkFive (a nice chunky font to fill with flowers) and click Accept.
Choose Orientation ► Any so that the flowers can be at any angle and then lock the three padlocks.
Load a variety of letters, corresponding to pretty flowers, as the text and click Submit:
Worryingly at this point, the image disappears!!! A few settings need tweaking to get it back:
Select these Word Options, press Accept when done:
To choose another of Tagxedo's colour themes simply click on Theme ► and choose a different one e.g. "Elephant In The Room"
Re-spinning Colour will change the colours of the individual flowers, keeping within the current theme:
It's worth re-spinning Colour (and possibly Layout) several times before choosing the one you like best from the History ...
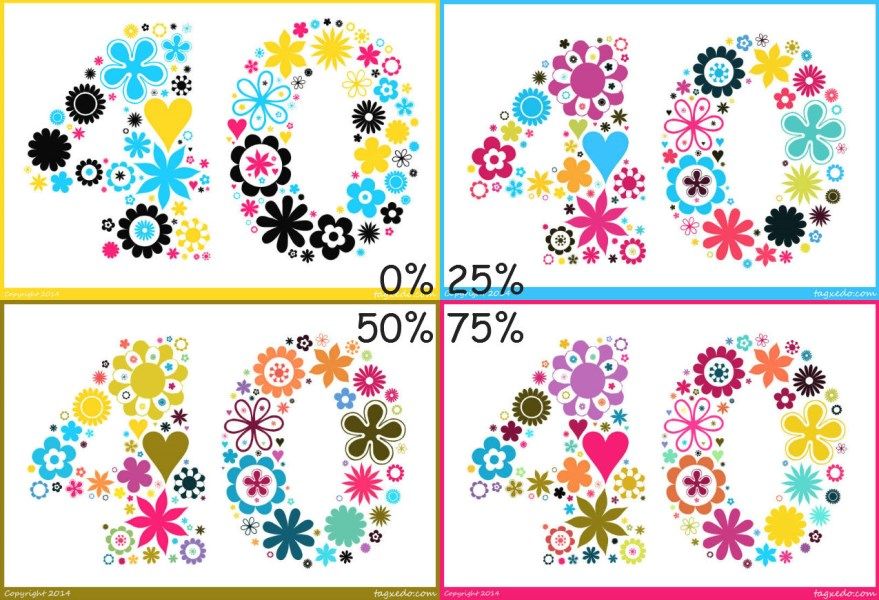
Tagxedo allows some variation from the colours shown in each theme (normally 50%) but you can change this to 0% to use ONLY the specified colours ("Fallen In Love" has just 4 shades: black, turquoise, hot pink and yellow) or increase it to 100% for maximum colour variation within the theme:
Finally, if none of Tagxedo's colour themes float your boat, you can create your own:
Click on Theme ► and use Add Themes ... to see a sample colour theme called "Blue Meets Orange" with six strings of numbers and letters afterwards (000000 007080 4080a0 f0f0f0 d0a030 c06010). These are the RRGGBB (red, green, blue) codes for various colours where 000000 is black and FFFFFF is white.
You can change the name*¹ to something sensible e.g. "Mauritius Flag" and then replace the RGB codes with the RGB codes for the colours*² you prefer e.g. ff0000 000066 009900 ffcc00 before clicking Submit.
Your new colour scheme will appear below as blocks of colour with a border representing the background. Auto chooses one of the colours as a background, but you can change the background colour e.g. click Bright for the brightest of your colours, click First for the first colour in the list or even select Black or White. Edit the RGB strings to change/add/delete colours and click Submit to make new themes. When you find one you like click the Add to the left of it and X to get rid of the Add Themes ... box. Now you can select your newly named theme (with or without colour variation):
My thanks to Lynn for her query. I hope this helps a little. Have fun!
*¹ Unfortunately when you have finished
with Tagxedo for the day it doesn't save anything ... neither your
shape, your extra fonts, your settings nor your colour themes will be there
next time you play ... so don't stress about what you call your scheme!
*² Try Colour Picker, Design Seeds (hold your mouse over the side colours to see the codes), or Colour Palette Generator to choose colours and find out the required RGB codes.
To save you clicking back to 2012, here are the steps for making the card design before I address the colours:
Download Sarus's Flower Ding Font to the computer, then click on Font ► and use Add Fonts ... to load it onto Tagxedo. The flowers will appear (in red) on the list of fonts. Click on it to select it.
Click on Shape ► and use Add Words ... to create a "40" in ChunkFive (a nice chunky font to fill with flowers) and click Accept.
Choose Orientation ► Any so that the flowers can be at any angle and then lock the three padlocks.
Load a variety of letters, corresponding to pretty flowers, as the text and click Submit:
♥:50:@0The 50 forces the ♥ to be the most frequent character and the @0 forces it to be horizontal.
A A A B B B B B B B B B B C C C C D D D D D
G G G G G G G G H H H H H H H H H I I I I I I I I L L L L L L L L
M M M M M O O O O O O O O O V V V V V V V V V V V V V W W W W W W
X X X X X X X X o o o o o o o p p p p p x x x x x x x x x y y y y y y
Worryingly at this point, the image disappears!!! A few settings need tweaking to get it back:
Select these Word Options, press Accept when done:
Punctuations = Yes (this allows the ♥ to show)Select these Layout Options, press Accept when done:
Remove Common Words = No (this allows the individuallettersflowers to show)
Max Word Count = 150 (stops the flowers getting too small - but make sure that the shape is still filled)This produced a chunky 40 filled with flowers in the default colour theme "Quiet Morning".
Tightness = 150% (fills the shape as much as possible, but slows Tagxedo down)
Normalize Frequency = Yes
Hard Boundary = Yes (makes the shape seem more defined)
Allow Replication = Yes (so that there are enoughwordsflowers to fill the shape)
Font Preference = Any 1 (only the red flowers should be selected in Font ►)
To choose another of Tagxedo's colour themes simply click on Theme ► and choose a different one e.g. "Elephant In The Room"
Re-spinning Colour will change the colours of the individual flowers, keeping within the current theme:
It's worth re-spinning Colour (and possibly Layout) several times before choosing the one you like best from the History ...
Tagxedo allows some variation from the colours shown in each theme (normally 50%) but you can change this to 0% to use ONLY the specified colours ("Fallen In Love" has just 4 shades: black, turquoise, hot pink and yellow) or increase it to 100% for maximum colour variation within the theme:
Finally, if none of Tagxedo's colour themes float your boat, you can create your own:
Click on Theme ► and use Add Themes ... to see a sample colour theme called "Blue Meets Orange" with six strings of numbers and letters afterwards (000000 007080 4080a0 f0f0f0 d0a030 c06010). These are the RRGGBB (red, green, blue) codes for various colours where 000000 is black and FFFFFF is white.
You can change the name*¹ to something sensible e.g. "Mauritius Flag" and then replace the RGB codes with the RGB codes for the colours*² you prefer e.g. ff0000 000066 009900 ffcc00 before clicking Submit.
Your new colour scheme will appear below as blocks of colour with a border representing the background. Auto chooses one of the colours as a background, but you can change the background colour e.g. click Bright for the brightest of your colours, click First for the first colour in the list or even select Black or White. Edit the RGB strings to change/add/delete colours and click Submit to make new themes. When you find one you like click the Add to the left of it and X to get rid of the Add Themes ... box. Now you can select your newly named theme (with or without colour variation):
My thanks to Lynn for her query. I hope this helps a little. Have fun!
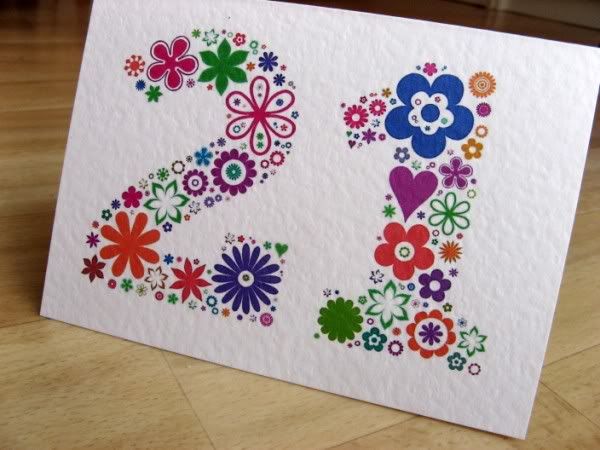
| I can't show the 40th card yet, but here's one I made earlier (using "Happy Brights") |
*² Try Colour Picker, Design Seeds (hold your mouse over the side colours to see the codes), or Colour Palette Generator to choose colours and find out the required RGB codes.
Labels:
Cards,
Instructions,
Tagxedo
Tuesday, 5 August 2014
Zoom In Zoom Out #31
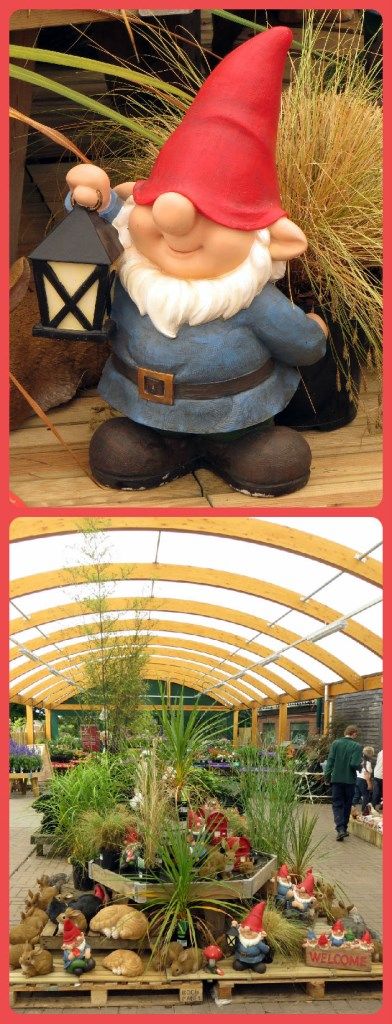
I'm just in time to join in with Helena's 31st week of ZIZO and another Summertime Scavenger Hunt "find":
Though as you see when I zoom out ... he was in a garden centre along with several others! Does a garden centre gnome count I wonder?
#2 A Garden Gnome
Though as you see when I zoom out ... he was in a garden centre along with several others! Does a garden centre gnome count I wonder?
Monday, 4 August 2014
Happy Mail #4
One of the things that I love about the "wonderweb" is the ability to connect with people with similar interests. I've had holiday tips, book recommendations and scrapping inspiration from all over the globe. It also allows me to enter challenges and competitions ... resulting in the arrival of a fun prize parcel from time to time. I recently entered Sue's Sketch Challenge and won one of her lovely kits with this page. Not only could I choose which kit I liked best, but it came with an inspiration sheet as well. Brilliant Sue - many thanks!
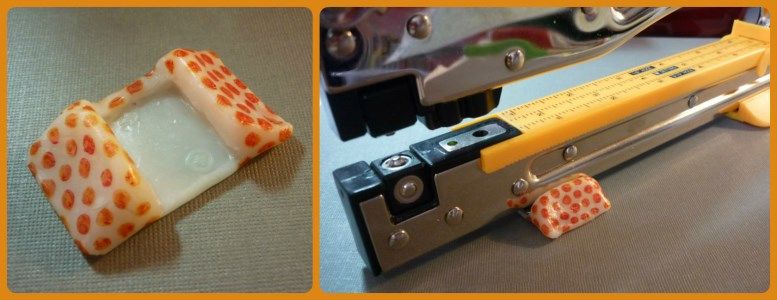
They say what goes around, comes around ... I was able to return a favour to Sue when I made her a replacement foot for her Big Bite using ThermoMorph (which I had received for review here):
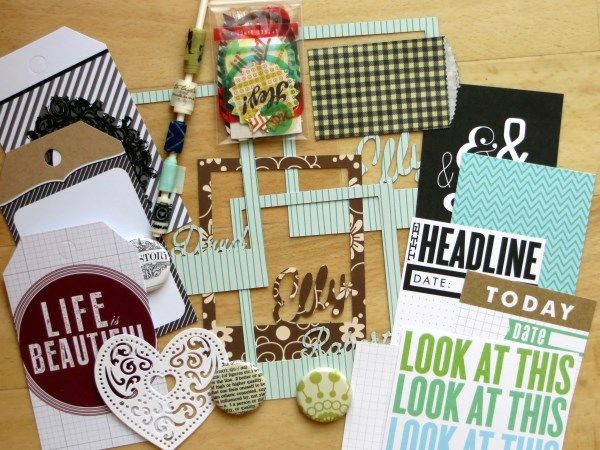
I also entered a contest on my friend Lesley's 500th blog post and won a super tailor-made prize package, full of the things that she knows I love, including some personalised frames cut on her Cameo - aren't they incredible!
Thank you Lesley :-D
There's a contest running over at the Counterfeit Kit Challenge Blog at the moment. It's to celebrate their 1000th post and the prize is to be Counterfeit Queen for October. The deadline is August 9th ... don't be late!
They say what goes around, comes around ... I was able to return a favour to Sue when I made her a replacement foot for her Big Bite using ThermoMorph (which I had received for review here):
I also entered a contest on my friend Lesley's 500th blog post and won a super tailor-made prize package, full of the things that she knows I love, including some personalised frames cut on her Cameo - aren't they incredible!
Thank you Lesley :-D
There's a contest running over at the Counterfeit Kit Challenge Blog at the moment. It's to celebrate their 1000th post and the prize is to be Counterfeit Queen for October. The deadline is August 9th ... don't be late!
Friday, 1 August 2014
Cutting & Pasting A Counterfeit Kit
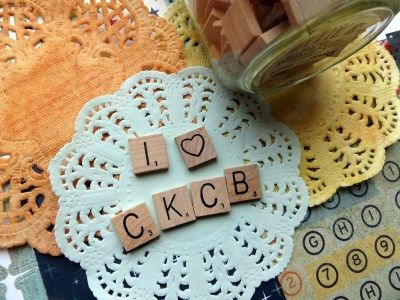
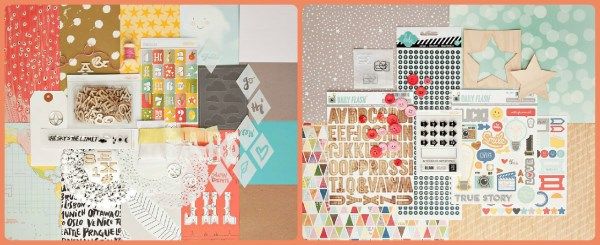
Welcome to August's kit counterfeiting with the Counterfeit kit Challenge Blog. This month we have former Master Forger Sherri back as our guest designer and you should have reached me via Lynnette if you've followed the hop from the start. The kit-to-copy this month is Studio Calico's Penny Arcade and its add-ons.
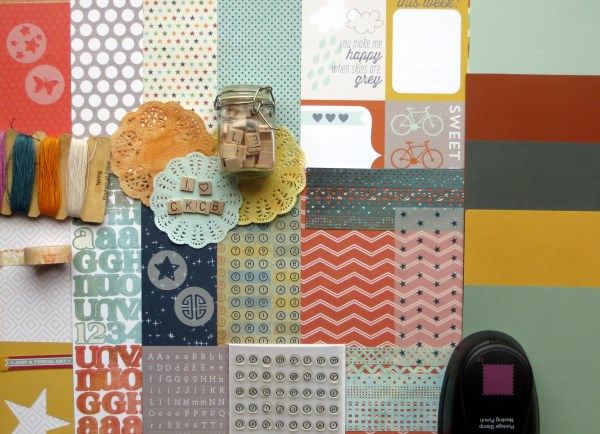
I ended up picking and choosing elements from both the main kit and the Fortune Teller add-on (now sold out) to make a hodge podge kit!
I found dots and stars, clouds and doilies, wooden letters and typewriter key numbers ... orange and teal, yellow and brown, grey and white ...
Supplies:
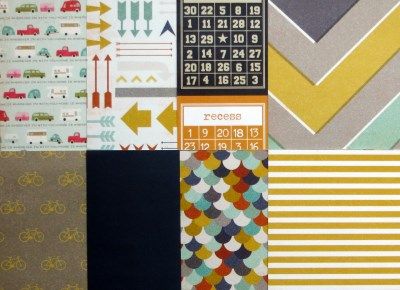
Echo Park's So Happy Together Road Trip (vehicles on the reverse)
MME Cut & Paste Charm Hey You Route (arrows)
Simple Stories Smarty Pants Stars (bingo cards)
MME Cut & Paste Charm Carefree Mellow (giant chevrons)
MME Cut & Paste Charm Sweet Treat (yellow stripe)
MME Cut & Paste Charm Sweet Spin (bicycles)
BG Marrakech alpha stickers
Polar Bear Press Northern Lights (plain blue)
BG Recess Test Sheet
MME Cut & Paste Charm Smile Shine (scales)
Various colours of toning cardstock
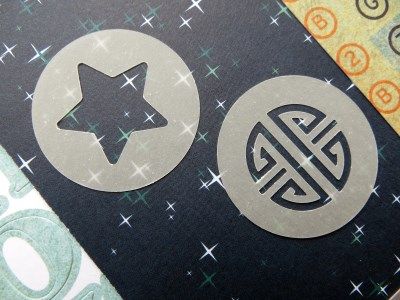
Vellum circles with punched shapes
Crafters Cords in teal, yellow & cream
Doilies inked in orange, yellow & duck-egg
Jar of wooden scrabble alphas
WRMK orange floral washi
Crate Paper Boys Rule Star 4x6 Card
Sn@p! Typset alpha stickers
Craftwork Cards Typewriter Keys clear stamps
BG laser cut doilies
Crate Paper Boys Rule Starry vellum
A stamp punch
I'm looking forward to using the vellum shapes ... nice to get some use out of my old punches. What old tools and supplies can you drag out of hibernation this month? Let's see whether Bethany is using old or new supplies ... she's next on our hop this month (the complete list is published here on the CKCB). Happy hopping!
I ended up picking and choosing elements from both the main kit and the Fortune Teller add-on (now sold out) to make a hodge podge kit!
I found dots and stars, clouds and doilies, wooden letters and typewriter key numbers ... orange and teal, yellow and brown, grey and white ...
Supplies:
Echo Park's So Happy Together Road Trip (vehicles on the reverse)
MME Cut & Paste Charm Hey You Route (arrows)
Simple Stories Smarty Pants Stars (bingo cards)
MME Cut & Paste Charm Carefree Mellow (giant chevrons)
MME Cut & Paste Charm Sweet Treat (yellow stripe)
MME Cut & Paste Charm Sweet Spin (bicycles)
BG Marrakech alpha stickers
Polar Bear Press Northern Lights (plain blue)
BG Recess Test Sheet
MME Cut & Paste Charm Smile Shine (scales)
Vellum circles with punched shapes
Crafters Cords in teal, yellow & cream
Doilies inked in orange, yellow & duck-egg
Jar of wooden scrabble alphas
WRMK orange floral washi
Crate Paper Boys Rule Star 4x6 Card
Sn@p! Typset alpha stickers
Craftwork Cards Typewriter Keys clear stamps
BG laser cut doilies
Crate Paper Boys Rule Starry vellum
A stamp punch
I'm looking forward to using the vellum shapes ... nice to get some use out of my old punches. What old tools and supplies can you drag out of hibernation this month? Let's see whether Bethany is using old or new supplies ... she's next on our hop this month (the complete list is published here on the CKCB). Happy hopping!
Subscribe to:
Posts (Atom)