Oh dear! Whatever happened to "I'm determined to be a more consistent blogger and scrap more" which I posted back on January 1st???? Here I am squeezing just one layout from my January Counterfeit Kit onto my blog in a whole month! What a bad, bad blogger :-( I will try harder next month, I promise. In the meantime, this page was done at my January crop using Sue's Sketch of the Month and documents the delay we had on our journey between Copenhagen and Malmö.
Unfortunately, some inconsiderate person had abandoned their car, blocking the turning circle outside the station. After waiting in vain for the owner to return and move, our driver attempted a thirty-3-point turn but just could not get past. Eventually he was forced to reverse back down the crowded street to continue the journey! I wonder if the red car owner had gone off somewhere on the train ... or was hiding after spotting our coach and the traffic jam behind??
Sunday, 31 January 2016
Sunday, 24 January 2016
Hello, How Are You?
Welcome to the first Members' Blog Hop of 2016 from the Counterfeit Kit Challenge Blog; Although we can choose ANYTHING that we've made with this month's November's kit, I'm starting you off with my go at Challenge #2 - a matching card and tag:
Sometimes it's good to give a little something to a friend ... just because ... and these two will do very for that don't you think?
Next stop on the Members' Hop is the lovely Cindy and you can find the full list of participants Counterfeit Kit Challenge Blog today (where there is also a poll to see what you think of the Members' Hop in general - do let us know what you think)
Friday, 1 January 2016
Goodbye 2015 - Hello 2016
"I'm determined to be a more consistent blogger and scrap more"
As I also said back then, what better way to start than by putting together a new kit to join in with the Counterfeit Kit Challenge Blog.
Today the Master Forgers are all sharing their takes on this month's kits-to-copy which come from the 
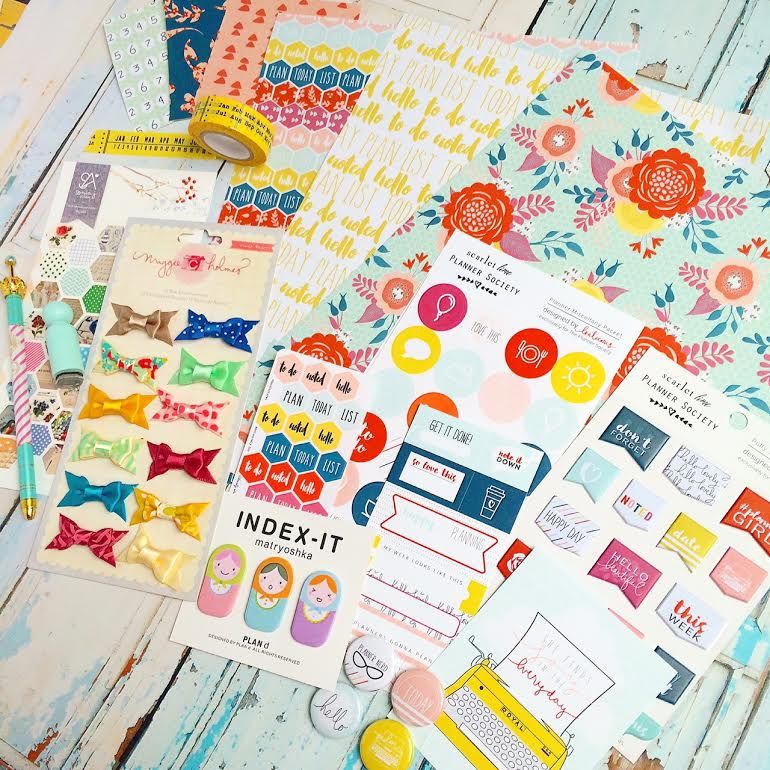
Scarlet Lime's Planner Society Kits - we were allowed to pick any of the past kits from May 2015 onwards. If you've been hopping along, you'll have just been to visit my compatriot Clair. I chose the June Kit to copy as the warm colours and pretty shapes were a tonic after all the cold wind and rain we've had lately.
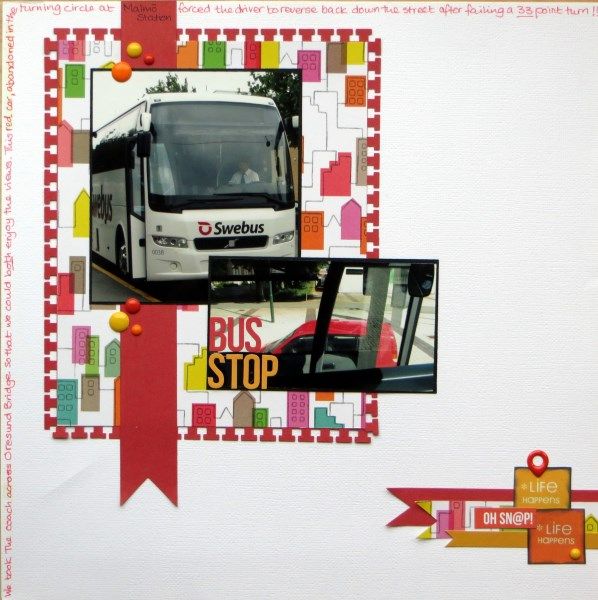
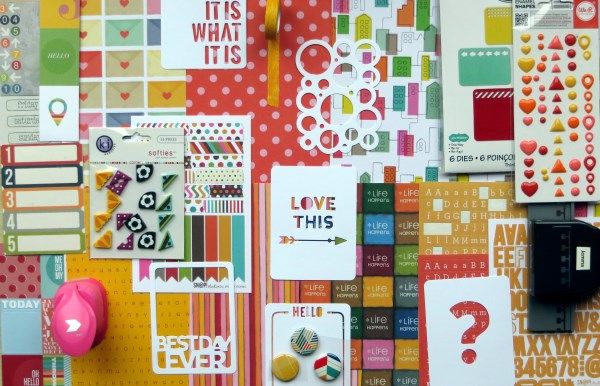
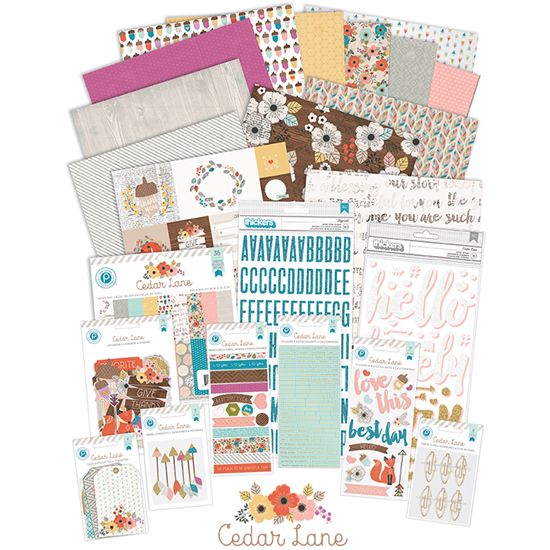
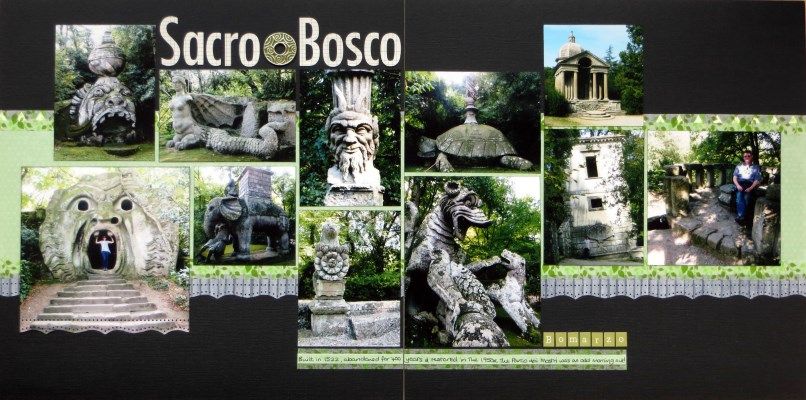
Rather than a planner kit, I have been inspired to make a page (or two) kit reflecting the pinks (!) and yellows of the original:
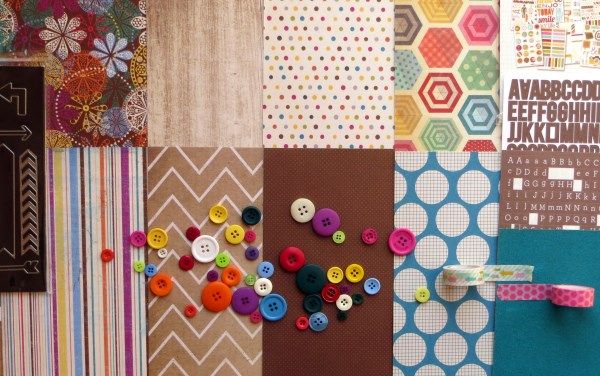
2 sheets from a Dear Lizzy Lucky Charm pad
1 sheet from an Amy Tangerine Yes Please pad
2 sheets from a Christina Cole 8x8 slab
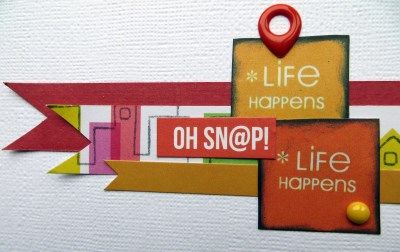
½ sheet Rainbow Life Happens by Christina Cole
Various journalling cards and mini-spots from my stash
American Crafts ⅝ Chevron knockout punch
KI Memories Softies Corners
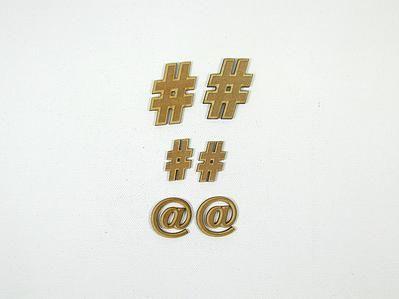
Simple Stories Sn@p! Stickers and alphas
Jillibean Soup It Is What It Is Mini Placemats
WRMK yellow woodgrain washi
3 toning flair from my stash
Sizzix This Way Thinlits dies
WRMK Enamel Shapes
EK Success Binding Edge border punch
I'll add cardstock as and when I need it.
Now it's time to hop over to see what Julene has for you. If you want to visit all the Master Forgers or you want to know more about kit counterfeiting pop over to the Counterfeit Kit Challenge Blog today.
Happy New Year !!!
Monday, 7 December 2015
December Documented with the CKCB
Over at the Counterfeit Kit Challenge Blog, the Master Forgers are sharing kits to help document December in various ways. I showcased my kit yesterday ...
... and today I am sharing my project ...
It's based on my original Lean Mean Maxi-Book, but with an added half-sheet of patterned paper to extend it and allow for 25 photos or snippets of journalling.
A standard Lean Mean MAXI-book needs 2½ sheets of good quality patterned paper for the inner pages (instructions here) and one sheet of cardstock for the cover (instructions here). My extended version needs 2½ sheets of patterned paper plus an extra ½ sheet (mine was the same pattern as one of the full sheets I'd used for the last half of the book which allowed me to make a double page spread for Christmas Day):
Simply make up the cover and inside pages - but don't stick them together yet!. Measure the depth of the spine of the inner pages - mine was 3/16". Cut a 5"x12" strip from the extra ½ sheet of patterned paper. Score the strip 5" away from the right hand edge of the strip and make a second score line, to the left of this, that is the smae as the depth of your inner pages spine. Trim the strip 5" beyond this second score line. Punch a semi-circle half-way along the top edge of the left-hand 5" section. Adhere the other three sides of the left hand 5" section to the front of your inner pages to make a pocket for a tag. The right-hand 5" section of the extra strip of paper is now stuck down onto the centre section of the cover, over the ribbon tie (see the cover instructions). Finish off the cover construction, decorate and you are ready to Document December!
All of the inner pages are shown on the CKCB today.
In fact there's inspiration every day of December on the Counterfeit Kit Challenge Blog; please join us and share your creations on our Mr Linky page.
Labels:
CKCB,
CKCB Kit,
Instructions,
Mini Books
Wednesday, 4 November 2015
Socially Acceptable
Today the Counterfeit Kit Challenge Blog is sharing their regular Forgeries on the Fourth post and this month several Master Forgers have been counterfeiting add-on embellishments for their November kits. I chose to recreate the social media wood veneers from Grapevine Studio ...
... using various shades of kraft cardstock! Simply cut several layers of the same die-cut or punch and glue them together to recreate the dimension of the wood veneer.
I found that three or four layers were enough to give me a decently solid shape. You can see how the un-layered hashtags above are so much less substantial than the @ signs. As I'd packed some arrow dies in my November kit I made goood use of them as well.
Check out the other tutorials and tips on the CKCB today - there's sure to be plenty more inspiration there.
Labels:
CKCB,
Instructions
Sunday, 1 November 2015
Not Quite A Collection
Welcome to the November Master Forger Kit Reveal Blog Hop which started with our Guest Designer Alicia. If you're following in order you'll have popped over from Clair (if not, the hop order is on the CKCB today).
You never quite know where the Counterfeit Kit Challenge Blog will glean inspiration from ... this month Bethany has chose a collection pack rather than a kit: The Cedar Lane Collection by Pink Paislee which hit the (US) stores in August this year. The first thing that struck me with this collection was that sheet of bright purple ... followed by the mix of bright colours against brown ... plus splashes of bright blue and some neutral woodgrain. Here's what I found in my stash (more or less) along those lines:
I added some arrow dies to help with the counterfeiting, and a splash of buttons as they've been missing from my kits for a while. There's also a sheet of teal cork to cut my own titles from. Seeing the two photos together ... I realise Pink Paislee won't be hiring me as a collection designer any day soon ... ;-)
Supplies:
Glitz Designs Sparrow Daisy (orange reverse) and Sparrow Stripe (teal reverse)
All the other papers were from the giveaway pile at my recent Bloggers' retreat - leftovers from a pad of Crate Paper's The Pier collection and a pad of Amy Tangerine from American Crafts one brown polkadot paper fromgoodness knows where?!
Little B's Arrows dies
A selection of buttons from my stash
Arrow and honeycomb washi tapes
Simple Stories SN@P! studio alphas and icon stickers
Teal cork from WRMK
We're also counterfeiting an embellishment add-on ... and I chose to have a go at Grapevine Design's social media wood veneers in honour of the smartphone I was given for my birthday ... 21st century, here I come!!!!
Now it's time to hop on to Julene ... I wonder what she has put together for this month and what she'll be adding to her kit?
You never quite know where the Counterfeit Kit Challenge Blog will glean inspiration from ... this month Bethany has chose a collection pack rather than a kit: The Cedar Lane Collection by Pink Paislee which hit the (US) stores in August this year. The first thing that struck me with this collection was that sheet of bright purple ... followed by the mix of bright colours against brown ... plus splashes of bright blue and some neutral woodgrain. Here's what I found in my stash (more or less) along those lines:
I added some arrow dies to help with the counterfeiting, and a splash of buttons as they've been missing from my kits for a while. There's also a sheet of teal cork to cut my own titles from. Seeing the two photos together ... I realise Pink Paislee won't be hiring me as a collection designer any day soon ... ;-)
Supplies:
Glitz Designs Sparrow Daisy (orange reverse) and Sparrow Stripe (teal reverse)
All the other papers were from the giveaway pile at my recent Bloggers' retreat - leftovers from a pad of Crate Paper's The Pier collection and a pad of Amy Tangerine from American Crafts one brown polkadot paper fromgoodness knows where?!
Little B's Arrows dies
A selection of buttons from my stash
Arrow and honeycomb washi tapes
Simple Stories SN@P! studio alphas and icon stickers
Teal cork from WRMK
Now it's time to hop on to Julene ... I wonder what she has put together for this month and what she'll be adding to her kit?
Saturday, 31 October 2015
Monster Park
How suitable for Halloween: a park in the Sacred Wood, full of weird and wonderful monstrous (as in large as well as mythical creatures) sculptures. Last year's trip to Italy yielded a morning's visit to Bomarzo where there is a very old sculpture park from 1522. It was neglected for many years and evntualy restored (after a fashion) in the 1950s.
I did start attempting the 3rd Challenge from the CKCB with this spread - to use Just One Thing other than photos, cardstock and paper - i.e. the semi-transluscent leafy washi tape which gave different effects depending on the background surface. However the giveaway pile at my recent Bloggers' Retreat yielded the most perfect giant gromlet that I had to interpret the challenge as just one thing that wasn't in my original October Counterfeit Kit!
I'd printed photos specially for the retreat but had somehow forgotten to select the bottom left one (of me in the mouth of a picnic cave) so I had to use a scrap of cardstock during the weekend. I'd used it to practice with the MS border punch and liked the effect so much that the final photo had to be given a border too!
The sculptures weren't that scary after 500 years, but I certainly wouldn't fancy going walking there this evening!
Subscribe to:
Posts (Atom)