Yesterday I shared the instructions for making the inner pages of my Lean Mean MAXI-Book - which was quite enough photos and text for one day! I'm rested, you're rested and so today I have the instructions for the cover.
The Cover
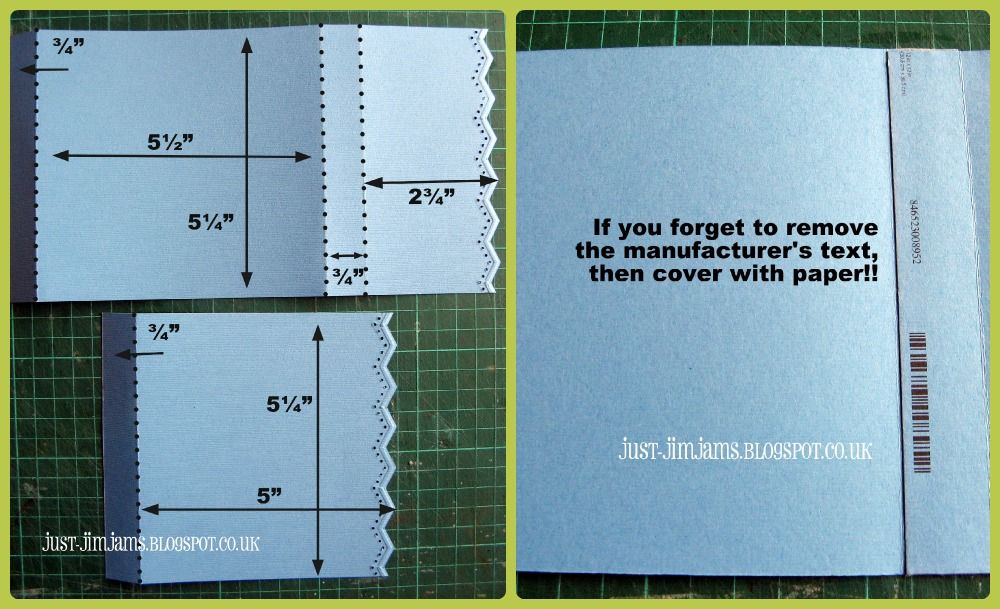
Cut two 5¼"x12" strips of cardstock. Punch a decorative border along one short edge of each rectangle and trim the strips so that they measure 5¼"x9¾" and 5¼"x6" respectively. Keep these trimmings for finishing the inside of the cover (see below).
Score three times across the width of the longer strip (¾", 6¼" and 7") and once across the width of the shorter strip (¾"). Crease all score lines as shown in the photo.
Apply adhesive to the inner side of the ¾" flap on shorter piece (the front cover) and join it to the outer side of the ¾" flap on larger piece (the back cover and closing flap) to form a 5¼"x14½" cover.
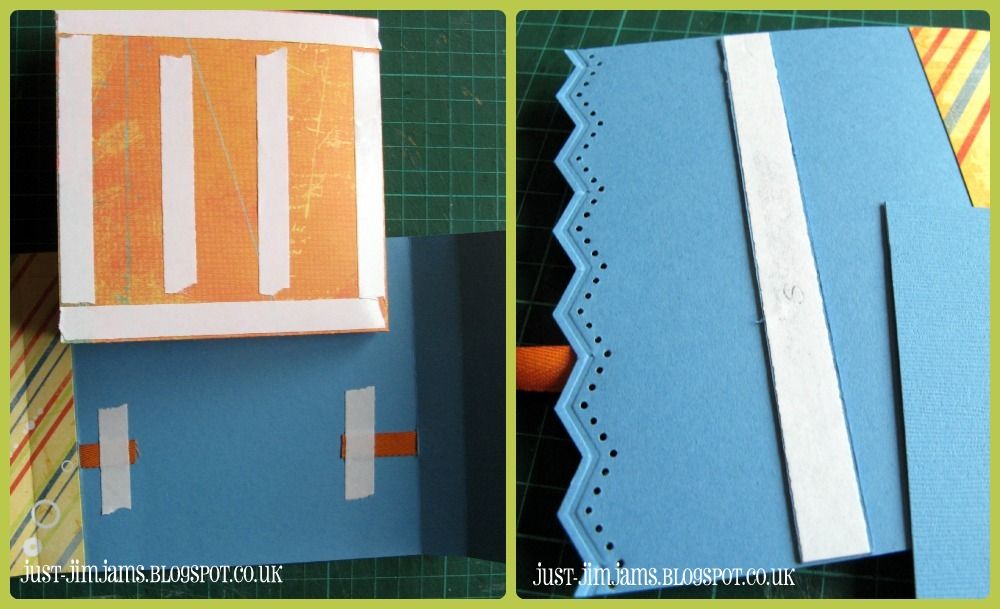
Make two slits for the ribbon closure about 2" up from the bottom edge on either side of the central section. Slot your ribbon pieces into place and secure with tape. You need 9-12" for the left-hand piece and 6-9" for the right-hand piece (if you have 20-26" you don't have to cut it in two). The shorter measurements are enough to tie a knot, the longer ones are enough for a bow.
Apply adhesive to the back of the inner pages and secure in place on the left of the central section of the cover, leaving room for tag-pulls on the right hand side. (Be careful to ensure the pages are the correct way up before you stick them down)
In order to stop the ribbon tie from squashing the inner pages I added a cardstock "stop" inside the front cover. It's two thin strips from the 5¼" offcuts, layered on top of each other 2¾" in from the punched edge of the front flap (see photo above).
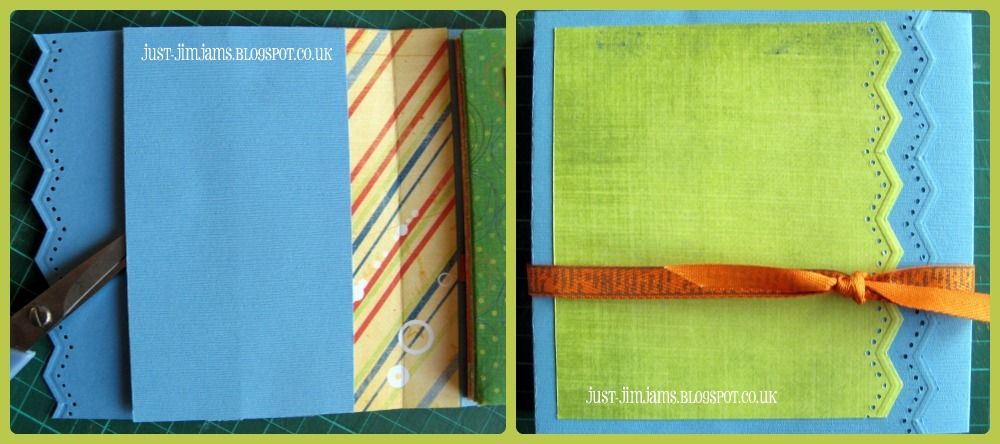
Cover with a 3"x5¼" rectangle of cardstock to form a slot (as shown above). When closing the cover, slip the right-hand flap inside the slot and the cover will remain in shape once the ribbon is tied.
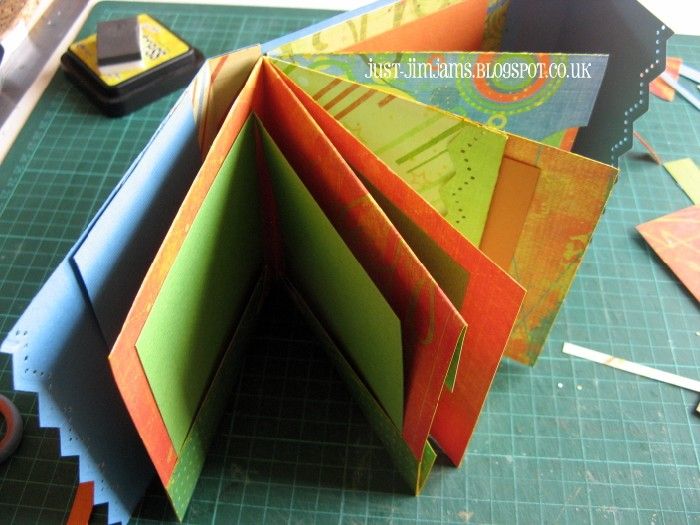
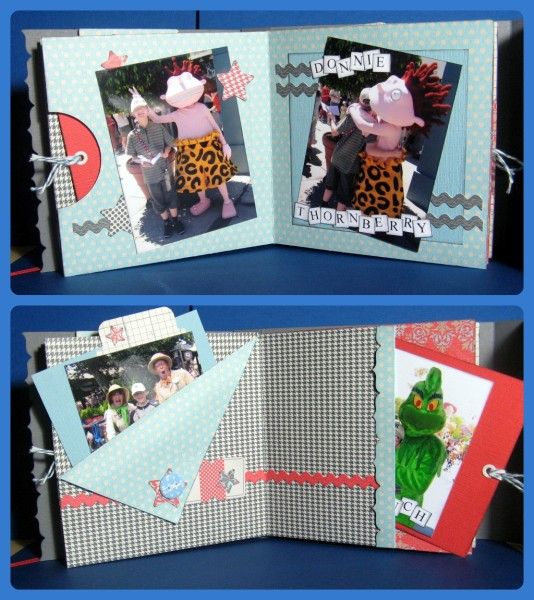
Add 4"x4" cardstock photo mats, photos, tag-ties, embellishments and journalling and you're done! I'm still working on mine, so here's a view inside one I completed earlier!
Thanks for sticking with me ... do please let me know if you have a go at my Lean Mean MAXI-Book (or even my original Lean Mean Mini-Book) as I'd love to see your version!
10 comments:
Thank you for posting this! I quite fancy having a go now! :)
chrisrydal x
This is a very nifty project..anything with pockets and space to slip things in is a winner for me!
Great tutorial, Jemma, thank you!
I will be giving this a go at some point in the very near future :)
Another winner - really enjoying this series. So much you can do with only a couple of sheets of paper.
Your comment on the manufacturer's text made me smile. I love it when they give an extra bit of pattern on one side - I've been known to use that and cover up the text too :)
This is something I think I'm going to be trying for sure
super cute and a gret tutorial but if you can believe it, I CANNOT measure. At. all.no.lie.
Thanks Jemma, its on my TO DO list!
I definitely love this project! Must have a go...
Just popped back to see the finished cover of your mini book following the UKS blog hop.it looks really lovely and thanks for sharing! Bubbleblitt Uks
wow brilliant.
Post a Comment