Showing posts with label Scrapbookers Anonymous. Show all posts

Sunday, 23 October 2011

Magic Tulips

As you may know tulips are pretty important in Holland and were once more prized than gold.  Not surprising then, that they feature in the Dutch theme park, the Efteling, one of the oldest theme parks in the world.

I lived in Holland as a child and enjoyed many visits; pretty much everything I remember is still there (plus lots more) and we have visited several times in my adult years (before and after starting a family when I worked in Holland) and we returned in 2006 to reintroduce the boys to their childhood memories.

When I was a child, one of the most magical animatronic sets was where a sorcerer flies on a magic carpet between two towers, serenading yellow tulips into life from the window of one tower, before returning to revitalise the red tulips around the other tower.  Our visit in 2006 coincided with some of the worst August weather and we rarely had to queue for more than 5 minutes for the various rides, but I was amazed to come to the "Fliegende Fakir" and find that we were entirely alone.  Nobody else there at all!  Can you see the puddles and the wet jeans?

"This attraction hasn't changed at all since I first saw it over 40 years ago;
what was different today was that we were, briefly, the only people watching
the tulips rise and fall to the sorcerer's magic flute."
My October Counterfeit Kit was great for this page as it brightened up the soggy photos and reflects the magical feeling the Efteling evokes in me.  I also took up the third CKCB challenge this month: to pile the layers on a page.  I have cut up a strip of Kaisercraft Allsorts Passionfruit, punched loads of circles from a sheet of Allsorts Blue Heaven, layered my photos and added a few squares from my Life Happens paper to match the bottom of my ancient (rather creased) Creamotion yellow paper - so glad that that is covered used up!!!

P.S. The use of punched circles and Creamotion paper also ties in rather nicely with Scrapbookers Anonymous' C Challenge :D

Thursday, 29 September 2011

Still Life?

Here's another page from my Green Button Retreat last weekend - from a misting and masking class by Ali.  She generously shared dozens of misting inks, masks and templates so that we could all have a few goes with her techniques.  This was my third (and final) attempt!!
It was all a bit random and uncontrolled for my mathematically ordered brain - but once I stopped trying to control the spray and allowed myself to "go with the flow" I really enjoyed myself. Thank you Ali for your generosity - perhaps I'll put some mists on my birthday list!

I used Ali's cogs and sequin waste masks plus two colours of blue and a lovely delicate shimmery mist to tone perfectly with No.3 Child's photos of a street artist we'd seen in Las Ramblas in Barcelona.


I used gold acrylic paint to stencil through the waste from a chipboard question mark and painted a variety of chipboard letters with a thick and lumpy layer of paint for my title.  I don't know what I'd do without chipboard alphas in my supplies - I buy white or plain and cover them with paint, paper, embossing powder to go with my projects - they are so versatile!!  Do you like chipboard?  Why not check out what other people have been doing with chipboard here at Scrapbookers Anonymous.  I'm also playing along with ATDML's A-Z challenge - with C for Cosmic Shimmer!

Tuesday, 27 September 2011

Shared Stamping

Welcome to my post for the CKCB Master Forgers' Blog Hop - you may have joined me from Kim, or just happened by - in which case, feel free to catch up with previous hops by starting at the Counterfeit Kit Challenge Blog.  This month's hopping is sponsored by one of the Master Forgers, Sherri, and her Etsy Shop selling Ippity Stamps.

I've just returned from the most brilliant weekend away: scrapping with friends old and brand new!!  My UKScrappers team is part of a "house" and a bunch of the girls from our "house" teams got together for a meet up near Birmingham.  A few of us had done classes & challenges to share and the weekend was packed full with creativity, chat and chocolate ... plus 3 meals a day with NO washing up to do!  Heaven!!!!


One of the classes was given by my good friend Claire K.  I knew in advance that it would be perfect for this post as she was sharing a stamping technique which is surprisingly quick and easy to do and creates a really effective decorative frame for your page!  I saved some of my September Counterfeit Kit especially for this and, with Claire's permission, I took photos of my page as the class progressed so that I could share with you.
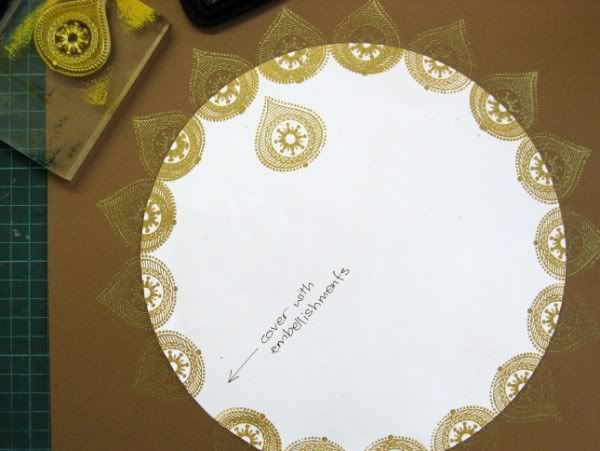
  1. Choose a decorative CLEAR stamp, ink, a photo and base card or lightly patterned paper.
  2. Decide what shape you want your stamped frame to be: circular, square, oval ... or something else entirely??? Cut the shape from scrap paper (I used the back of some unloved old stash but others used the inserts from page protectors). 

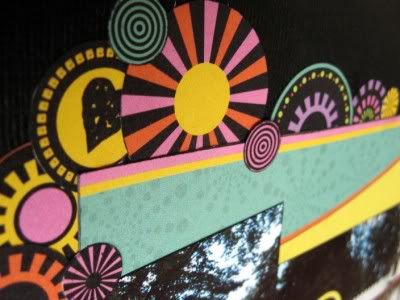
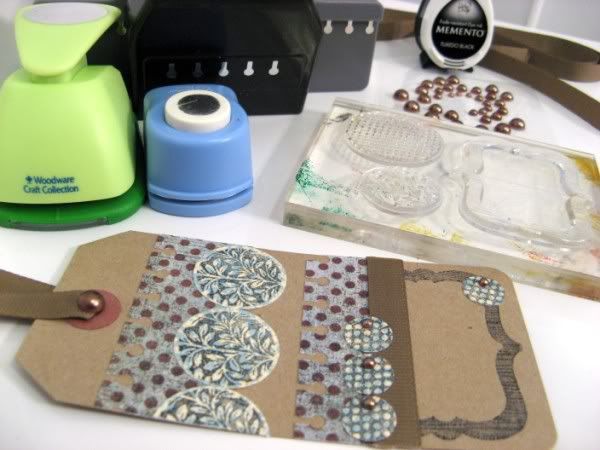
    I've used Kaisercraft Christmas Bauble stamps from their Silly Season line
    It's worth practising the next steps on some scrap paper before you try it on your decent stash ... or have a go on the back of your page first!
  3. Lay your scrap paper shape into position and keep it there with repositionable glue/sticky tak/paper clips/magnetic posts/paperweights/a third hand.
  4. The stamping around the shape will almost certainly leave a gap or an overlap, so work out where you can conceal this with an embellishment cluster, title letters or a journalling block.  Start stamping from this point, around the edge of the scrap paper shape - with part of the stamped image on the scrap paper and part on your background paper or card.

  5. I lined up the centre of the bauble along the edge of the circle with adjacent images just about touching. 
    It didn't always work exactly, but nobody but me will really care!
  6. Remove the scrap paper shape to reveal a crisp outline frame.

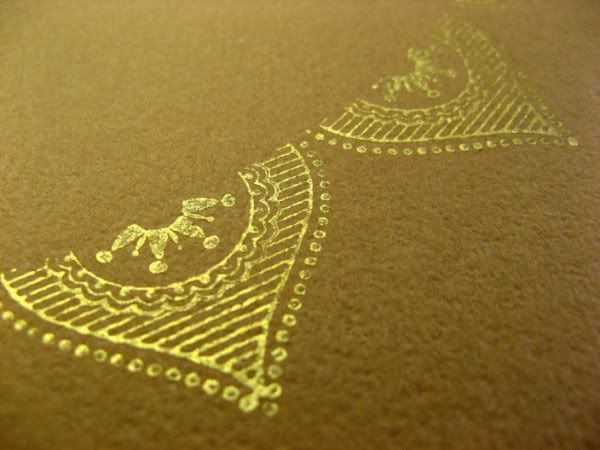
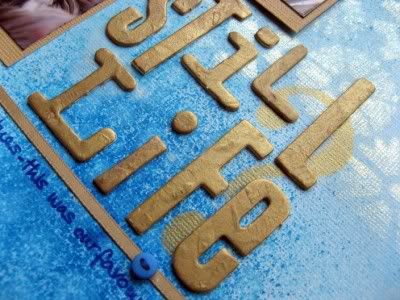
    Gold Stazon (lent by Claire) was really effective on my cardstock
  7. You can now use the paper shape as a template to cut patterned paper to fill the centre of the frame if you wish.  (I decide to mix it up and just use a partially curved strip of paper across the bottom of my circle)
  8. Place photo, title, embellishments journalling blocks etc onto your page, not forgetting to conceal that gap/overlap in the stamped frame.
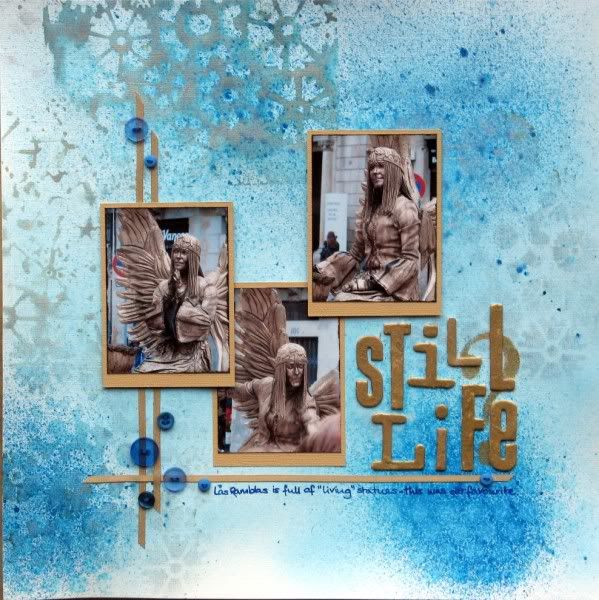
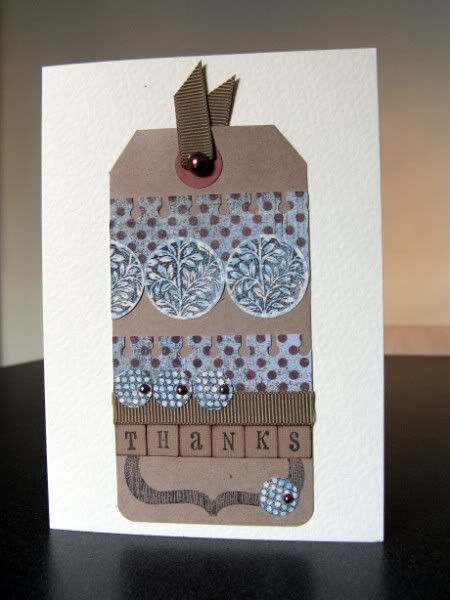
Claire suggested using ric-rac/ribbon to outline the frame shape for added definition (or if your stamping has been less than perfect).  Mine was good enough for me, but with 20/20 hindsight I did wish that my join had been a little higher up the page.  I had to make quite a large embellishment to cover it up yet leave the page balanced.

As you can see I got carried away with another bauble stamp on my background and also used it to help make layered petals for my "flower".  I toned down the Quickutz Blossom die-cut title lettering by overstamping with an Artemio dotted circle stamp.


Many, many thanks to Claire for a great technique (and allowing me to share it today) and a special thank you to a class-mate, Karelyn, who lent me her circle-cutting system for my photo mats.  Aren't scrappers just the best, most generous people?!?!?!

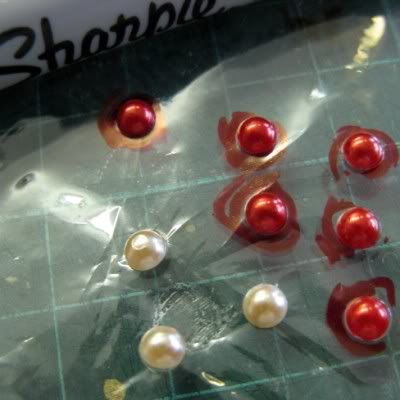
The keen eyed amongst you may notice that I have supplemented my September Counterfeit Kit supplies with red cardstock and fancy ribbon ... but those pearls were in my kit, honest!  I just attacked them with a red Sharpie pen!

Oh and I have one more stamping thing to share with you before you hop over to Margie for more stamping surprises ... a free e-zine of The Best of 2010 from Craft Stamper - a seriously lovely UK stamping magazine.  Hurry though, as you only have until October 1st to download it!

ETA: Challenge combining as ever .... this is loosely based on Kaisercraft September Sketch #3, ties in with A Trip Down Memory Lane's "D" for Daughter and fits in with Scrapbookers Anonymous' stamping challenge - how many birds have I killed with this page? :P

Friday, 23 September 2011

September Stamping

Over at the Counterfeit Kit Challenge Blog this month has been all about stamping - thanks to Sherri (a fellow Master Forger) and her Etsy Shop selling Ippity Stamps. Sherri is sponsoring this month's Blog Hops (on the 26th & 27th).  Challenge #3 was to create an embellishment with stamps.  I decided to take a plain manilla tag and see what I could do with a few scraps from my Spetember Counterfeit Kit.


I stamped a wood-grain frame directly onto the tag and added strips of patterned paper after running them through my EK Success border punch.  I then stamped the leafy circle (by Artemio) three times onto blue & white patterned paper and punched the images out with a 1" circle punch. Finally I stamped the large dotty circle (also Artemio) once onto the same patterned paper and punched four tiny circles out of it.  A little ribbon and some brown pearls and it was ready for a project.  The scraps are from the page I made here for Scrapbookers Anonymous.


I'm away on a scrapbooking retreat this weekend and I wanted a quick card to give to the organiser ... a quick trim of the ribbon, a fold of some cardstock and the addition of some stamped letter tiles and  ... hey presto! ... a card was created!  I can see me making a lot more of these tags - they are a great way to use up scraps and can fit equally well on a page or a card.

Saturday, 20 August 2011

An experiment in journalling

I love journalling on my pages - to me that's the point of scrapbooking - it's important to add the story behind a photo as well as adding the who, what, where & when.  Last year we had a lovely family break in Northumberland and visited Alnwick Gardens (the castle is famous for being Harry Potter's Hogwarts) which were spectacular!

We visited the Poison Garden - layout is in the pipeline - and loved the spectacular fountains and water sculptures everywhere, especially in the Serpent Garden.

I was experimenting with having several "stories" running across a page: labelling the photos, telling the general story of where we were, and adding some extra info about one particular photo - namely No.1 Son showing us how skinny he is by being able to fit into a gap I could barely slide sideways through! 
What do you think - do the three types of journalling work, or are they confusing?


I've used my August Counterfeit Kit, but no orange papers this time!  This page also fits in with Shimelle's recent challenge to incorporate 3 things on your page (journalling spots & large stamped butterflies, types of journalling) and also Scrapbookers Anonymous's challenges (discovered through Julie's blog) to use journalling spots and/or stash beginning with A - August's Counterfeit Kit ... or possibly American Craft cardstock as a base!