Showing posts with label Mini Books. Show all posts

Monday, 7 December 2015

December Documented with the CKCB

Over at the Counterfeit Kit Challenge Blog, the Master Forgers are sharing kits to help document December in various ways.  I showcased my kit yesterday ...

Jimjams - CKCB Document December Kit

... and today I am sharing my project ...

Jimjams - 25 Days of Christmas Lean Mean MAXI-book

It's based on my original Lean Mean Maxi-Book, but with an added half-sheet of patterned paper to extend it and allow for 25 photos or snippets of journalling.

A standard Lean Mean MAXI-book needs 2½ sheets of good quality patterned paper for the inner pages (instructions here) and one sheet of cardstock for the cover (instructions here).  My extended version needs 2½ sheets of patterned paper plus an extra ½ sheet (mine was the same pattern as one of the full sheets I'd used for the last half of the book which allowed me to make a double page spread for Christmas Day):

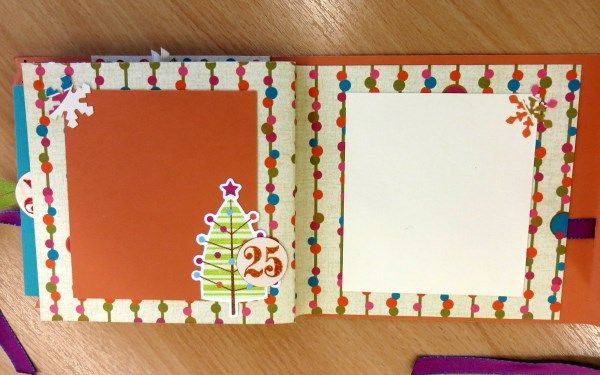
Jimjams - 25 Days of Christmas Lean Mean MAXI-book - day 25

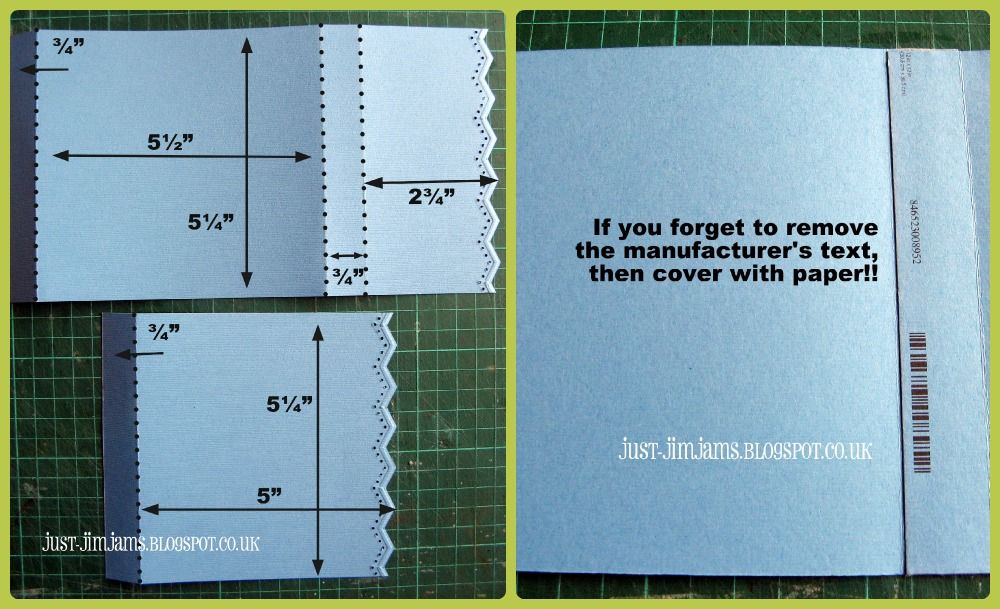
Simply make up the cover and inside pages - but don't stick them together yet!.  Measure the depth of the spine of the inner pages - mine was 3/16".  Cut a 5"x12" strip from the extra ½ sheet of patterned paper.  Score the strip 5" away from the right hand edge of the strip and make a second score line, to the left of this, that is the smae as the depth of your inner pages spine.  Trim the strip 5" beyond this second score line.  Punch a semi-circle half-way along the top edge of the left-hand 5" section.  Adhere the other three sides of the left hand 5" section to the front of your inner pages to make a pocket for a tag.  The right-hand 5" section of the extra strip of paper is now stuck down onto the centre section of the cover, over the ribbon tie (see the cover instructions).  Finish off the cover construction, decorate and you are ready to Document December!

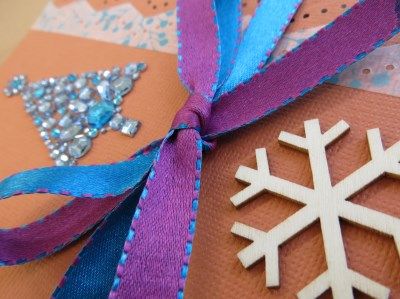
Jimjams - 25 Days of Christmas - cover detail

All of the inner pages are shown on the CKCB today.
In fact there's inspiration every day of December on the Counterfeit Kit Challenge Blog; please join us and share your creations on our Mr Linky page.

Tuesday, 24 December 2013

Festive Greetings!

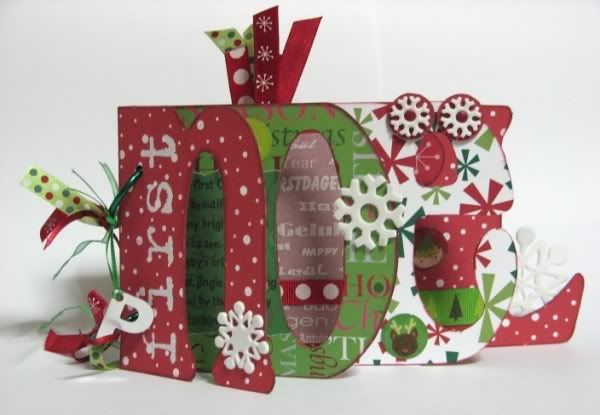
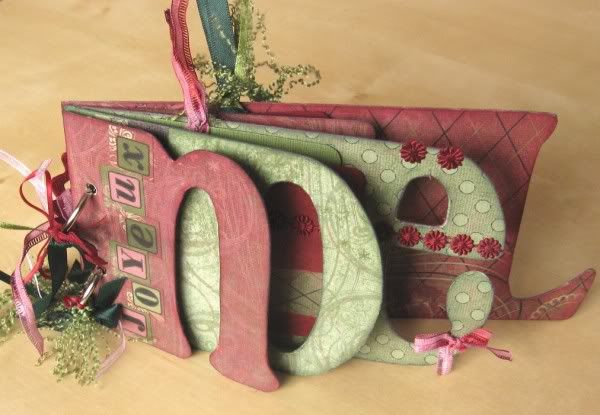
Over at the Counterfeit Kit Challenge Blog today* I've shared a couple of sketches for scrapping some of the many photos we'll be snapping this festive season.  If mini-books are more your thing then perhaps you'd like to give a home-made word book a try ...


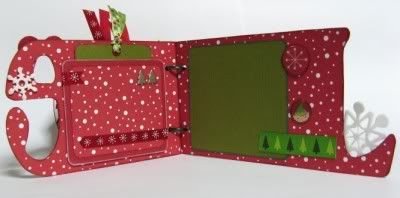
I made that one back in 2008 as a present for a friend's photos of her first grandson's first Christmas. I made another one a couple of years later to fill with quotes and festive photos as a family gift.  It had extra pages between the letters to allow for extra snapshots.


While I was making it I took step-by-step photos and put together a set of instructions - originally published in 2010 on UKScrappers, but you can download them directly here and see some more inside pages here.  The instructions are for the word "NOËL" but they are easy to adapt to "XMAS", "2013" or indeed any other word, long or short!  Let me know if you have a go!

Merry Christmas Everyone!!

* A slight scheduling faux pax on my part means that this post went live 2 days early - so that CKCB post isn't there until Christmas Eve! Sorry!

Tuesday, 24 September 2013

September's Members' Blog Hop

Welcome to the start of September's Members' Blog Hop from the Counterfeit Kit Challenge Blog.  The main challenge this month was to dust off a U.F.O. (Un-Finished Object) and get creative with it.

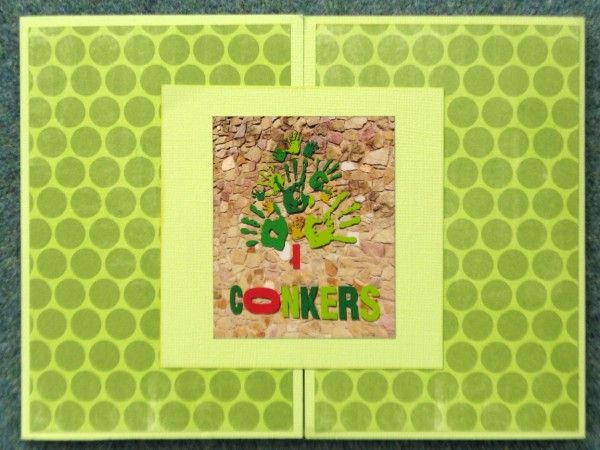
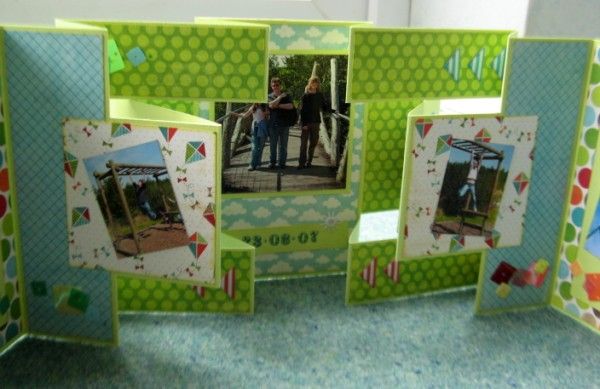
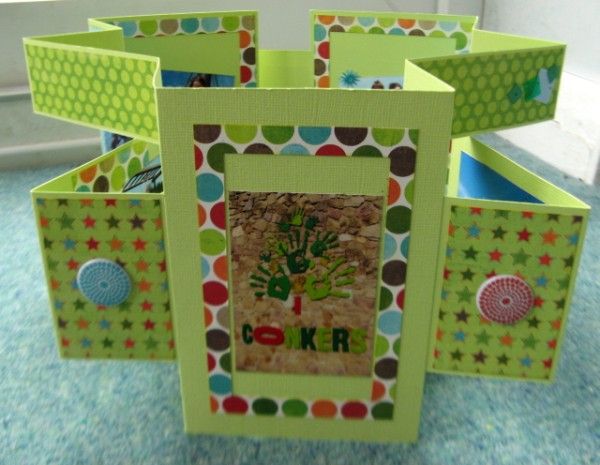
Jimjams - tri-fold mini-book - Conkers Cover

Each year I go away with UKS friends for a weekend of scrapping.  It's a no frills budget retreat with lots of scrapping room, great company and a few classes and challenges provided by some creative souls.  Last year my friend Claire showed us how to make a mini-book based on two tri-fold cards and I got as far as preparing the cardstock base.  In less than three weeks I'll be joining my friends again and I thought I had better complete my mini-book before this year's challenges are revealed!

Jimjams - tri-fold mini-book - Conkers just opened

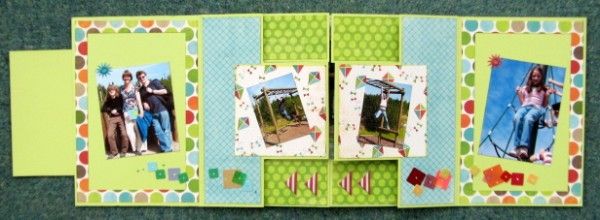
The photos are from a lovely day out at Conkers in the National Forest ... from 2007 (when No.2 Son had longer hair and shorter legs than I did).

Jimjams - tri-fold mini-book - Conkers fully opened

By pure fluke, the bright cheery colours in my September Counterfeit kit were a perfect match for the bright green cardstock that I'd folded and scored to make the mini-book pages last October.

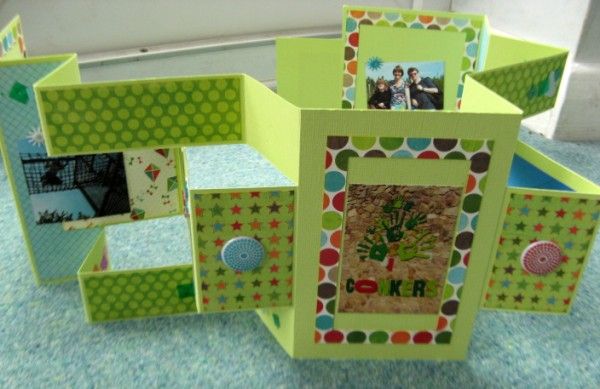
Jimjams - tri-fold mini-book - Conkers opened and upright

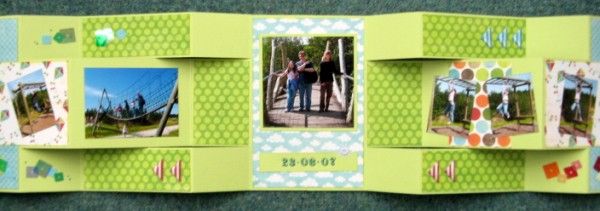
There were far too many photos for just one side of the mini-book though ... so I flipped it and covered most of the reverse as well.

Jimjams - tri-fold mini-book - Conkers rear view

The front flap closes with a mini magnet, rather than the ribbon Claire used in her instructions.  Unfortunately she doesn't have a blog, so I cannot credit her properly, but there are plenty of tutorials out there for tri-fold cards - just join two together and get folding!  Here is a link with a template for the tri-fold card if you fancy a go.

Jimjams - tri-fold mini-book - Conkers fully opened and upright

The next stop on the forgery trail is Lesley, but if you get lost along the way, the full blog hop order is published on the Counterfeit Kit Challenge Blog today.  Have fun!

Tuesday, 16 April 2013

Lean Mean MAXI-Books - The Instructions (The Cover)

Welcome back!
Yesterday I shared the instructions for making the inner pages of my Lean Mean MAXI-Book - which was quite enough photos and text for one day!  I'm rested, you're rested and so today I have the instructions for the cover.

The Cover

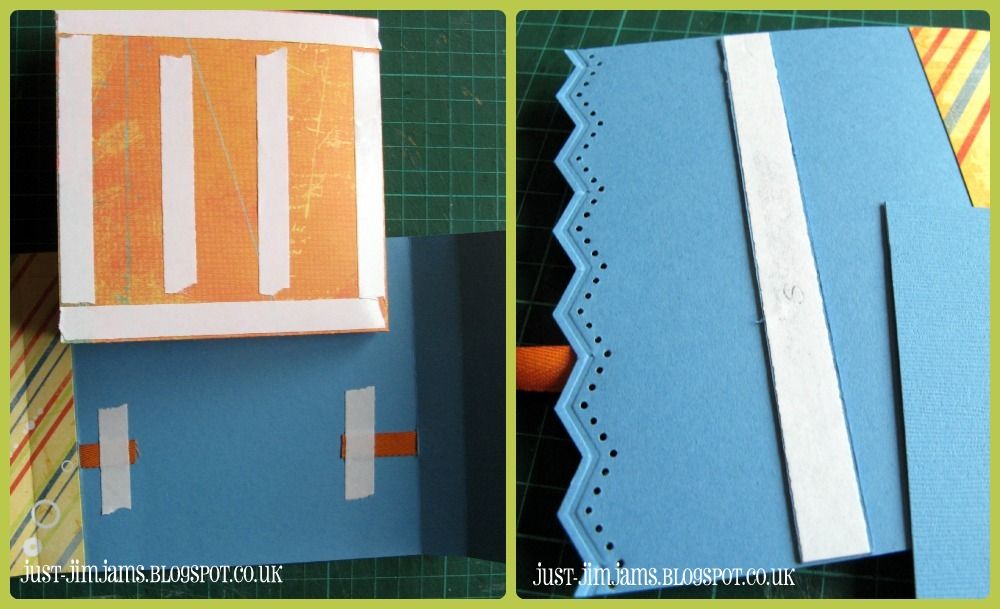
Cut two 5¼"x12" strips of cardstock.  Punch a decorative border along one short edge of each rectangle and trim the strips so that they measure 5¼"x9¾" and 5¼"x6" respectively.  Keep these trimmings for finishing the inside of the cover (see below).
Score three times across the width of the longer strip (¾", 6¼" and 7") and once across the width of the shorter strip (¾").  Crease all score lines as shown in the photo. 

Jimjams - Lean Mean MAXI-Book Cover Instructions

Apply adhesive to the inner side of the ¾" flap on shorter piece (the front cover) and join it to the outer side of the ¾" flap on larger piece (the back cover and closing flap) to form a 5¼"x14½" cover.

Make two slits for the ribbon closure about 2" up from the bottom edge on either side of the central section.  Slot your ribbon pieces into place and secure with tape.  You need 9-12" for the left-hand piece and 6-9" for the right-hand piece (if you have 20-26" you don't have to cut it in two).  The shorter measurements are enough to tie a knot, the longer ones are enough for a bow.

Jimjams - Lean Mean MAXI-Book Cover Instructions

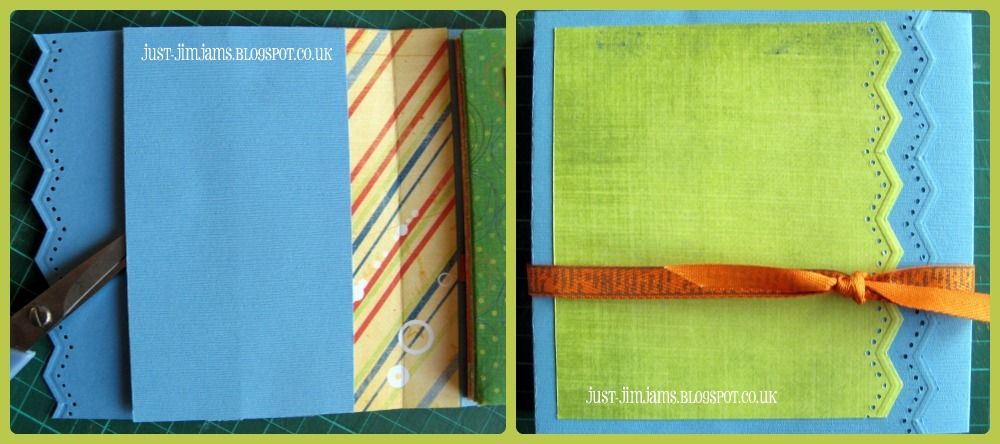
Apply adhesive to the back of the inner pages and secure in place on the left of the central section of the cover, leaving room for tag-pulls on the right hand side.  (Be careful to ensure the pages are the correct way up before you stick them down)

In order to stop the ribbon tie from squashing the inner pages I added a cardstock "stop" inside the front cover.  It's two thin strips from the 5¼" offcuts, layered on top of each other 2¾" in from the punched edge of the front flap (see photo above).

Jimjams - Lean Mean MAXI-Book Cover Instructions

Cover with a 3"x5¼" rectangle of cardstock to form a slot (as shown above).  When closing the cover, slip the right-hand flap inside the slot and the cover will remain in shape once the ribbon is tied.

Jimjams - Lean Mean MAXI-Book Cover Instructions

Add 4"x4" cardstock photo mats, photos, tag-ties, embellishments and journalling and you're done!  I'm still working on mine, so here's a view inside one I completed earlier!

Jimjams - Lean Mean MAXI-Book - inside view

Thanks for sticking with me ... do please let me know if you have a go at my Lean Mean MAXI-Book (or even my original Lean Mean Mini-Book) as I'd love to see your version!

Monday, 15 April 2013

Lean Mean MAXI-Books - The Instructions (The Inner Pages)

Welcome!
If you are hopping along with UKScrappers you should have reached me from Ifa, but the hop started here if you have no idea what I'm talking about (there are prizes available for commenting along the way by midnight BST tonight)!

Last year I decided to make a MAXI version of my Lean Mean Mini-Book with the Mystery Kit from UKScrappers Now We Are Ten Cybercrop.

Jimjams - Lean Mean MAXI-Book collage

Using just 2½ sheets of decent quality double-side paper and 3 sheets of cardstock, it's an eleven page, 5" square mini-book with room for 21 3"x4" photos!  I blogged the pages of the book here and today I am sharing the instructions for the inner pages.  It's a photo heavy post, but hopefully all will be clearer that way!

The Inner Pages

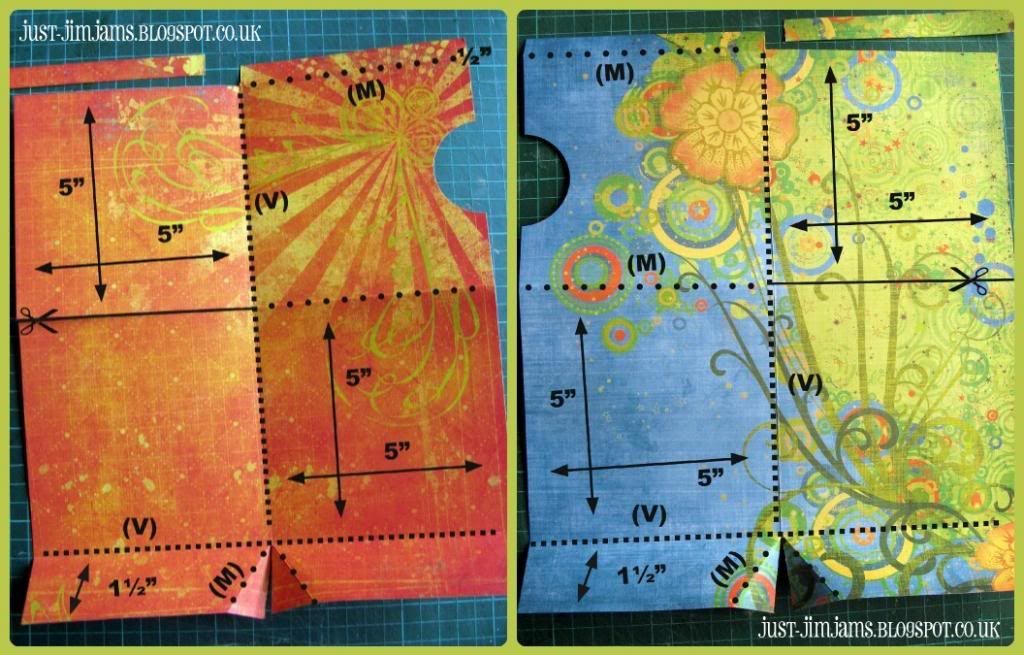
Jimjams - Lean Mean MAXI-Book - Inner Page Instructions

Trim 2" from one edge of two of the patterned papers and cut the remaining sheet into a 6"x12" rectangle (I used Fancy Pants About A Boy Peace, Vivid and Wild Child).

Score the two sheets of 10"x12" paper along the long centre line (5") and score three times across the width  (½", 5½" and 10½"). These two sheets form the front and rear sections of the mini-book and are cut as mirror images of each other.

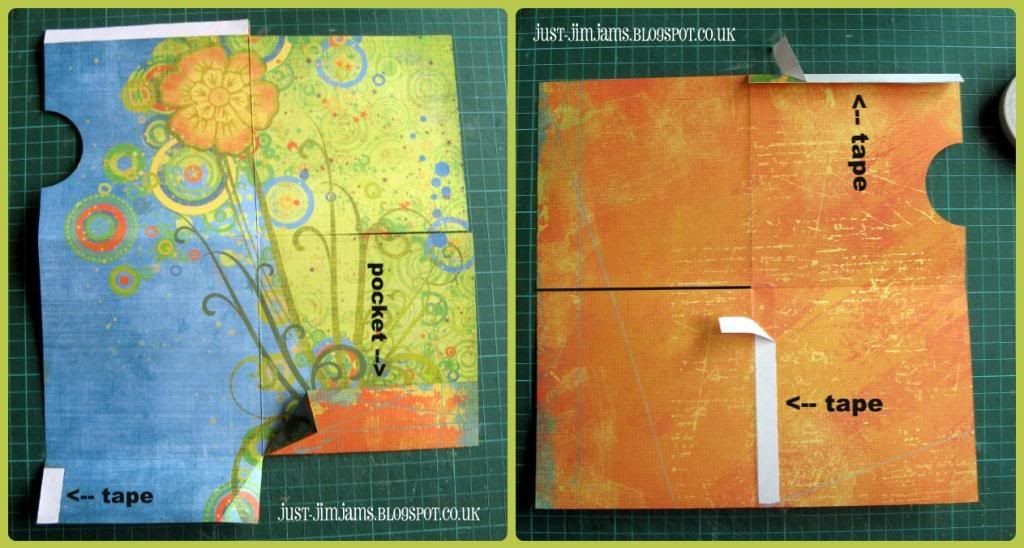
Jimjams - Lean Mean MAXI-Book - Inner Page Instructions

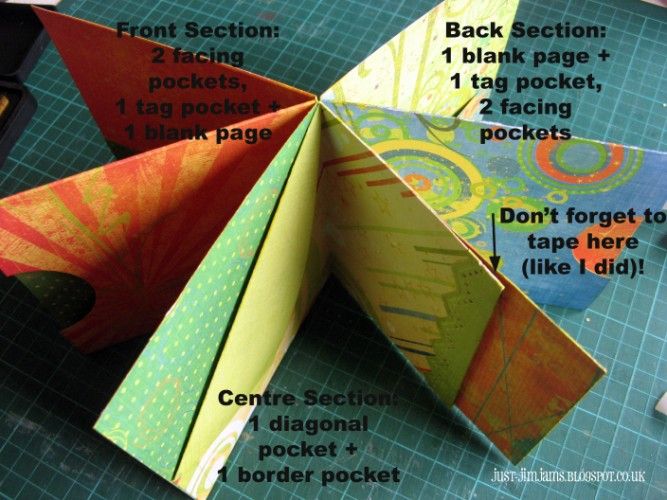
Remove a ½"x5" rectangle from one end of each sheet by cutting along the first width-ways score line to the central score line.  Cut a semi-circle from the edge which is still intact to provide a pull-out space for a tag.  Cut 5" along the middle width-ways score line on the opposite side to the semi-circle.  Cut 1½" along the central score line to the third score line and fold back the corners as shown in the photo.  Crease all score lines as shown in the photo.

Jimjams - Lean Mean MAXI-Book - Inner Page Instructions
Apply adhesive (I've used double-sided tape) along the small flap at the top of the sheet.  Apply adhesive to the outer edges of the bottom flaps and fold upwards to create pockets.  Turn the sheet over and apply tape to the same side of the central score line as the top flap & punched semi-circle.  Fold the sheet in half (from top to bottom) to form a concealed pocket with a semi-circular cut-out.

Jimjams - Lean Mean MAXI-Book - Inner Page Instructions

This completes one set of pages for the mini-book (the back pages of mine): containing a plain page, a pocket page with semi-circular cut-out and a double page with facing pockets.
Repeat with the other scored & cut sheet (remembering that you are working on the mirror image) to form another set of pages: a double page with facing pockets, a pocket page with a semi-circular cut-out and a plain page.
Each of the six pockets have room for tags measuring 4"x4½".

The half sheet of patterned paper is used to join these sets of pages together.
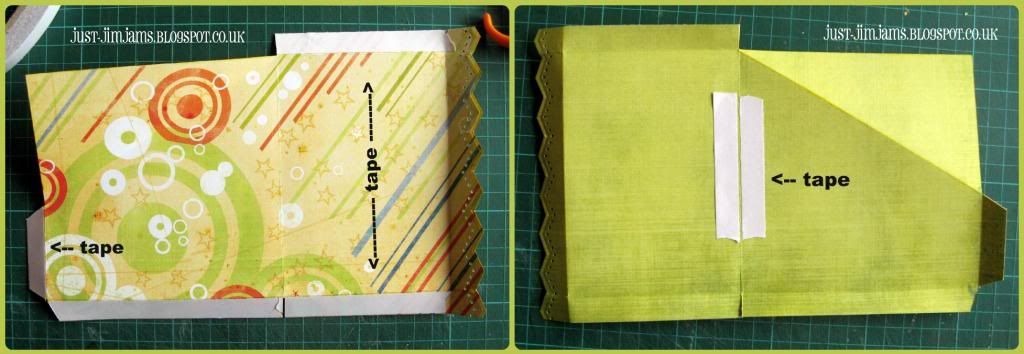
Punch a decorative border along one short edge.  Trim the sheet so that it measures 6"x9¾".  Score along both long edges of the sheet (½").  Score three times across the short width (½", 5½" and 9").

Jimjams - Lean Mean MAXI-Book - Inner Page Instructions

Trim away excess paper as shown on the photo.  Cut in ½" from the bottom edge along the "central" (valley!) score line. Score a diagonal line across from the top centre to a point 3" down the un-punched edge.  Crease all score lines as shown in the photo.

Jimjams - Lean Mean MAXI-Book - Inner Page Instructions
Apply adhesive to the ½" flaps as shown in the photo.  Turn the sheet over and apply some adhesive either side of the central fold line to seal the rear of the pockets which will be formed in the next step.

Jimjams - Lean Mean MAXI-Book - Inner Page Instructions

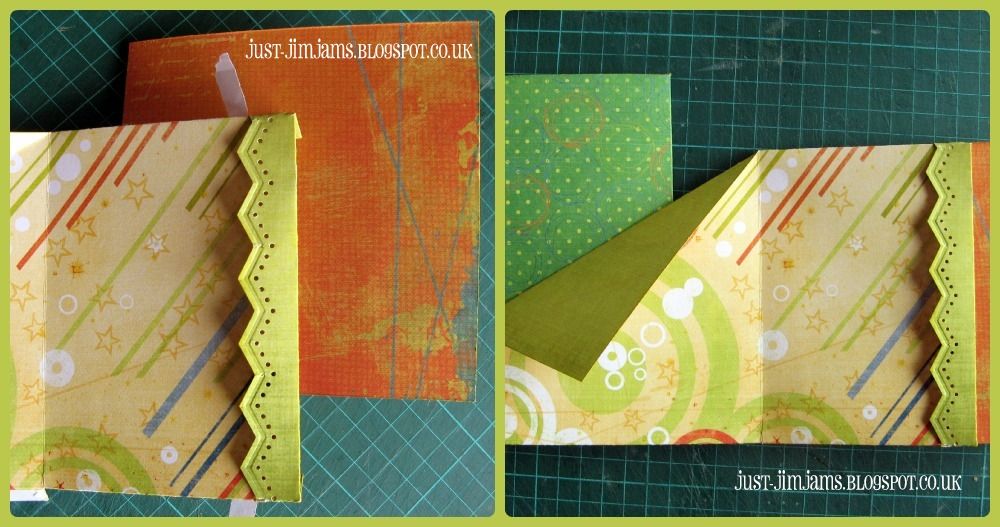
Fold back the punched border and adhere the right hand section to the back of the plain page of the rear set of pages.  NB: You will need a little extra adhesive on the flaps where the border folds back (see photo below)!
Adhere the left-hand section to the back of the plain page of the front set of pages.
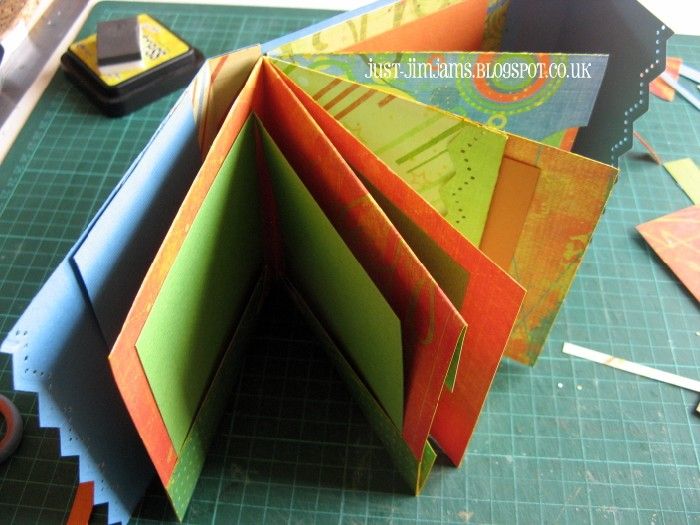
The two central pockets have room for tags measuring 4"x4".  The inner pages are now complete:

Jimjams - Lean Mean MAXI-Book - Inner Page Instructions

Phew!  Well done for sticking with me this far!  Tomorrow I'll share the instructions for the cover.
ETA - the cover post is here!

In the meantime, please hop on over to Kathy to see what she has to share with you today (but remember to leave a comment, including your UKS name, before midnight tonight in order to be eligible for a prize from UKScrappers).
Friday, 22 March 2013

Take My Advice ...

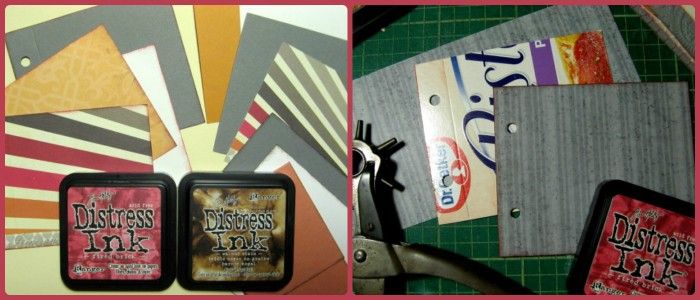
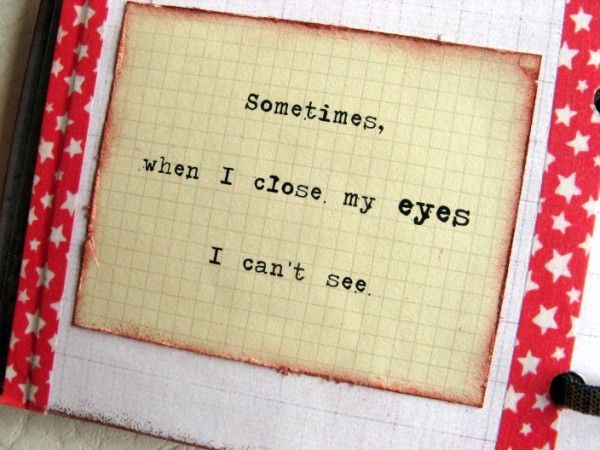
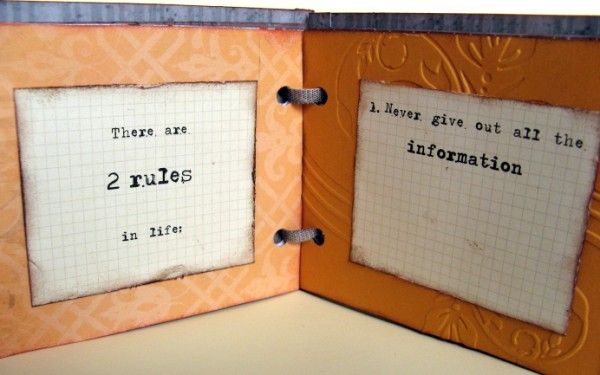
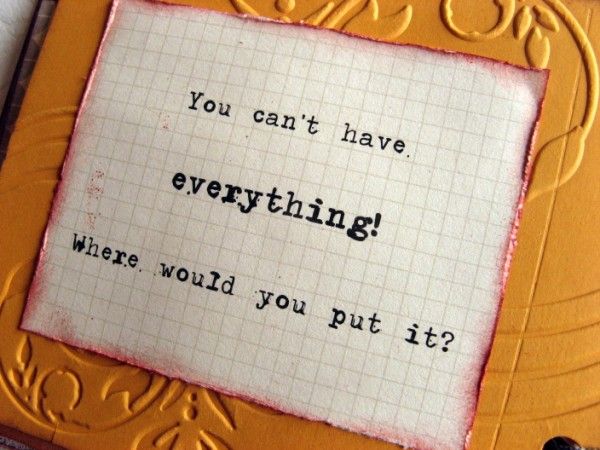
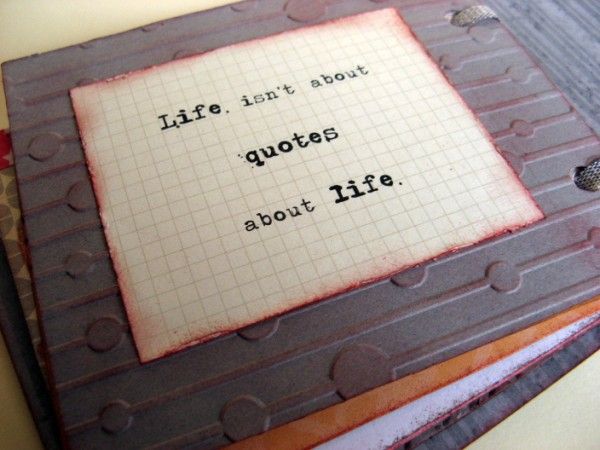
My recent Bloggers Retreat was a chance to meet up with several blogging friends and exchange ideas, learn new techniques, share supplies as well as eat a lot of cake.  One blogger generously shared out piles of blank mini-book pages as long as we promised to decorate them using two colours of Distress Ink and share the results on-line.  I didn't have time to start during the weekend so I took my blank pages and cardboard covers home and got to work with two of my four shades of Distress Ink ...

Jimjams - Quotes Mini-book - Supplies

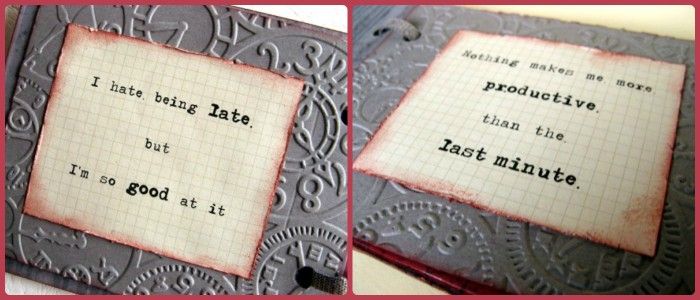
... along with some rather tongue in cheek quotes and printed in Type-Ra onto some pages from an old stamp album:

Jimjams - Quotes Mini-book - embossed background pages

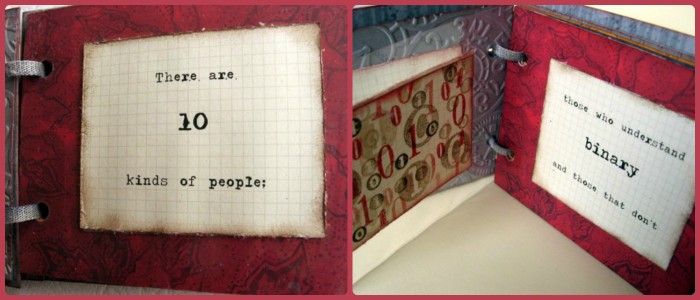
I incorporated a clear page to include a joke that makes me laugh every time:

Jimjams - Quotes Mini-book - There are 10 Kinds of People

The pages weren't all exactly the same size so some needed some washi-tape to cover up the joins ...

Jimjams - Quotes Mini-book - Quote#4

... while others were fine as they were:

Jimjams - Quotes Mini-book - Smaller sized pages

I loved the mix of colours tied together by the repeated font on scissor-distressed and inked stamp album paper:

Jimjams - Quote Mini-book - Quote#7

Jimjams - Quotes Mini-book - There are 2 rules in life ...

My embossing folders were a quick and easy way to perk up some plain cardstock too.

Jimjams - Quotes Mini-book - Embossed cardstock

Sometimes I could use both sides of the patterned paper for a quote ...

Jimjams - Quotes Mini-book - Double sided papers

... and sometimes I simply stuck a single-sided piece to another sheet:

Jimjams - Quotes Mini-book - Take My Advice ...

Do any of these quotes speak to you? If you do want to take my advice then I'd suggest that:

Jimjams - Quotes Mini-book - Final page

Friday, 26 October 2012

Lean Mean MAXI-book

Over on UKScrappers it's Cybercrop time.  Things have been building up during the last month ... with pre-cop activities and challenges ... but today was the start of the CC proper.  There's lots of free inspiration over there - and prizes too!

So far I've only managed to join in with one pre-crop activity: the Mystery Kit Challenge, where you buy a kit of unknown content and make something or some things with it - BUT you aren't allowed to add anything to the kit except a few limited extras e.g.black/white paint, black/white thread, black/white ink, adhesive ...

I forgot to take a photo before I got cutting - but the kit was based around a Stamping Up Tickets & Tags Kit similar to this digi download on the SU site.  I decided to see if I could expand upon my Lean Mean Mini-Book and make a larger album from the good quality double-sided patterned papers.

Collage - 3 views of Lean Mean MAXI-book - Jimjams

After much experimentation with 12x12 page protector inserts, I worked out what I could do with 2½ sheets of double-side paper and 3 sheets of cardstock ... and made an eleven page book with 5" square pages and enough tags and pockets to hold 21 3"x4" photos!

Collage - pp1,2,3 Lean Mean MAXI-book - Jimjams

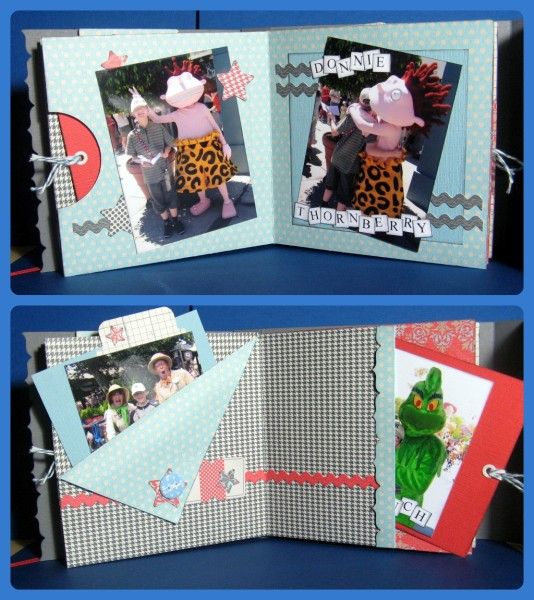
The photos are from our 2004 trip to Florida and feature No.2 Son, aged 12, "meeting" the various cast members. At 14 No.1 Son felt he was too old to do this and Child No.3 was only interested in the classic princesses and cute furry creatures.

Collage - pp4-7 of Lean Mean MAXI-book - Jimjams

Not all the photos had colours that "went" with the papers e.g. The Grinch was much too green, so they were relegated to the pockets.

Collage - pp8-11 of Lean Mean MAXI-book - Jimjams

I had originally intended to scrap the majority of these photos on a double page in with the rest of our Florida trip ... but this way No.2 Son has his own little mini- MAXI-book.

P.S. If anyone knows the identity of the characters in this photo - please let me know - they offered to pose with our son in the Magic Kingdom's Adventureland near the Swiss Family Robinson Tree House and we felt rude asking who they were :o)  I'm hoping that they were cast members and not just a couple of weirdos in fancy dress!!!

Photo - mystery cast members at Magic Kingdom 2004

ETA: They're not the Wild Thornberrys as they are Nickelodeon not Disney - nice try though Missus W :o)

ETA: My instructionsfor the Lean Mean MAXI-book are now available here and here - enjoy!

Thursday, 24 November 2011

Teeny Tiny Envelope Mini

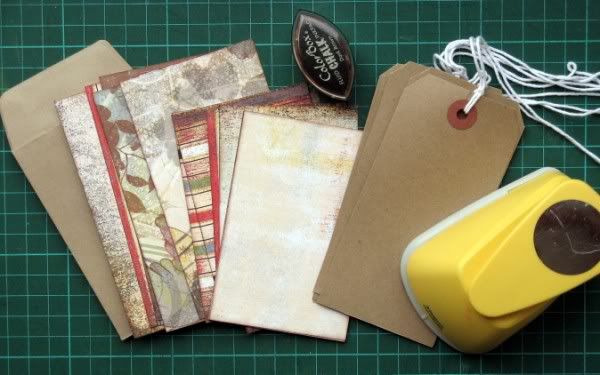
As promised here is are the instructions to my Teeny Tiny Envelope Mini ... a project I made for the Green Buttons Retreat back in September.  It's cheap as chips to make using money envelopes, scraps of paper and card, but showcasing dozens of small photos or quotes.

Get Set
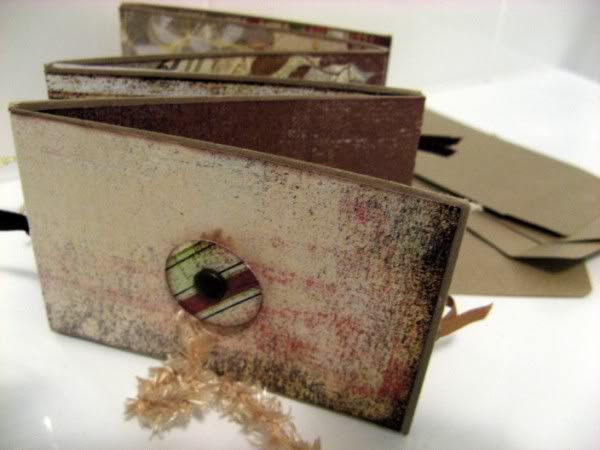
Prototype #1 with no cover
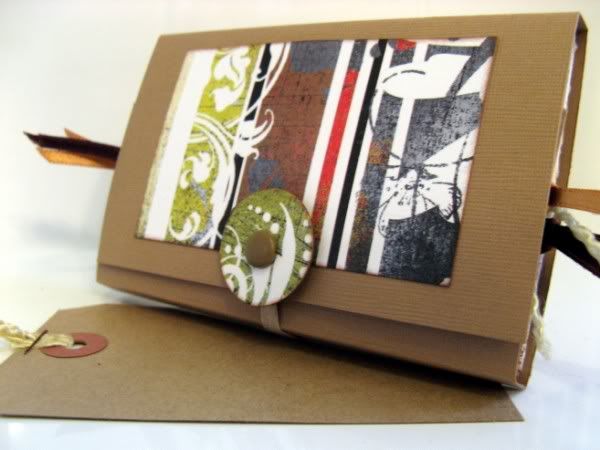
Prototype #2 with a protective cover
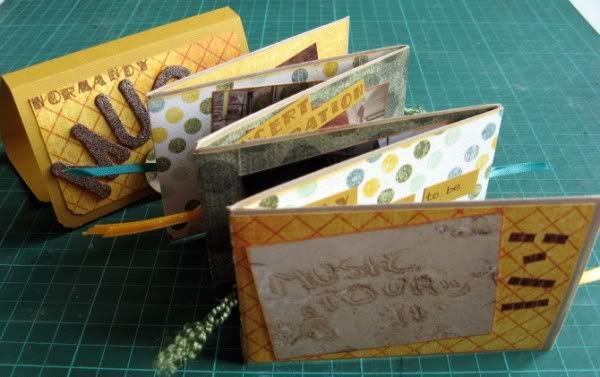
Musical Mini Book - more photos here
The instructions can be viewed, printed and downloaded from here.  Have fun with it and please link back to this post so that I can see what you've created!

Thursday, 17 November 2011

Musical Mini-Book

A little while ago I attended a scrapbooking retreat with my UKS house-mates (the Green Buttons) down near Birmingham and had a fabulous time.  There was plenty of chocolate, chat and creativity as well as a few challenges and some classes.  I prepared a class too, which I called my "Teeny Tiny Envelope Album".  It was made from those tiny kraft money envelopes you can buy for wage slips or lunch money or whatever, but can just as easily be made with larger envelopes too!


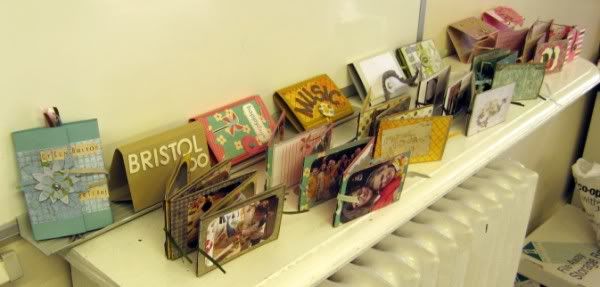
Here are some of the albums completed that weekend - each made unique thanks to different patterned papers, photos, ribbons and embellishments.  I made one that weekend too ... using my September Counterfeit Kit ... to record No.3 Child's school music trip to Normandy this summer.


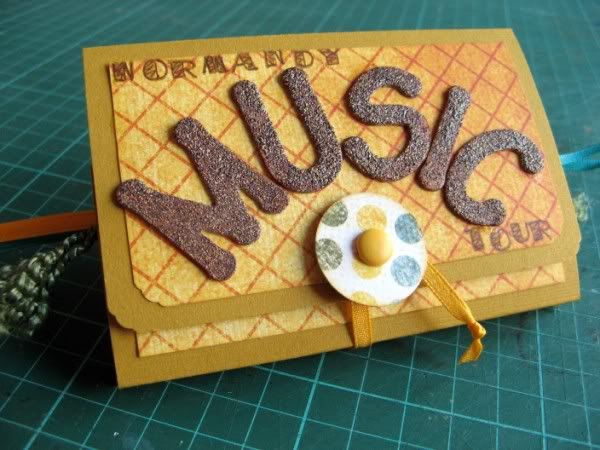
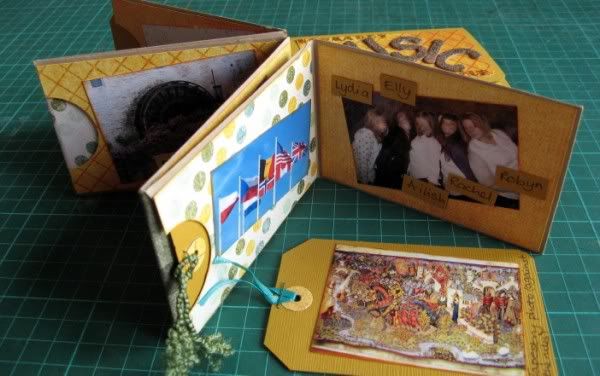
The letters on the front cover have been heat embossed with PSE's "Woven Tapestry" - a lovely textural finish.  Inside the cover there is a concertina of six money envelopes, each containing a tag.


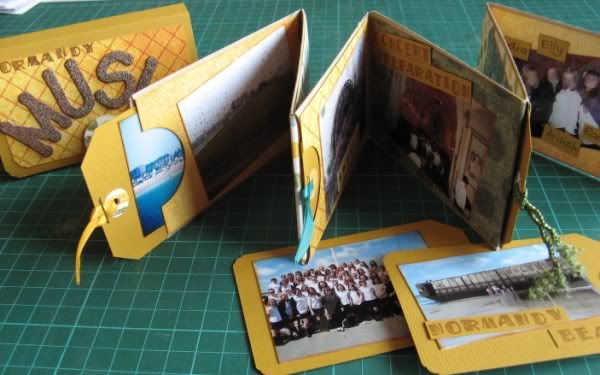
The way that it's folded you can "read" it like a book and then turn it around to "read" the other side.


There's plenty of room for lots of small photos and even more space for journalling or extra photos on the tags!  Just as well because her camera had about 100 photos from the 4 days!  I managed to include 19 in her mini-book.


This would also make a handy little "brag" book for inside a handbag - it measures around 4½" x 3" and the photos are all nicely protected by the cover.
And I'm still playing along with ATDML's Thirsty Thursdays - so this will be for I for Interactive (and inked?).  I'll be back this weekend with K for Kit, Kraft & Kaisercraft as I'm just about ready to share my JYC prep!

ETA: Instructions can be found here!