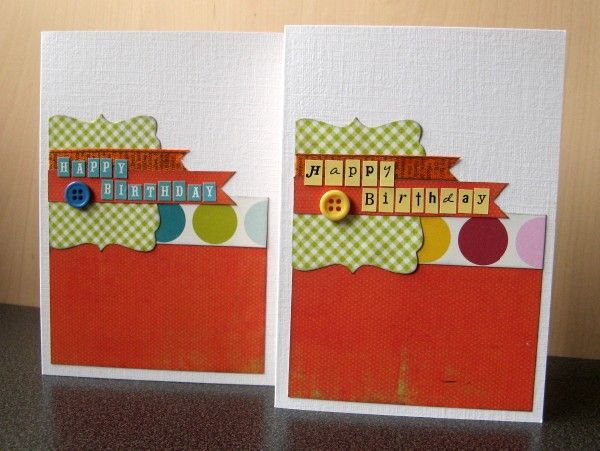
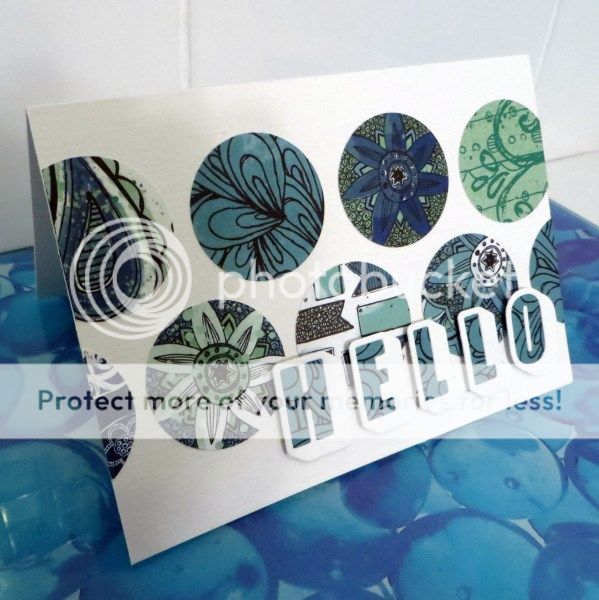
Welcome to the final post of the January CKCB Members' Blog Hop; if you didn't reach me from Cindy then you might want to start at the beginning with Lisa (the full hop list is here). We had a choice of three challenges to use for the hop (#1 Doors , #2 Zentangles, #3 Perfect Day) or indeed, anything made from this month's kit. I started a new job this month, so scrapping time has been short and I have several unfinished pages ... but I did have time to complete a card from the scraps:
That's it for the CKCB Members' Hop - I hope you had fun!
Showing posts with label Cards. Show all posts
Showing posts with label Cards. Show all posts
Tuesday, 24 January 2017
Sunday, 24 January 2016
Hello, How Are You?
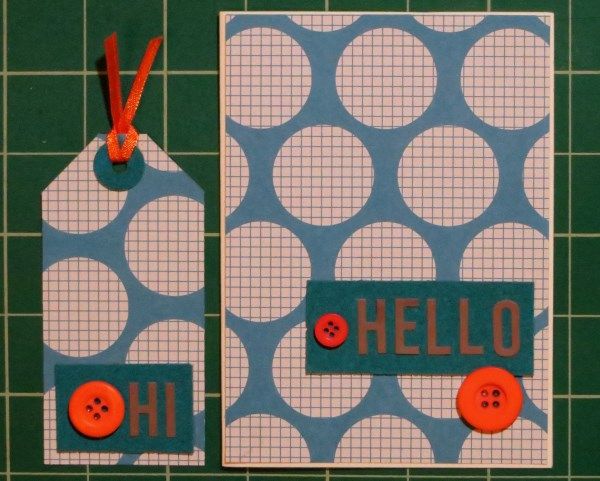
Welcome to the first Members' Blog Hop of 2016 from the Counterfeit Kit Challenge Blog; Although we can choose ANYTHING that we've made with this month's November's kit, I'm starting you off with my go at Challenge #2 - a matching card and tag:
Sometimes it's good to give a little something to a friend ... just because ... and these two will do very for that don't you think?
Next stop on the Members' Hop is the lovely Cindy and you can find the full list of participants Counterfeit Kit Challenge Blog today (where there is also a poll to see what you think of the Members' Hop in general - do let us know what you think)
Wednesday, 17 December 2014
Two In two days?!
Hi again ... my second post on Sympathy cards is up on the Counterfeit Kit Challenge Blog today along with a couple more cards and lots of internet inspiration. Please check it out.
Tuesday, 16 December 2014
I am still here!
Whoops - hello poor neglected blog! Hopefully I'll have a bit more time for you in the new year ... I miss you!
In the meantime the Counterfeit Kit Challenge Blog is having a month of card inspiration ... and it's my turn today (and tomorrow) with Sympathy Cards - please pop over and see what the Master Forgers have been creating for everyone.
In the meantime the Counterfeit Kit Challenge Blog is having a month of card inspiration ... and it's my turn today (and tomorrow) with Sympathy Cards - please pop over and see what the Master Forgers have been creating for everyone.
Sunday, 24 August 2014
40 Love
Welcome to the start of August's Members' Blog Hop from the Counterfeit Kit Challenge Blog. I chose the first challenge: to keep to just one layer for my project, adding only embellishments.
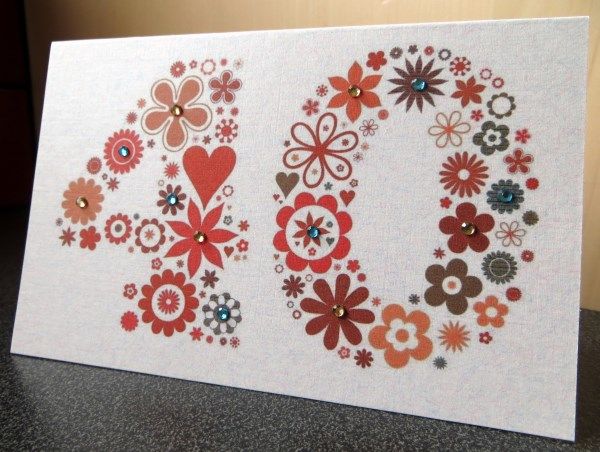
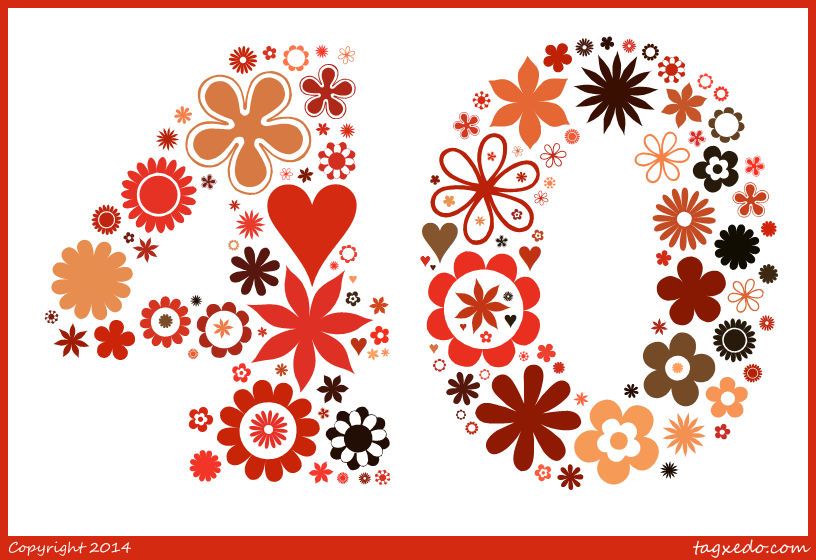
A friend turned 40 recently and I decided to send her a card made using Tagxedo:
Just one layer of printer ink ... glammed up with a few small crystals so that it can still be posted as a normal letter (the Royal Mail is annoyingly picky about all three dimensions).
I wonder which of this month's challenges will feature on the next stop on the hop: Tina's blog.
If you get lost whilst hopping the full order is published on the Counterfeit Kit Challenge Blog today.
Saturday, 9 August 2014
Tagxedo Theme Tones
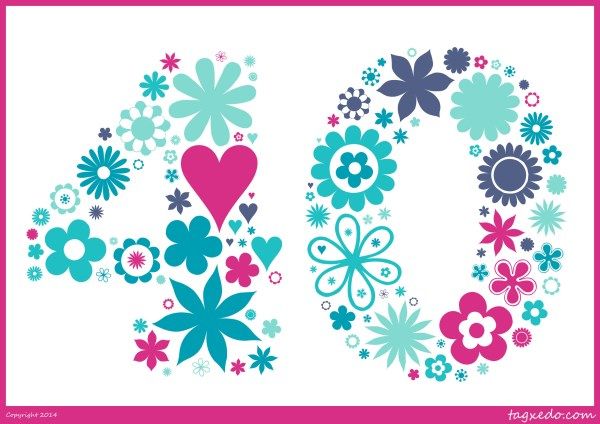
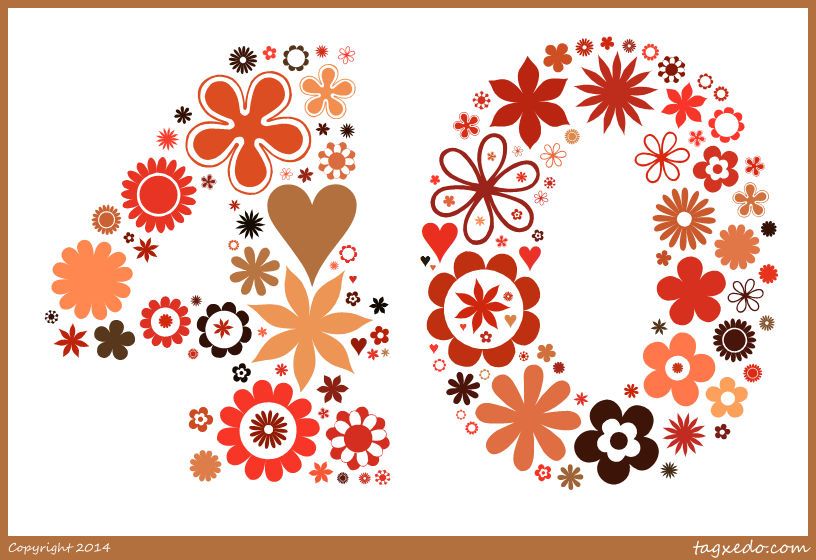
A reader recently contacted me to ask if I had some pointers for personalising a Tagxedo colour theme. To get the techniques straight in my head I decided to make a flowery 40 for a friend's birthday card following my own Tagxedo tutorial on using flowery fonts:
To save you clicking back to 2012, here are the steps for making the card design before I address the colours:
Download Sarus's Flower Ding Font to the computer, then click on Font ► and use Add Fonts ... to load it onto Tagxedo. The flowers will appear (in red) on the list of fonts. Click on it to select it.
Click on Shape ► and use Add Words ... to create a "40" in ChunkFive (a nice chunky font to fill with flowers) and click Accept.
Choose Orientation ► Any so that the flowers can be at any angle and then lock the three padlocks.
Load a variety of letters, corresponding to pretty flowers, as the text and click Submit:
Worryingly at this point, the image disappears!!! A few settings need tweaking to get it back:
Select these Word Options, press Accept when done:
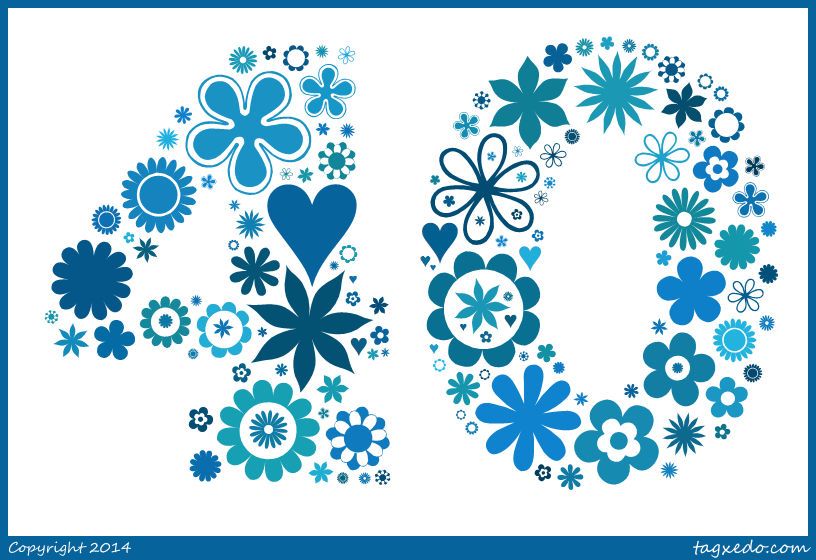
To choose another of Tagxedo's colour themes simply click on Theme ► and choose a different one e.g. "Elephant In The Room"
Re-spinning Colour will change the colours of the individual flowers, keeping within the current theme:
It's worth re-spinning Colour (and possibly Layout) several times before choosing the one you like best from the History ...
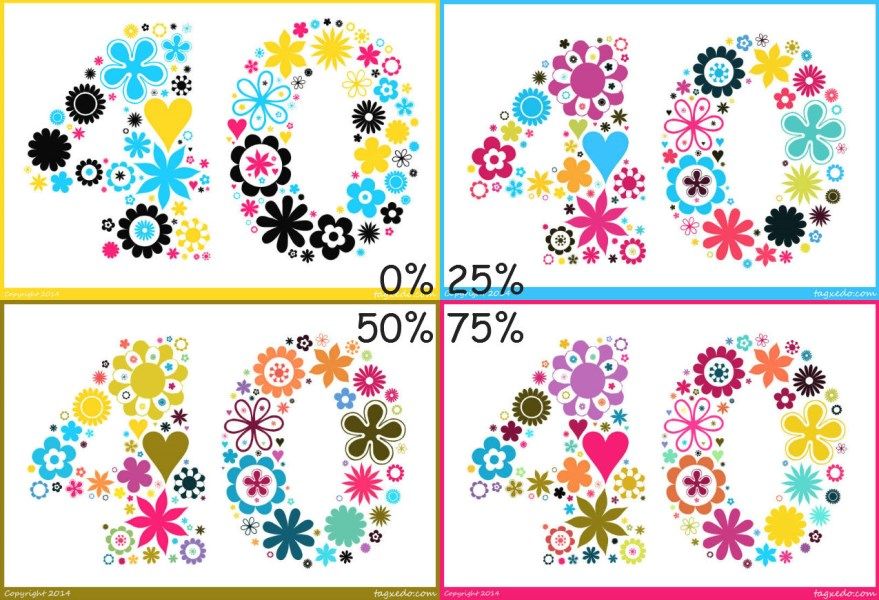
Tagxedo allows some variation from the colours shown in each theme (normally 50%) but you can change this to 0% to use ONLY the specified colours ("Fallen In Love" has just 4 shades: black, turquoise, hot pink and yellow) or increase it to 100% for maximum colour variation within the theme:
Finally, if none of Tagxedo's colour themes float your boat, you can create your own:
Click on Theme ► and use Add Themes ... to see a sample colour theme called "Blue Meets Orange" with six strings of numbers and letters afterwards (000000 007080 4080a0 f0f0f0 d0a030 c06010). These are the RRGGBB (red, green, blue) codes for various colours where 000000 is black and FFFFFF is white.
You can change the name*¹ to something sensible e.g. "Mauritius Flag" and then replace the RGB codes with the RGB codes for the colours*² you prefer e.g. ff0000 000066 009900 ffcc00 before clicking Submit.
Your new colour scheme will appear below as blocks of colour with a border representing the background. Auto chooses one of the colours as a background, but you can change the background colour e.g. click Bright for the brightest of your colours, click First for the first colour in the list or even select Black or White. Edit the RGB strings to change/add/delete colours and click Submit to make new themes. When you find one you like click the Add to the left of it and X to get rid of the Add Themes ... box. Now you can select your newly named theme (with or without colour variation):
My thanks to Lynn for her query. I hope this helps a little. Have fun!
*¹ Unfortunately when you have finished
with Tagxedo for the day it doesn't save anything ... neither your
shape, your extra fonts, your settings nor your colour themes will be there
next time you play ... so don't stress about what you call your scheme!
*² Try Colour Picker, Design Seeds (hold your mouse over the side colours to see the codes), or Colour Palette Generator to choose colours and find out the required RGB codes.
To save you clicking back to 2012, here are the steps for making the card design before I address the colours:
Download Sarus's Flower Ding Font to the computer, then click on Font ► and use Add Fonts ... to load it onto Tagxedo. The flowers will appear (in red) on the list of fonts. Click on it to select it.
Click on Shape ► and use Add Words ... to create a "40" in ChunkFive (a nice chunky font to fill with flowers) and click Accept.
Choose Orientation ► Any so that the flowers can be at any angle and then lock the three padlocks.
Load a variety of letters, corresponding to pretty flowers, as the text and click Submit:
♥:50:@0The 50 forces the ♥ to be the most frequent character and the @0 forces it to be horizontal.
A A A B B B B B B B B B B C C C C D D D D D
G G G G G G G G H H H H H H H H H I I I I I I I I L L L L L L L L
M M M M M O O O O O O O O O V V V V V V V V V V V V V W W W W W W
X X X X X X X X o o o o o o o p p p p p x x x x x x x x x y y y y y y
Worryingly at this point, the image disappears!!! A few settings need tweaking to get it back:
Select these Word Options, press Accept when done:
Punctuations = Yes (this allows the ♥ to show)Select these Layout Options, press Accept when done:
Remove Common Words = No (this allows the individuallettersflowers to show)
Max Word Count = 150 (stops the flowers getting too small - but make sure that the shape is still filled)This produced a chunky 40 filled with flowers in the default colour theme "Quiet Morning".
Tightness = 150% (fills the shape as much as possible, but slows Tagxedo down)
Normalize Frequency = Yes
Hard Boundary = Yes (makes the shape seem more defined)
Allow Replication = Yes (so that there are enoughwordsflowers to fill the shape)
Font Preference = Any 1 (only the red flowers should be selected in Font ►)
To choose another of Tagxedo's colour themes simply click on Theme ► and choose a different one e.g. "Elephant In The Room"
Re-spinning Colour will change the colours of the individual flowers, keeping within the current theme:
It's worth re-spinning Colour (and possibly Layout) several times before choosing the one you like best from the History ...
Tagxedo allows some variation from the colours shown in each theme (normally 50%) but you can change this to 0% to use ONLY the specified colours ("Fallen In Love" has just 4 shades: black, turquoise, hot pink and yellow) or increase it to 100% for maximum colour variation within the theme:
Finally, if none of Tagxedo's colour themes float your boat, you can create your own:
Click on Theme ► and use Add Themes ... to see a sample colour theme called "Blue Meets Orange" with six strings of numbers and letters afterwards (000000 007080 4080a0 f0f0f0 d0a030 c06010). These are the RRGGBB (red, green, blue) codes for various colours where 000000 is black and FFFFFF is white.
You can change the name*¹ to something sensible e.g. "Mauritius Flag" and then replace the RGB codes with the RGB codes for the colours*² you prefer e.g. ff0000 000066 009900 ffcc00 before clicking Submit.
Your new colour scheme will appear below as blocks of colour with a border representing the background. Auto chooses one of the colours as a background, but you can change the background colour e.g. click Bright for the brightest of your colours, click First for the first colour in the list or even select Black or White. Edit the RGB strings to change/add/delete colours and click Submit to make new themes. When you find one you like click the Add to the left of it and X to get rid of the Add Themes ... box. Now you can select your newly named theme (with or without colour variation):
My thanks to Lynn for her query. I hope this helps a little. Have fun!
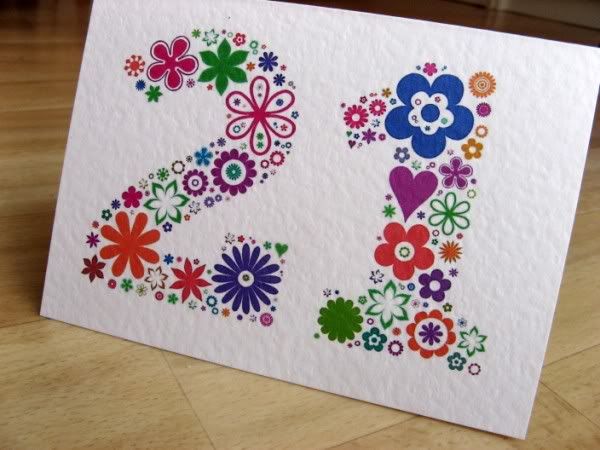 |
| I can't show the 40th card yet, but here's one I made earlier (using "Happy Brights") |
*² Try Colour Picker, Design Seeds (hold your mouse over the side colours to see the codes), or Colour Palette Generator to choose colours and find out the required RGB codes.
Labels:
Cards,
Instructions,
Tagxedo
Sunday, 15 June 2014
Refreshing Cards
Happy Fathers' Day / Happy Father's Day
I'm never quite sure where to put that apostrophe ... most of us only have one father to make a card for (though I used to have two thanks to my lovely step-father) so it could be the apostrophe-S, but then there are
Not my problem though, as I have nobody left to make a card for.
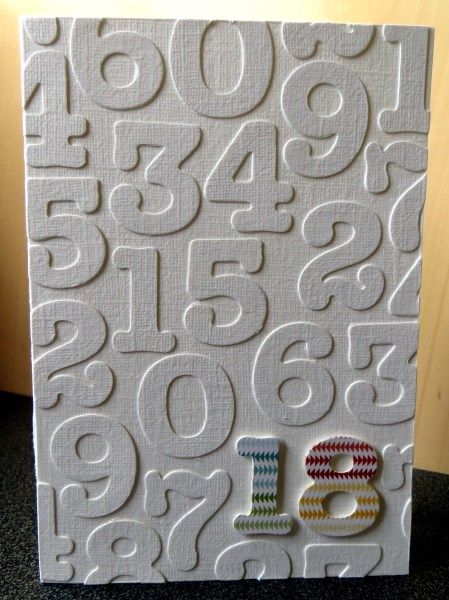
Instead I have been having a playing with my June Counterfeit Kit using the 1st challenge over at the CKCB: using tone on tone as a background. It's not a new technique for me to layer my cardstock with letters cut from self-coloured scraps; I love the subtlety it gives to (sub-)titles here. Today, however, I've used it to create the background for an 18th birthday card:
 |
| Sizzlits Round-a-Bout numbers |
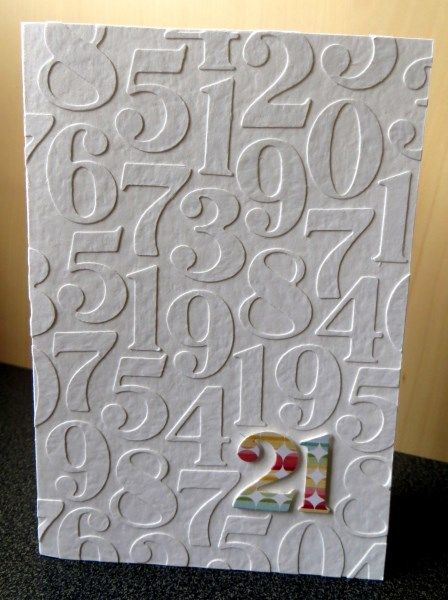 |
| Sizzlites Broadway Melody numbers |
I wondered what it would be like to use the letters with a Queen & Co washi tape covered word:
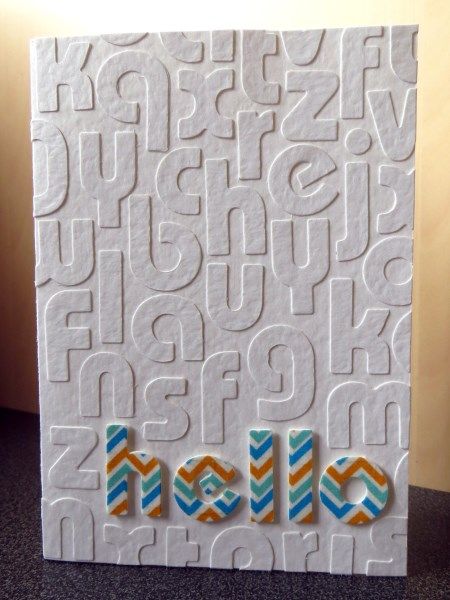 |
| Sizzlits Boys Will Be Boys letters |
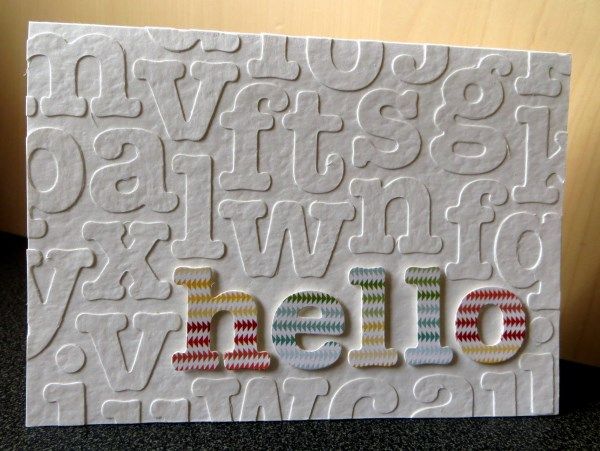 |
| Sizzlits Round-a-Bout letters |
I'm also joining in with Jennifer's Refresh Your Craft Event challenges - keeping things clean and simple and using teal orange & white.
Thursday, 12 June 2014
Sketchy Card
There's a sketch today as the second challenge over at the Counterfeit Kit Challenge Blog and it came in time for me to make something for my fellow Master Forger Lesley:
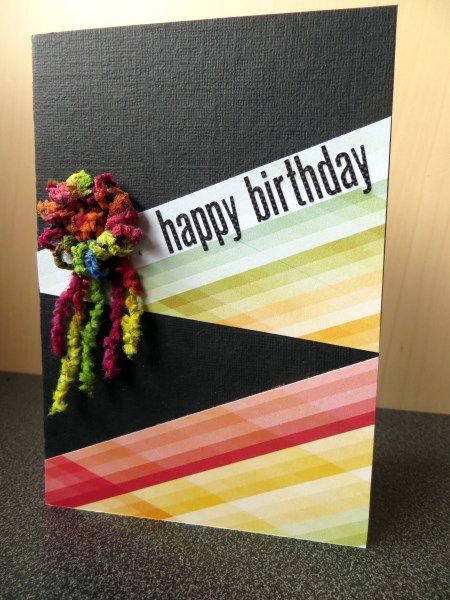
And gave me a space to use up some fibres ... still not a new worldwide trend, despite my best efforts LOL!
P.S. British readers might like to know that S J Crafts is having a Bargain Basement Paper Sale at the moment - I've been tempted and have a few new supplies on their way {but shhh don't tell Bethany at the CKCB that I'm adding to my stash rather than using it up!}
Tuesday, 3 June 2014
Zoom In Zoom Out #22
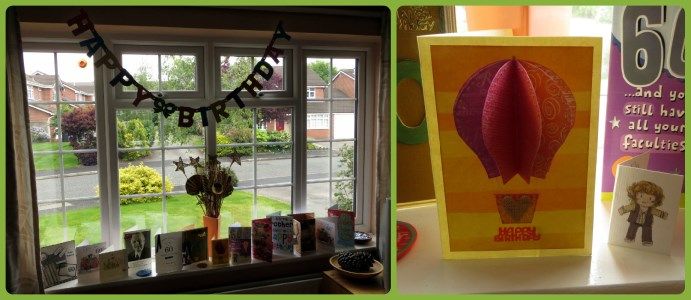
It's been another birthday weekend chez moi ... and this time I managed an appropriate card in time so I'll zoom in on it (and the cute hand drawn Samwise Gamgee tag that Child No.3 put on her gift to her father).
My card is *not* one that needs to fit in an envelope, though it probably would fold flat enough! The colour scheme was dictated by the June challenge over at S J Crafts ... check out the lovely examples from my fellow DT members. I've also added a brief explanation of how I made my balloon (inspired by this amazing project) on the June Challenge post ... *and* Sarah has generously put a prize up for grabs again!
22/52 ZIZOs joined in with so far ... VERY good going for me! It should be even easier to keep up for the next couple of months as I'll be out and about with my camera joining in with Rinda's 2014 Summertime Scavenger Hunt which launched on June 1st. Anyone else joining in?
Labels:
Cards,
S J Crafts,
Scavenger Hunt,
ZIZO
Monday, 24 March 2014
How Many Posts?!?!?
Welcome to the final post of the March CKCB
Members' Blog Hop; if you didn't reach me from Cindy then you might want to start at the beginning with Lisa. This month we had a choice of three challenges to use for the hop (#1 Use Watercolour Techniques, #2 Be Inspired By Jennifer and #3 Add Texture To Your Background).
I had a page all ready for the texture challenge, but then I realised that today I'd also celebrating blog post No:
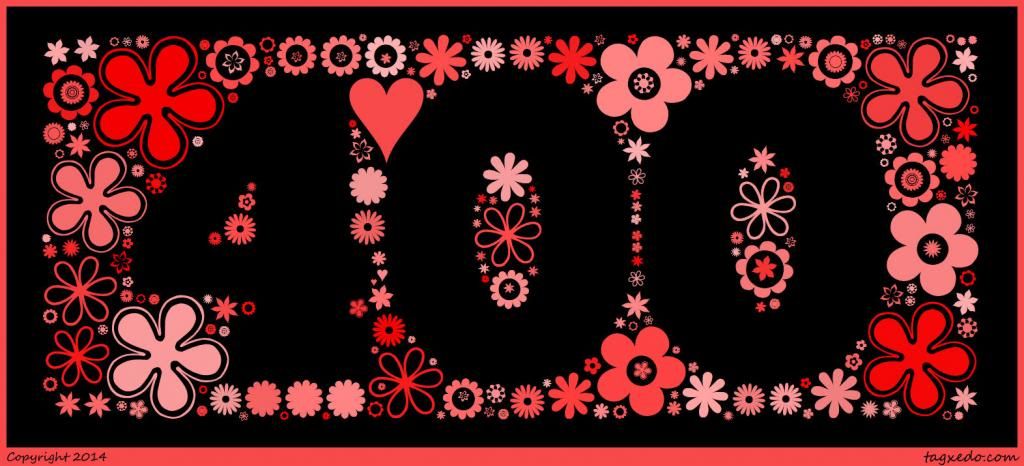 so I decided to combine texture with my favourite on-line tool: Tagxedo.
As you can see from the image, it's possible to load up your own text to be used as the outline rather than use the pre-defined shapes (here I selected Shape ► and Add Words ... and typed the characters "400", chose ChunkFive font and then inverted the shape.
It's also easy to upload special fonts to use instead of the standard ones: my 200th blog post explains how I used Saru's Flower Ding Font, available free from dafont here. Any special font has to be already downloaded onto your computer and then uploaded into Tagxedo by selecting Font ►and Add Fonts ...
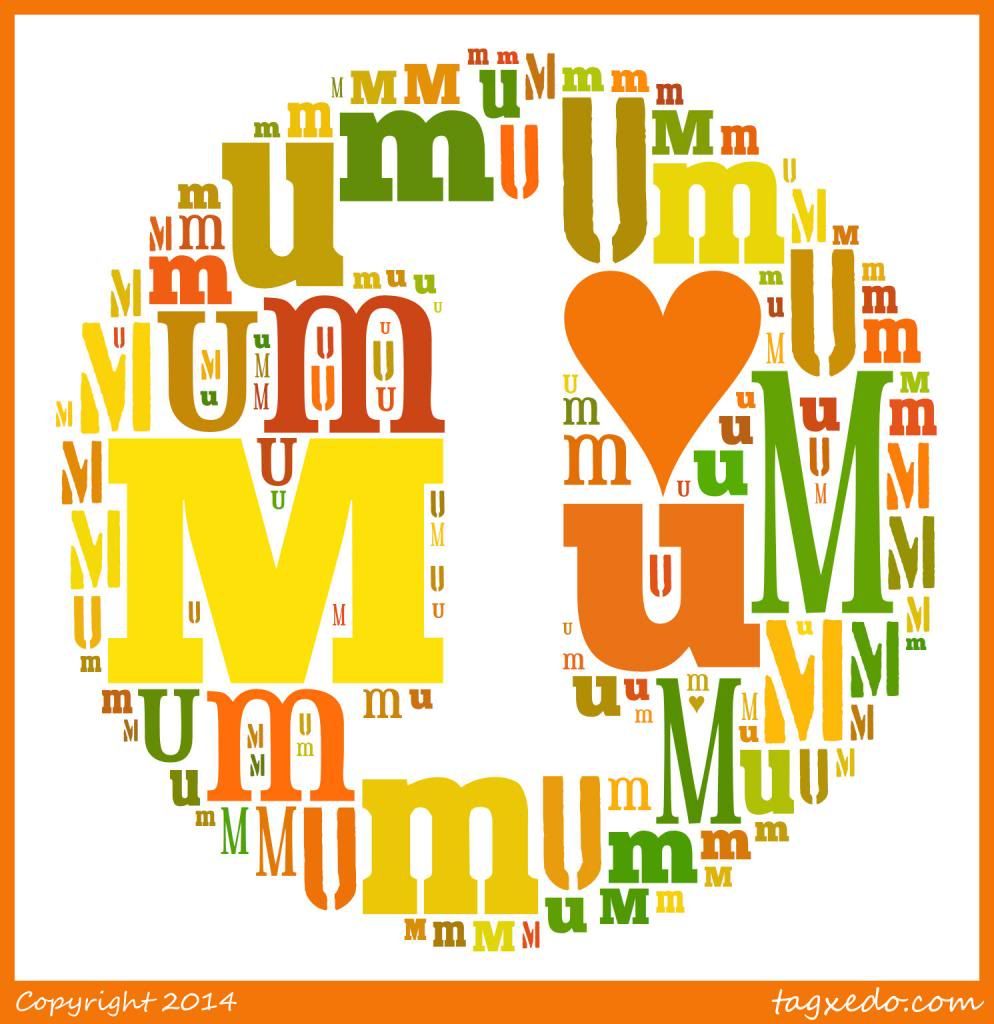
Mothering Sunday is approaching (in the U.K.) so I thought I'd see if I could combine these two actions and make my outline shape from the character set of an added font. I loaded Wingdings2 into Tagxedo first, then made my shape the letter "u" in Wingdings2 to give me ❶ (I generally copy & paste from the Windows Character Map to select characters in weird fonts as it's impossible to remember all the character equivalents ... this sheet is useful for quick reference though).
My Tagxedo text was simply the letters "M", "u" and "m" rather than the word "Mum" plus a ♥. I forced the ♥ to be artificially large using ♥:150 and the letters were repeated 40 times (for some reason it's necessary to type in the letters individually rather than use "M:40 u:40 m:40" but I have NO idea why).
I used the defaults for everything else except:
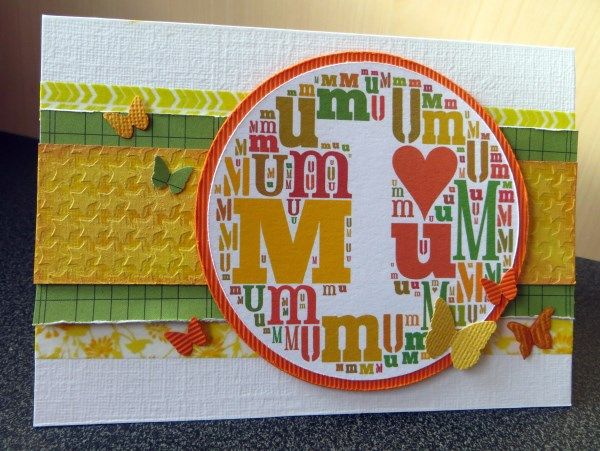
And here's the finished card:
My Coluzzle circle templates were dusted off to cut out the Tagxedo image and mat it onto a scrap of textured orange card before scissor distressing the edges. The starry strip is made with a 6x6 Crafter's Workshop punchinella stencil and some texture paste which was coloured once dry. The rest of the supplies (washi, butterflies, ledger paper scraps) are from my March Counterfeit Kit.
I've just had the Tagxedo image printed onto a mug for a matching gift ... Aldi have free postage on gifts at the moment with the code EASTER3 ... hope it arrives in time!
Well, that's it for the CKCBMBH today - if you missed anyone you can see the whole blog hop listed here. If you fancy joining in yourself next month, just drop the CKCB a mail - everyone is welcome.
P.S. If you're new to Tagxedo, please check out some of my other Tagxedo posts for more tips & tricks.
I had a page all ready for the texture challenge, but then I realised that today I'd also celebrating blog post No:
 so I decided to combine texture with my favourite on-line tool: Tagxedo.
As you can see from the image, it's possible to load up your own text to be used as the outline rather than use the pre-defined shapes (here I selected Shape ► and Add Words ... and typed the characters "400", chose ChunkFive font and then inverted the shape.
It's also easy to upload special fonts to use instead of the standard ones: my 200th blog post explains how I used Saru's Flower Ding Font, available free from dafont here. Any special font has to be already downloaded onto your computer and then uploaded into Tagxedo by selecting Font ►and Add Fonts ...
Mothering Sunday is approaching (in the U.K.) so I thought I'd see if I could combine these two actions and make my outline shape from the character set of an added font. I loaded Wingdings2 into Tagxedo first, then made my shape the letter "u" in Wingdings2 to give me ❶ (I generally copy & paste from the Windows Character Map to select characters in weird fonts as it's impossible to remember all the character equivalents ... this sheet is useful for quick reference though).
My Tagxedo text was simply the letters "M", "u" and "m" rather than the word "Mum" plus a ♥. I forced the ♥ to be artificially large using ♥:150 and the letters were repeated 40 times (for some reason it's necessary to type in the letters individually rather than use "M:40 u:40 m:40" but I have NO idea why).
I used the defaults for everything else except:
Theme = Pi PaletteMy Word Options were:
Font = a few of the ones I like best (deselect unwanted ones, including Wingdings2!)
Orientation = Horizontal
Remove Common Words = No (for small words like “a”, “is” and “it” ... and "m" and "u"!!!)My Layout Options were:
Combine Identical Words = No (so that "M" and "m" aren't treated as one item)
Max Word Count = 150 (stops the letters getting too small - for printing out reduce it further)I messed about with Layout, Colour, and Font Respins until I found a combination that I was happy with - utilising the History to see thumbnails of the variations - before using Save ... to get an image onto my computer.
Allow Replication = Yes (to fill the shape without typing "M", "u", "m" repeatedly)
Font Preference = All (the ones I have selected)
And here's the finished card:
My Coluzzle circle templates were dusted off to cut out the Tagxedo image and mat it onto a scrap of textured orange card before scissor distressing the edges. The starry strip is made with a 6x6 Crafter's Workshop punchinella stencil and some texture paste which was coloured once dry. The rest of the supplies (washi, butterflies, ledger paper scraps) are from my March Counterfeit Kit.
I've just had the Tagxedo image printed onto a mug for a matching gift ... Aldi have free postage on gifts at the moment with the code EASTER3 ... hope it arrives in time!
Well, that's it for the CKCBMBH today - if you missed anyone you can see the whole blog hop listed here. If you fancy joining in yourself next month, just drop the CKCB a mail - everyone is welcome.
P.S. If you're new to Tagxedo, please check out some of my other Tagxedo posts for more tips & tricks.
Labels:
Blog Hop,
Cards,
Instructions,
Tagxedo
Sunday, 23 February 2014
10 Minute Craft Dash
Each month on UKScrappers there is a home-page feature listing interesting, inspiring and often incredible blog posts from various members and sponsors. It's a lovely way to find unexpected mojo and this month I have used a technique from one of Angela's cards from Paper & Ribbons with the third challenge over at the Counterfeit Kit Challenge Blog (to make a card in 10 minutes or less):
I can't say I really enjoyed working within such a strict time deadline, but it certainly focussed my mind and stopped me from pondering too much on the options. Can you spot the inspiration card on UKS ? Angela used the centres to make another card ... maybe I shouldn't have tidied up so vigorously!
P.S. There's still time to have a go with the SJ Crafts February Sketch and be in with a chance of a prize ... check it out!
Saturday, 14 December 2013
Tagxedo New Year
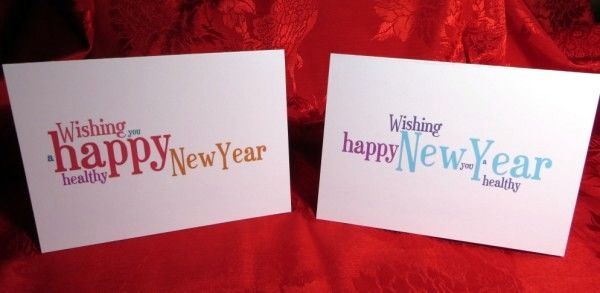 Today over at the Counterfeit Kit Challenge Blog I have a post about making VERY quick Tagxedo New Year's cards
If you like Tagxedo as much as I do you may want to play around with it to produce something a little more complicated.
I searched for multi-lingual versions of "Happy New Year" and plugged them into Tagxedo to produce this multi-lingual card:
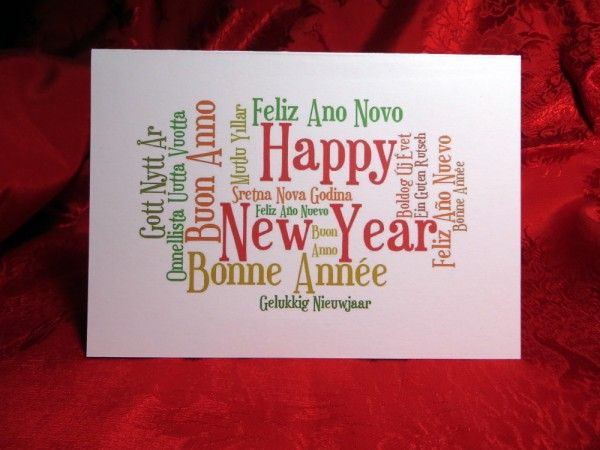
Ring the changes with a different colour-way and layout:
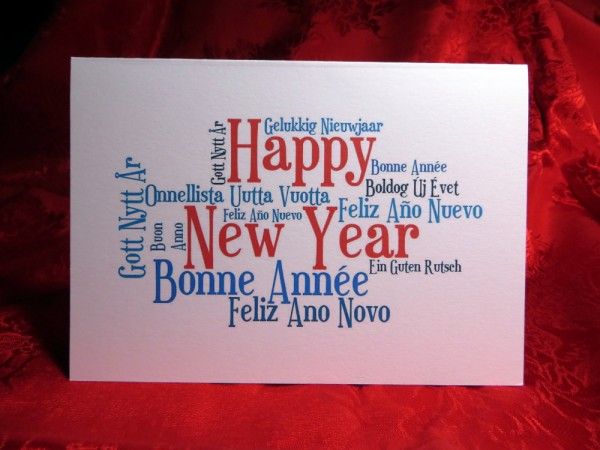
Or change the shape:
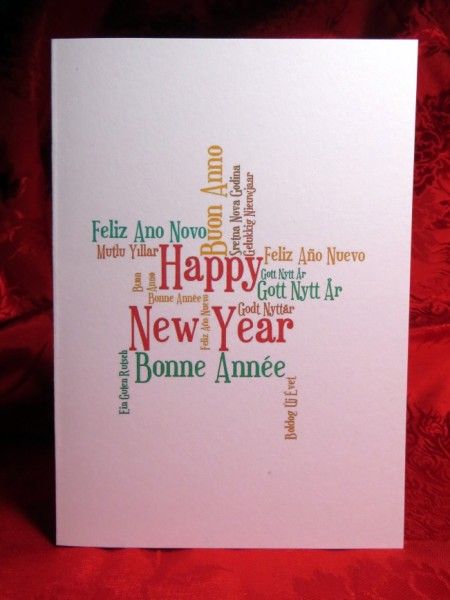
Gelukkig~Nieuwjaar Bonne~Année Buon~AnnoThe tilde (~) characters keeps associated words together, twice (~~) will stop them from being on separate lines, thrice {~~~) will force a line break. The text in red is the RGB code to make the words "Happy New Year" appear in red! The 20 forces "Happy New Year" to be the biggest phrase and the @0 apparently forces it to be horizontal (though I'm still not convinced)!
Ein~Guten~Rutsch Feliz~Ano~Novo Gott~Nytt~År
Feliz~Año~Nuevo Blwyddyn~Newydd~Dda Onnellista~Uutta~Vuotta
Mutlu~Yıllar Godt~Nyttår
Sretna~Nova~Godina Boldog~Új~Évet
Gelukkig~Nieuwjaar Bonne~Année Buon~~~Anno
Ein~Guten~~Rutsch Gott~Nytt~År
Feliz~Año~~Nuevo
Happy~~~New~Year:20:@0:#ff0000
The other settings are the defaults apart from:
Respins:You do need to respin the layouts and colours a few time to find a design you're happy with - but it doesn't take long to save, crop and print once you've found it. Have fun!
Shape = Oval / Star
Theme = Pi Palette / Quiet Morning / Citrus Wasabi
Font = Euphorogenic
Orientation = H/V
Word:
Remove Common Words = No
Combine Related Words = No
Combine Identical Words = No
Layout:
Max Word Count = 50
Normalize Frequency = Yes
Hard Boundary = Yes
Allow Replication = No
P.S. Use this link to see all my Tagxedo card ideas
Labels:
Cards,
CKCB,
Instructions,
Tagxedo,
Xmas
Sunday, 24 November 2013
Thanks But No Thanks
 Welcome to the start of November's Members' Blog Hop from the
Counterfeit Kit Challenge Blog. The challenge this month, was to make a little book of thankfulness. Oh dear, I thought. It's not that I'm not grateful for things, I am. But I have enough (unfinished) mini-books to last a life time and I need to use my creative time usefully ... so I decided to twist the challenge slightly to my own ends.
Welcome to the start of November's Members' Blog Hop from the
Counterfeit Kit Challenge Blog. The challenge this month, was to make a little book of thankfulness. Oh dear, I thought. It's not that I'm not grateful for things, I am. But I have enough (unfinished) mini-books to last a life time and I need to use my creative time usefully ... so I decided to twist the challenge slightly to my own ends.Normally around this time of year I am busy with one of my many sisters in law, gathering gift requests and financial donations from Hubby's very large family. There are so many brothers, sisters, nephews and nieces, cousins and spouses that we found it easier to put together a huge pot of money and buy each relative ONE gift on behalf of everyone else. Far better to get just one decent sized exactly-right present than two dozen much smaller and less perfect gifts. Each family contributes according to their means and last year the pot was nearly £1000 divided between 34 children and adults.
However this year several families are feeling the pinch and sadly the majority have decided that they will be cutting back and not joining in with extended family giving and receiving. The end of a very useful family tradition, leaving a big hole in the festivities :-(
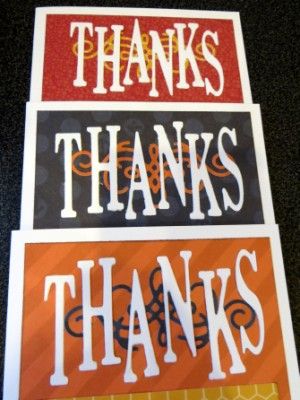
Which is the perfect excuse for me to think outside the box and start making gifts instead ... starting with a set of Thank You cards for a variety of occasions:
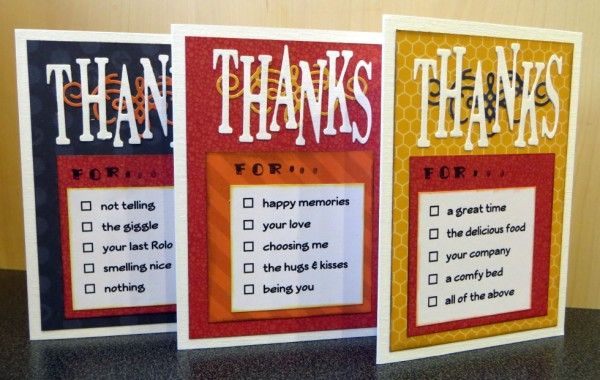
Using my November Counterfeit Kit along with some white card, Sizzlits Retro Metro alphabet & Decorative Accent dies I concocted a number of reasons to be grateful and printed them in Veggieburger Font.
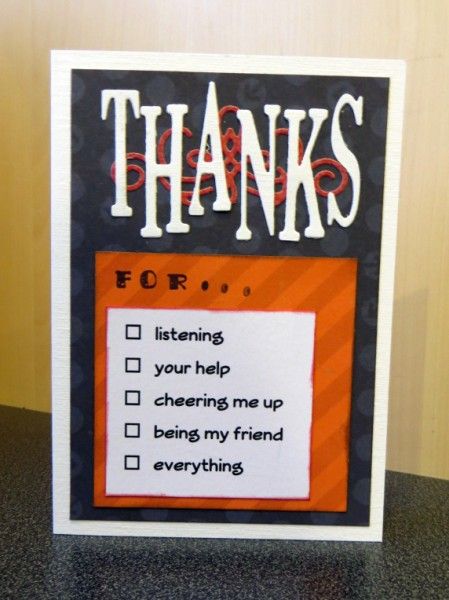
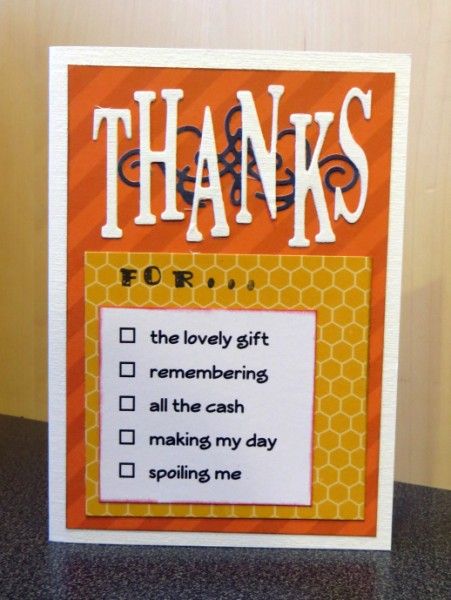
Hopefully this set of cards will make one of Hubby's sisters happy on Christmas Day. Now I'm off to look at other creative things to make and package prettily for the other four lovely ladies. Do you make gifts to give away?
The next stop on the gratitude trail is Valerie, but if you get lost along the way, the full blog hop order is published on the Counterfeit Kit Challenge Blog today. Happy Thanksgiving!
Wednesday, 12 June 2013
Hello Summer!
Welcome to the "Hello Summer!" Blog Hop in cooperation with this month's sponsor of the Counterfeit Kit Challenge Blog: Little Blue Button Stamps. If you reached me from Little Blue Button designer Dawn you are on track, if not the hop started here on the CKCB.
Olga from LBBS kindly sent us each something from her newly released June digital stamps and challenged us to make a project. I'm afraid I cheated a little as I'm not that great at colouring digital images; Child No.3, however, has a great selection of Promarkers and loves to use them, so she happily set to work instead! In the meantime, I had fun with some mists and a chevron stencil to make a "wave" effect on some blue patterned paper from my June Counterfeit Kit.
Little Blue Button Stamps is kindly sponsoring this hop - with four generous prizes up for grabs - just comment on each blog in the hop, leaving a final happy comment over at LBBS itself. But hurry - you only have 24 hours to do this in, so best hop right on over to Marla, another talented lady from the LBBS Design Team.
Olga from LBBS kindly sent us each something from her newly released June digital stamps and challenged us to make a project. I'm afraid I cheated a little as I'm not that great at colouring digital images; Child No.3, however, has a great selection of Promarkers and loves to use them, so she happily set to work instead! In the meantime, I had fun with some mists and a chevron stencil to make a "wave" effect on some blue patterned paper from my June Counterfeit Kit.
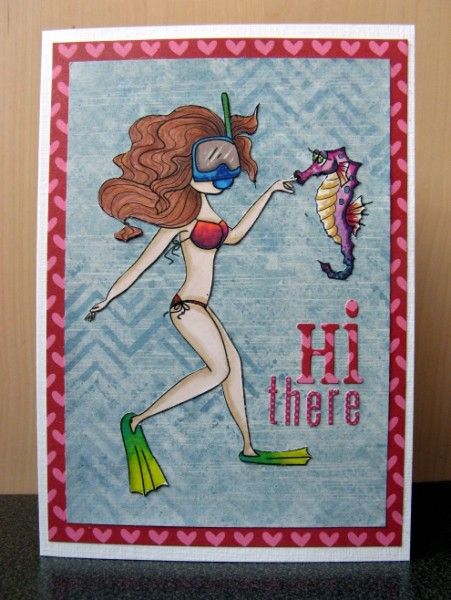 |
| Card made with "Jessica In The Ocean" Digital Stamp from LBBS |
Winners to be announced On June 15th - Good Luck!!
Tuesday, 4 June 2013
Mark(et)ing Cards!
Which leads me into the Counterfeit Kit Challenge Blog's first challenge for the month: taking inspiration from another sort of market where you pay more for good quality items - Farmers' Markets. As usual it's also the challenge being used for the Members' Blog Hop on June 24th: just e-mail them at the CKCB by June15th if you want to join in. For now, I took inspiration from the market stalls displaying boxes of healthy goodness to make a sunny card using some offcuts from my June Counterfeit Kit.
Friday, 24 May 2013
Happy Hoppy
Welcome to the start of the May Counterfeit Kit Challenge Blog Members' Blog Hop (or CKCBMBH for short)! Today we are sharing our takes on the masking challenge. I made a page for this challenge earlier in the month with my May Counterfeit Kit and today I am sharing a couple of cards made with the a simple masking technique:
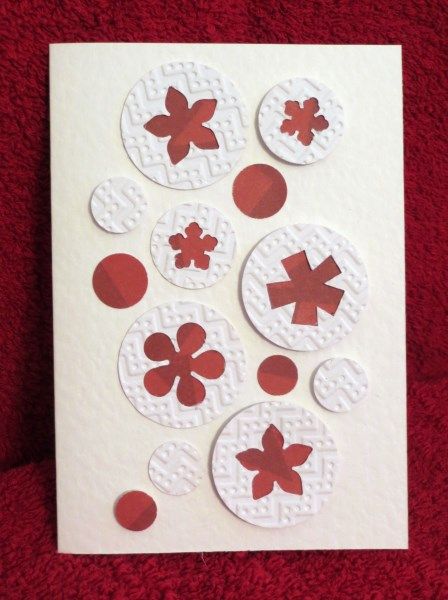
I was inspired by some cards I spotted over at the blog of my fellow Master Forger, Milissa, and just had to have a go with my circle punches and mini alphabet stamps. The photo doesn't show it brilliantly, but two of the circles are raised up on foam dots and two are inked through the "waste" from the punched circles.
The next stop on the hop is Dawn, but if get lost the full blog hop list is published on the Counterfeit Kit Challenge Blog where you can also find details of how to apply to be on the team of Master Forgers - the deadline is May 30th.
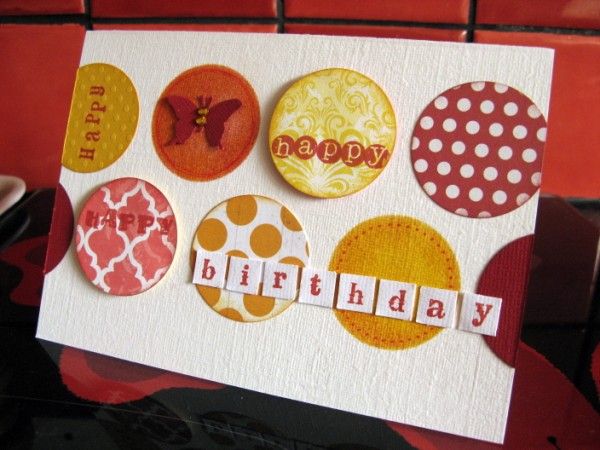 |
| Happy Birthday Mum ♥ |
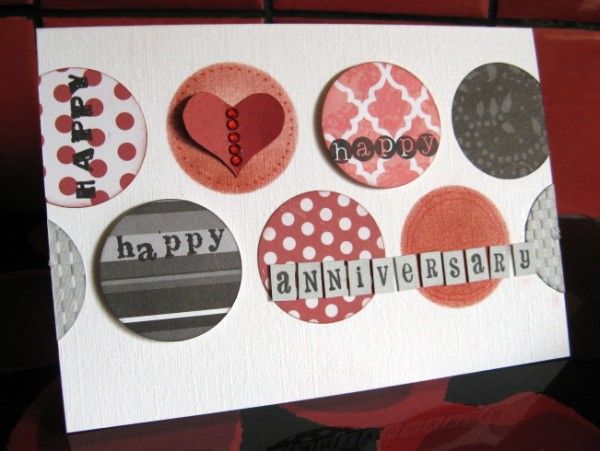 |
| Happy Anniversary Hubby ♥ |
Thursday, 28 February 2013
Master Forgers' Journalling Hop
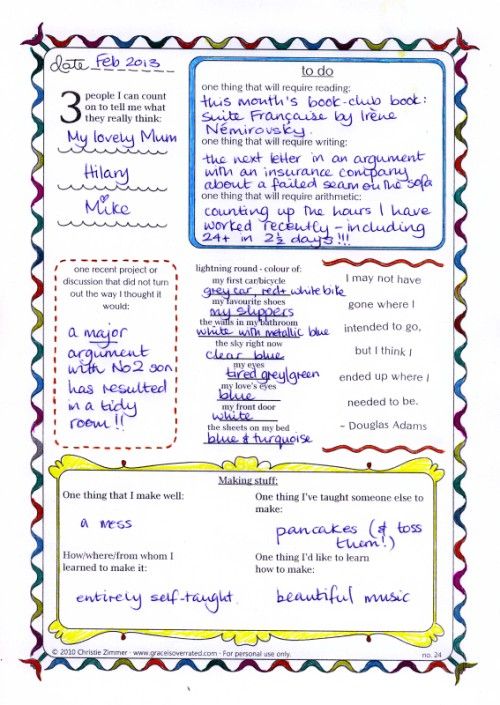
Along with several fellow Master Forgers from the Counterfeit Kit Challenge Blog, I was aksed to fill in one of two journalling sheets from Christie Zimmer's funny and inspirational site Grace Is Overrated and see where the answers & quotes led me in a crafty endeavour.
I chose sheet #24:
And this led me on to making a Mother's Day card for "my lovely Mum". She's away in Australia visiting my brother and it won't be Mother's Day in Australia as they celebrate in May rather than March, but I wouldn't want her to miss out!
If you are hopping around, getting to know the Master Forgers today, you will have arrived from Angela and now need to visit Jennifer ... the full list is here on the CKCB. Have fun!
I chose sheet #24:
 |
| Click for a closer view |
If you are hopping around, getting to know the Master Forgers today, you will have arrived from Angela and now need to visit Jennifer ... the full list is here on the CKCB. Have fun!
Labels:
Blog Hop,
Cards,
CKCB,
Grace Is Overrated
Monday, 25 February 2013
Reasons Why I Love ...
Hello and welcome to February's version of the Counterfeit Kit Challenge Blog Members' Blog Hop. Hopefully you've been all around the other counterfeiters' blogs already and reached me via Leslie. We've been playing along with the first challenge of the month - to not include a photo on our project, just journalling! I did a photo-less page earlier in the month, so I have cheated slightly with today's offering ... and made a Valentine's card!
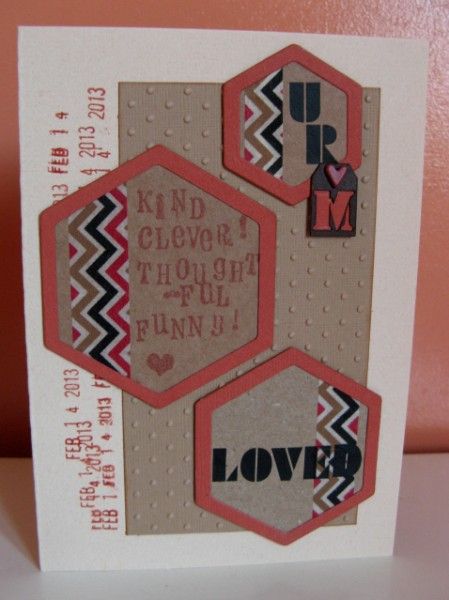
I had fun with some more home made hexagon spots, a tag and a few of my office transfer letters from my February Counterfeit Kit. I grabbed a swiss dot embossing folder for some texture, a date stamp and added a heart shaped brad from my stash.
That's not a lot of journalling, but I don't want Hubby to get too big for his boots LOL! Inside I have stamped:
Thanks for hopping around with the counterfeiters ... if you missed any, the full list is available on the CKCB today.
I had fun with some more home made hexagon spots, a tag and a few of my office transfer letters from my February Counterfeit Kit. I grabbed a swiss dot embossing folder for some texture, a date stamp and added a heart shaped brad from my stash.
That's not a lot of journalling, but I don't want Hubby to get too big for his boots LOL! Inside I have stamped:
I
♥
U
X
Sunday, 28 October 2012
Spot The Difference!
The third challenge this month at the Counterfeit Kit Challenge Blog is to make two cards with the same design: one masculine version and one feminine.
This got me thinking about what makes a card suitable for one sex or the other. Looking in the shops, the girly cards have flowers, shoes, handbags ... and the manly ones feature boats, footballs or power tools! Hmmm, not every woman spends a fortune on handbags (or wants to), nor does every man like to fish!
Anyway, my cards rarely feature objects these days - they're just made with scraps from my kits, so I guess that just left me colour ... pink for a girl and blue for a boy perhaps?
I decided to start with a card sketch and see how small a difference I could get away with using scraps from my October Counterfeit Kit. The Sampler Kit Club has a great card sketch challenge this month which I stuck very closely to:
Identical in design, I just used slightly different coloured dots from the Echo Park Lazy Days paper and then picked out one of the dot colours with my kit's tiny alphas and buttons. {I'm very irritated by the Cosmo Cricket Tiny Type teal stickers ... WHY is that "A" so ridiculously small? The "R" and "T" are also shorter than the rest of the letters ... is it a coincidence that they spell "art" or do I smell a "rat"?}
While the card on the right is definitely more feminine (thanks to the pink), I can't really say that the other one is only suitable for a man. My Mum reckoned I should have included more brown ...
What do you think?
Labels:
Cards,
CKCB,
The Sampler
Thursday, 29 March 2012
A Little Shapely Counterfeiting
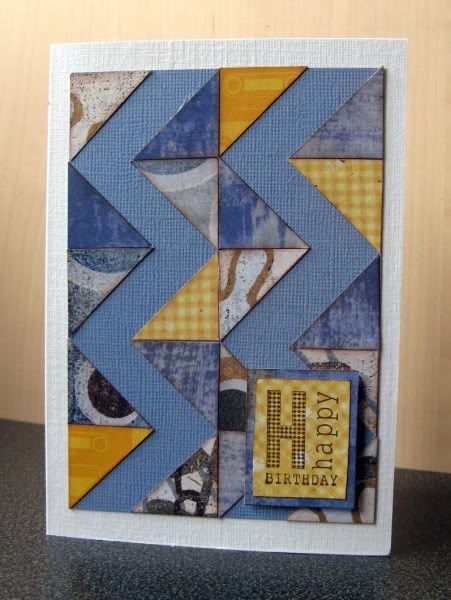
Have you got any scraps left from your March Counterfeit Kit? Want a fun way to use them up? Then you've come to the right place! I couldn't join in with a full blown kit this month as I was busy with ... well I was busy! But I loved the colours of the kit-to-copy by Birds of a Feather and one sheet of paper in particular: Authentique's Friendship paper from their Genuine collection.
Look closely and you will see that the chevrons are entirely made from triangles ... which got my counterfeiting brain into overdrive! So when the Counterfeit Kit Challenge Blog asked the Master Forgers to put together a card kit from the counterfeit kit I was quick to volunteer!
Just gather your paper and card scraps, a couple of card blanks, some ink and sentiment stamps and create along with me:
Cut your paper scraps into 1" (2.5cm) squares and then cut along each diagonal to make two right-angled triangles. Ink the edges of each triangle to hide white cores and "tie" them together.
Cut a piece of card to 3.5" x 5" (8.5cm x 12.5cm) and draw a faint pencil line down the centre parallel with the long edges.
Arrange the triangles along the centre line of your card to form a zig-zag line.
Add triangles along the long edges of the card to create a zig-zag effect from the cardstock.
Adhere the panel to your card blank and mount a stamped sentiment on foam pads to complete your card.
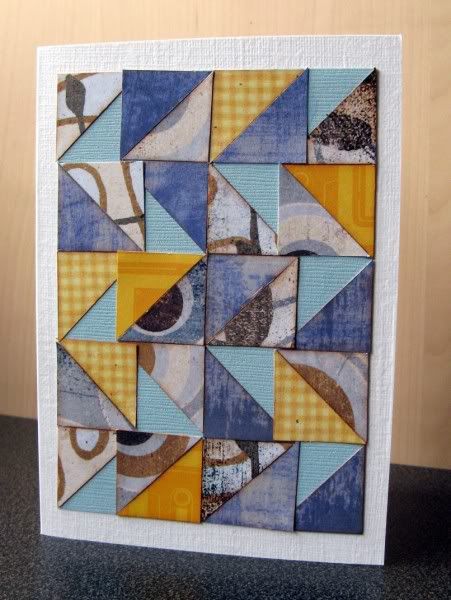
My second attempt used a different blue which was too bright ... so I added more triangles and created a modernist card:
I had a lot of fun playing around with the combinations of triangles on a page ... and decided this was a simple way to make subtle chevrons from any paper as well as a great way to use up tiny scraps or even hard to use patterns like my cassette paper from Crate Paper!
Look closely and you will see that the chevrons are entirely made from triangles ... which got my counterfeiting brain into overdrive! So when the Counterfeit Kit Challenge Blog asked the Master Forgers to put together a card kit from the counterfeit kit I was quick to volunteer!
Just gather your paper and card scraps, a couple of card blanks, some ink and sentiment stamps and create along with me:
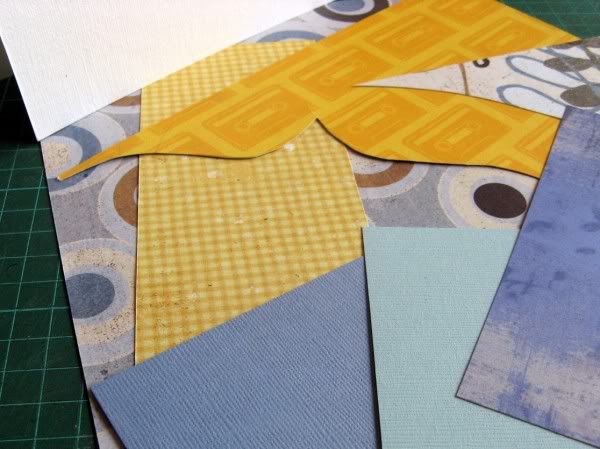 |
| Grab your scraps and get cutting! |
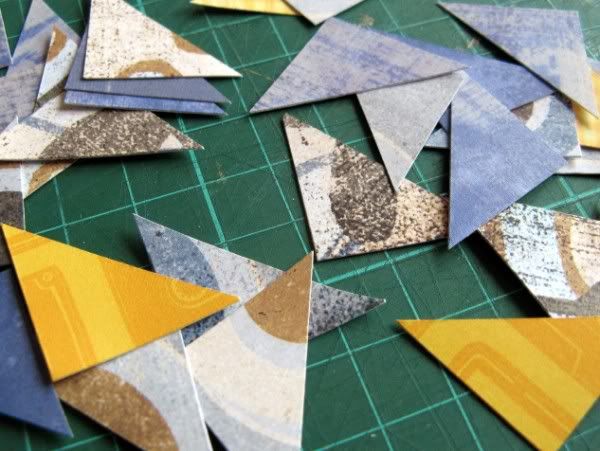 |
| I used 10-15 squares (20-30 triangles) to make each card |
Arrange the triangles along the centre line of your card to form a zig-zag line.
Add triangles along the long edges of the card to create a zig-zag effect from the cardstock.
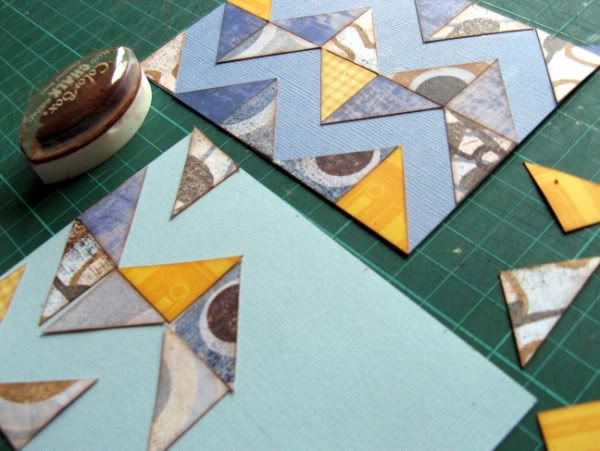 |
| 5 individual triangles fit along the long edge of the card |
 |
| Ippity Stamp |
 |
| Too busy for an added sentiment! |
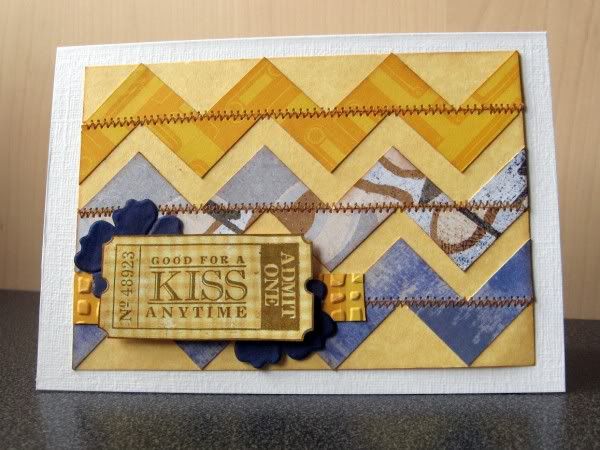 |
| A different arrangement of triangles gives thinner zig-zags and machine sewing adds texture Inkadinkado stamp |
Labels:
Cards,
CKCB,
Instructions
Subscribe to:
Posts (Atom)
.jpg)
.jpg)
