Showing posts with label Tagxedo. Show all posts

Saturday, 9 August 2014

Tagxedo Theme Tones

A reader recently contacted me to ask if I had some pointers for personalising a Tagxedo colour theme.  To get the techniques straight in my head I decided to make a flowery 40 for a friend's birthday card following my own Tagxedo tutorial on using flowery fonts:

Jimjams - Tagxedo Themes - Blulola

To save you clicking back to 2012, here are the steps for making the card design before I address the colours:

Download Sarus's Flower Ding Font to the computer, then click on Font ► and use Add Fonts ... to load it onto Tagxedo.  The flowers will appear (in red) on the list of fonts.  Click on it to select it.

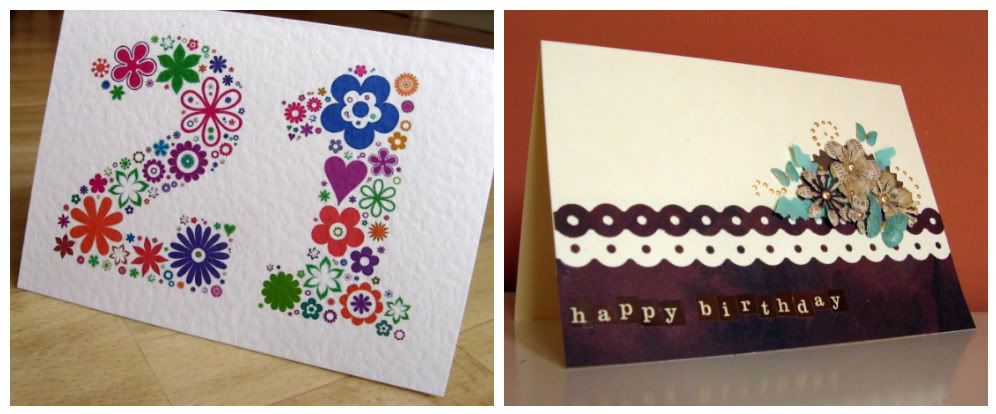
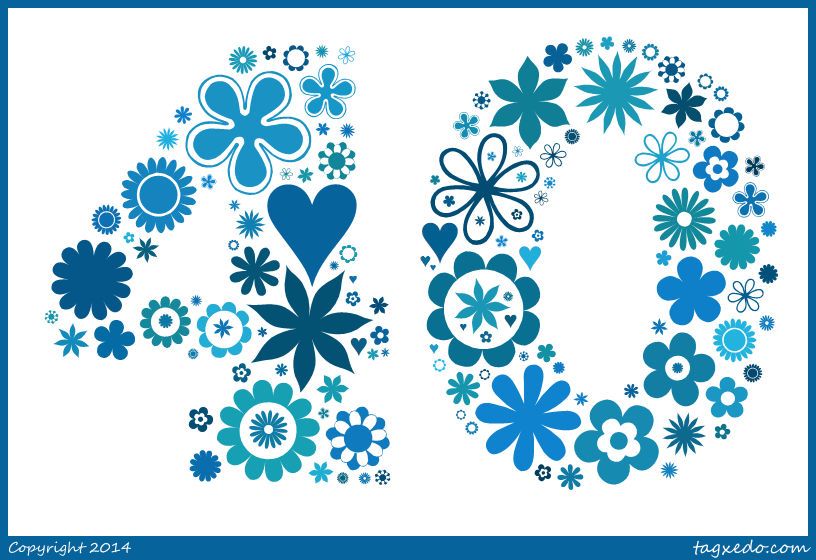
Click on Shape ► and use Add Words ... to create a "40" in ChunkFive (a nice chunky font to fill with flowers) and click Accept.

Choose Orientation ► Any so that the flowers can be at any angle and then lock the three padlocks.

Load a variety of letters, corresponding to pretty flowers, as the text and click Submit:
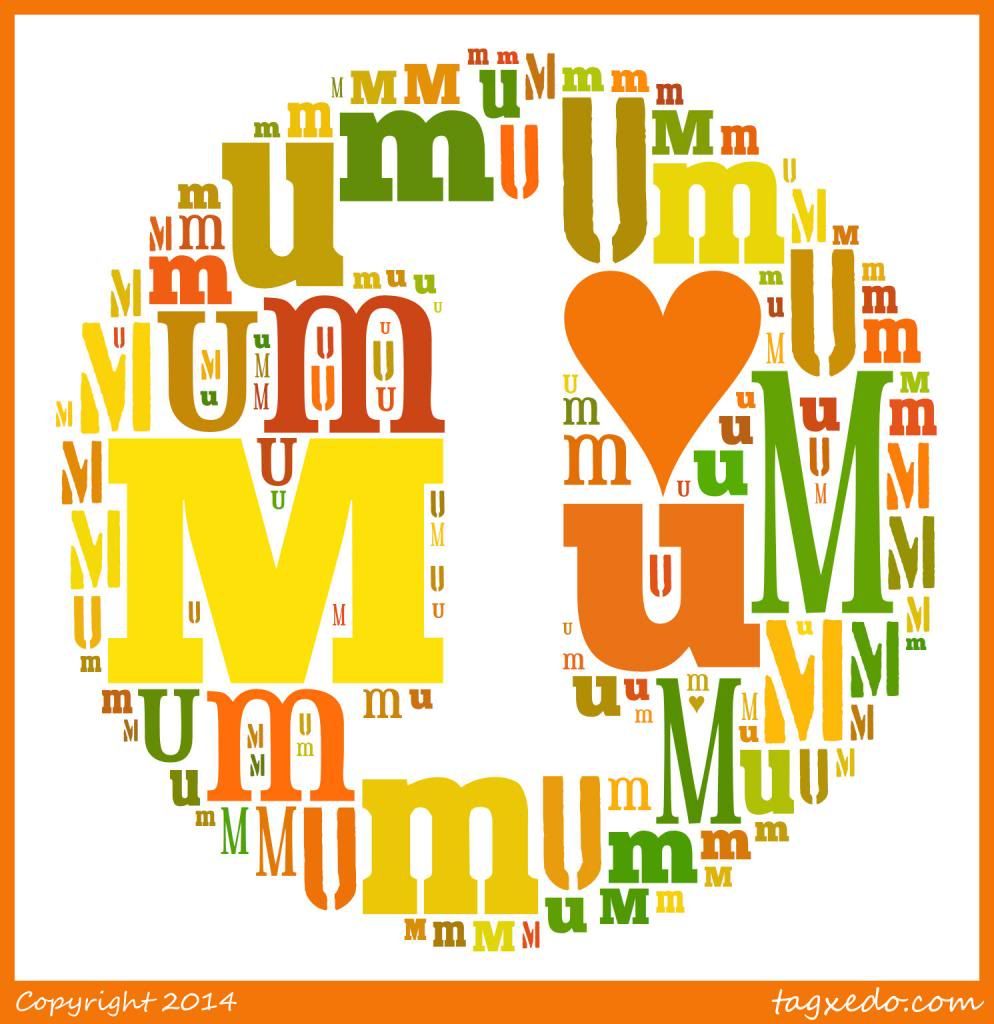
♥:50:@0
A A A B B B B B B B B B B C C C C D D D D D
G G G G G G G G H H H H H H H H H I I I I I I I I L L L L L L L L
M M M M M O O O O O O O O O V V V V V V V V V V V V V W W W W W W
X X X X X X X X o o o o o o o p p p p p x x x x x x x x x y y y y y y
The 50 forces the ♥ to be the most frequent character and the @0 forces it to be horizontal.

Worryingly at this point, the image disappears!!!  A few settings need tweaking to get it back:

Select these Word Options, press Accept when done:
Punctuations = Yes (this allows the to show)
Remove Common Words = No (this allows the individual letters flowers to show)
Select these Layout Options, press Accept when done:
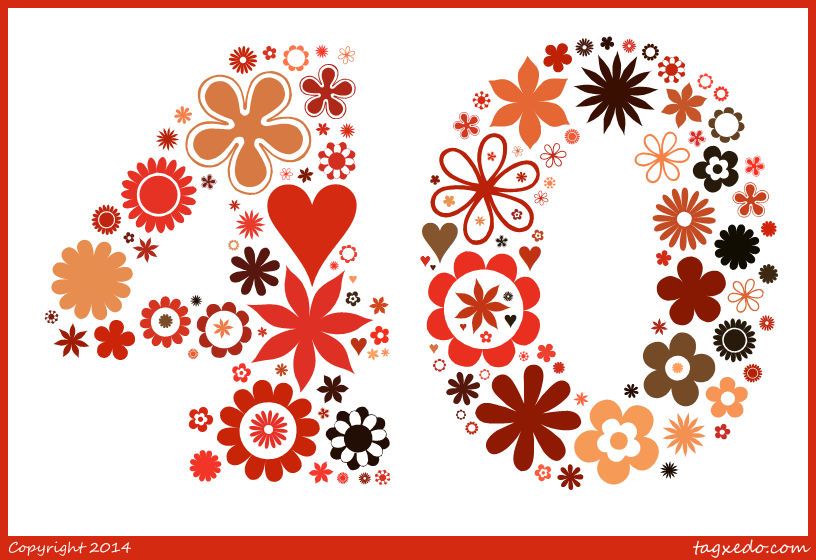
Max Word Count = 150 (stops the flowers getting too small - but make sure that the shape is still filled)
Tightness = 150% (fills the shape as much as possible, but slows Tagxedo down)
Normalize Frequency = Yes
Hard Boundary = Yes (makes the shape seem more defined)
Allow Replication = Yes (so that there are enough words flowers to fill the shape)
Font Preference = Any 1 (only the red flowers should be selected in Font ►)
This produced a chunky 40 filled with flowers in the default colour theme "Quiet Morning".

Jimjams - Tagxedo Themes - Quiet Morning

To choose another of Tagxedo's colour themes simply click on Theme ► and choose a different one e.g.  "Elephant In The Room"

Jimjams - Tagxedo Themes - Elephant In The Room

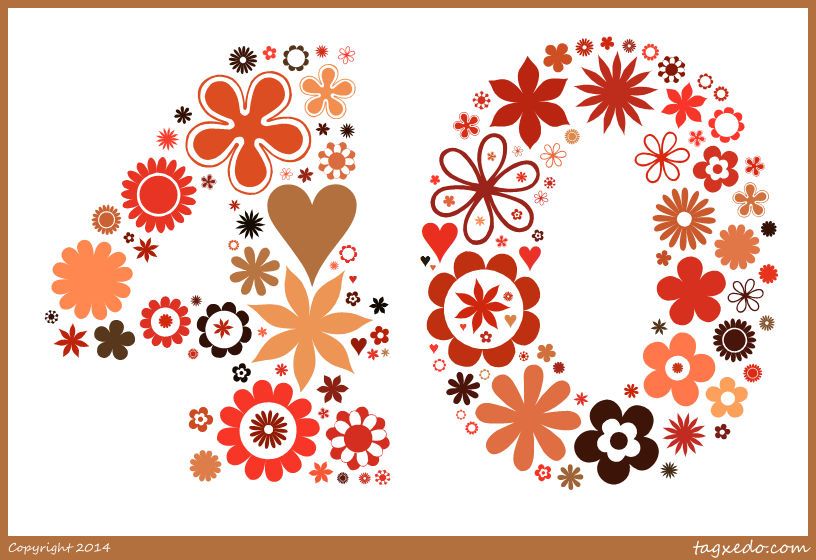
Re-spinning Colour will change the colours of the individual flowers, keeping within the current theme:

Jimjams - Tagxedo Themes - Elephant In The Room

It's worth re-spinning Colour (and possibly Layout) several times before choosing the one you like best from the History ...

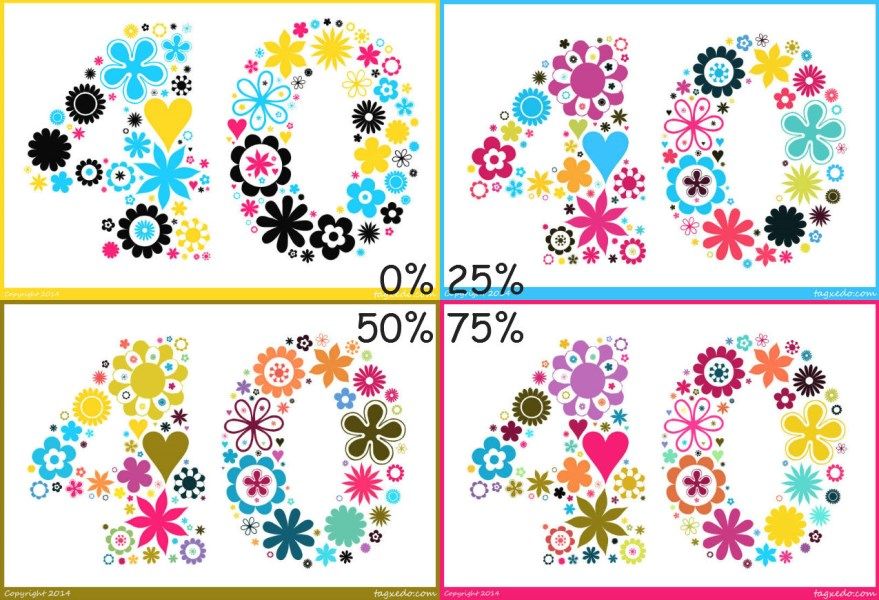
Tagxedo allows some variation from the colours shown in each theme (normally 50%) but you can change this to 0% to use ONLY the specified colours ("Fallen In Love" has just 4 shades: black, turquoise, hot pink and yellow) or increase it to 100% for maximum colour variation within the theme:

Jimjams - Tagxedo Themes - Fallen In Love

Finally, if none of Tagxedo's colour themes float your boat, you can create your own:

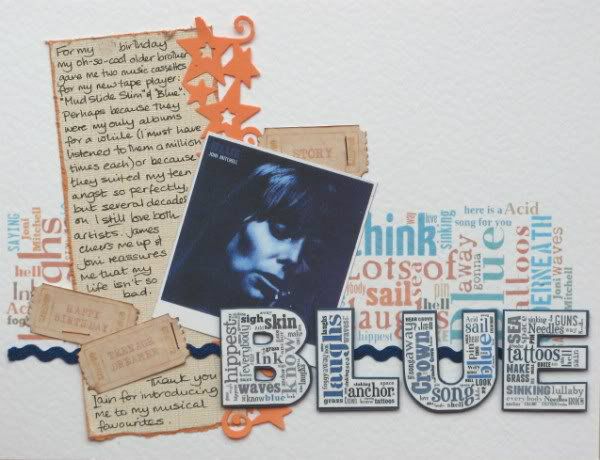
Click on Theme ► and use Add Themes ... to see a sample colour theme called "Blue Meets Orange" with six strings of numbers and letters afterwards (000000 007080 4080a0 f0f0f0 d0a030 c06010).  These are the RRGGBB (red, green, blue) codes for various colours where 000000 is black and FFFFFF is white.

You can change the name*¹ to something sensible e.g. "Mauritius Flag" and then replace the RGB codes with the RGB codes for the colours*² you prefer e.g. ff0000 000066 009900 ffcc00 before clicking Submit.

Your new colour scheme will appear below as blocks of colour with a border representing the background.  Auto chooses one of the colours as a background, but you can change the background colour e.g. click Bright for the brightest of your colours, click First for the first colour in the list or even select Black or White.  Edit the RGB strings to change/add/delete colours and click Submit to make new themes.  When you find one you like click the Add to the left of it and X to get rid of the Add Themes ... box.  Now you can select your newly named theme (with or without colour variation):

Jimjams - Tagxedo Themes - Mauritius Flag

My thanks to Lynn for her query.  I hope this helps a little.  Have fun!

Jimjams - Card - 21st Birthday Card with Tagxedo flowers
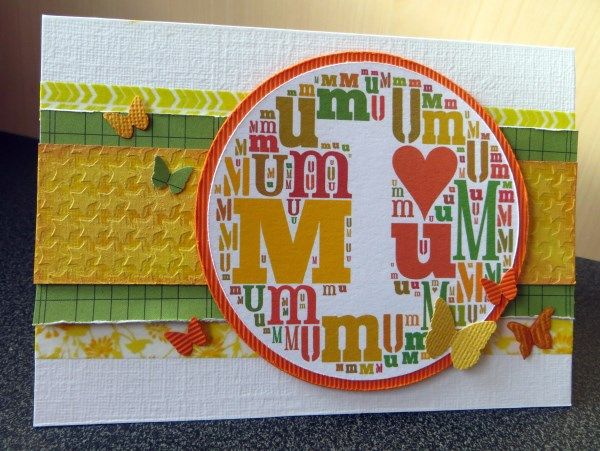
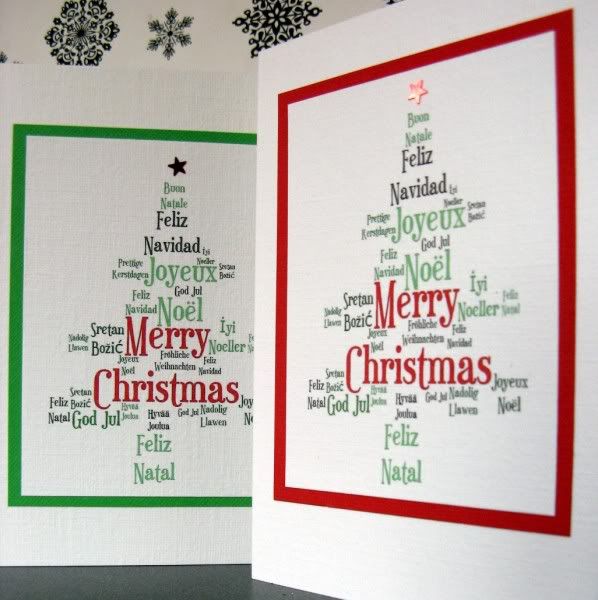
I can't show the 40th card yet, but here's one I made earlier (using "Happy Brights")
*¹ Unfortunately when you have finished with Tagxedo for the day it doesn't save anything ... neither your shape, your extra fonts, your settings nor your colour themes will be there next time you play ... so don't stress about what you call your scheme! 

*² Try Colour Picker, Design Seeds  (hold your mouse over the side colours to see the codes), or Colour Palette Generator to choose colours and find out the required RGB codes.

Monday, 24 March 2014

How Many Posts?!?!?

Welcome to the final post of the March CKCB Members' Blog Hop; if you didn't reach me from Cindy then you might want to start at the beginning with Lisa.  This month we had a choice of three challenges to use for the hop (#1 Use Watercolour Techniques, #2 Be Inspired By Jennifer and #3 Add Texture To Your Background).

I had a page all ready for the texture challenge, but then I realised that today I'd also celebrating blog post No:

Jimjams - Tagxedo - 400th blog postso I decided to combine texture with my favourite on-line tool: Tagxedo.

As you can see from the image, it's possible to load up  your own text to be used as the outline rather than use the pre-defined shapes (here I selected Shape ► and Add Words ... and typed the characters "400", chose ChunkFive font and then inverted the shape.

It's also easy to upload special fonts to use instead of the standard ones: my 200th blog post explains how I used Saru's Flower Ding Font, available free from dafont here.  Any special font has to be already downloaded onto your computer and then uploaded into Tagxedo by selecting Font ►and Add Fonts ...

Mothering Sunday is approaching (in the U.K.) so I thought I'd see if I could combine these two actions and make my outline shape from the character set of an added font.  I loaded Wingdings2 into Tagxedo first, then made my shape the letter "u" in Wingdings2 to give me ❶ (I generally copy & paste from the Windows Character Map to select characters in weird fonts as it's impossible to remember all the character equivalents ... this sheet is useful for quick reference though). 

Jimjams - Tagxedo - No.1 Mum

My Tagxedo text was simply the letters "M", "u" and "m" rather than the word "Mum" plus a ♥.  I forced the ♥ to be artificially large using ♥:150 and the letters were repeated 40 times (for some reason it's necessary to type in the letters individually rather than use "M:40 u:40 m:40" but I have NO idea why).

I used the defaults for everything else except:
Theme = Pi Palette
Font = a few of the ones I like best (deselect unwanted ones, including Wingdings2!)
Orientation = Horizontal
My Word Options were:
Remove Common Words = No (for small words like “a”, “is” and “it” ... and "m" and "u"!!!)
Combine Identical Words = No (so that "M" and "m" aren't treated as one item)
My Layout Options were:
Max Word Count = 150 (stops the letters getting too small - for printing out reduce it further)
Allow Replication = Yes (to fill the shape without typing "M", "u", "m" repeatedly)
Font Preference = All (the ones I have selected)
I messed about with  Layout, Colour, and Font Respins until I found a combination that I was happy with - utilising the History to see thumbnails of the variations - before using Save ... to get an image onto my computer.

And here's the finished card:

Jimjams - Card - No.1 Mum

My Coluzzle circle templates were dusted off to cut out the Tagxedo image and mat it onto a scrap of textured orange card before scissor distressing the edges.  The starry strip is made with a 6x6 Crafter's Workshop punchinella stencil and some texture paste which was coloured once dry.  The rest of the supplies (washi, butterflies, ledger paper scraps) are from my March Counterfeit Kit.

I've just had the Tagxedo image printed onto a mug for a matching gift ... Aldi have free postage on gifts at the moment with the code EASTER3 ... hope it arrives in time!

Well, that's it for the CKCBMBH today - if you missed anyone you can see the whole blog hop listed here. If you fancy joining in yourself next month, just drop the CKCB a mail - everyone is welcome.

P.S. If you're new to Tagxedo, please check out some of my other Tagxedo posts for more tips & tricks.

Wednesday, 8 January 2014

Tagxedo Word Art Tips & Tricks

This month's first challenge over at the Counterfeit Kit Challenge Blog was to be inspired by Subway Art in some way.  There are lovely examples on the blog as well as great interpretations from a some of the Master Forgers.  I thought I'd show you what I might be using for my interpretation of the challenge for the Members' Blog Hop later in the month: (regular readers will already have guessed LOL!!)

Jimjams - January 2014 with Tagxedo for Project Life
Tagxedo.com
If I did Project Life I'd make myself a set of these really quickly and easily with Tagxedo.  Here's some help to get you started:

Click on the Create button on the Tagxedo home page to see the default shape (currently Mother Earth in the shape of ... Earth).

Click Load and enter your text into the box then hit Submit.  My text was simple with 3 variations on January, an abbreviation and the year:
January:5
JANUARY
january
Jan
2014:3  
"January", "JANUARY" and "january" will be treated as different words with "January" being 5 times more “important” than the others.  I included the abbreviation "Jan" because Tagxedo works better with a variety of word lengths.
2014:3 is the same as typing 2014 2014 2014 (but less work!)

Choose your Theme ►, Font ► and Orientation ► then lock them by clicking on the padlocks. Pick your Shape ► too.
I chose:
Theme = Blue vs Grey
Font = a selection of the ones I like best (deselect the ones you don’t like)
Orientation = Horizontal
Shape = Oval 
Select these Word Options, press Accept when done:
Punctuation = Yes *
Numbers = Yes (to allow for 2014)
Remove Common Words = No (for words like “a”, “is” and “it”) *
Combine Related Words = No (for words like “day” and “days”, “go” and “gone”) *
Combine Identical Words = No (so the 3 forms of January are all visible)
Select these Layout Options, press Accept when done:
Max Word Count = 75 (reduced to stop the text getting too small)
Tightness = 150% (fills the shape as much as possible, but slows Tagxedo down)
Normalize Frequency = Yes
Hard Boundary = Yes
Allow Replication = Yes (so that there are plenty of words to fill the shape without having to type them in repeatedly)
Font Preference = All (the ones I have selected) 
* Not strictly necessary for my text, but you might wonder why certain words or characters disappear from your own!  Equally, if you are using phrases in your Word Art and you want to keep some words together then you need to know that the tilde (~) character has special powers: if I wanted "Jan" and "2014" to appear together I would load "Jan~2014" into the text box.

To change the colours within your theme click on the Colour Respin:

Jimjams - January 2014 with Tagxedo for Project Life

Vary the position of the words by clicking on the Layout Respin:

Jimjams - January 2014 with Tagxedo for Project Life

Click on History to see thumbnails of the variations so far - pick your favourite or keep re-spinning or fine-tuning your options and choices until you are happy.  For example you can try out a different shape:

Jimjams - January 2014 with Tagxedo for Project Life

That one might be better with different text and colours for a February page!  What about a circle instead?

Jimjams - January 2014 with Tagxedo for Project Life

The shape-text combination didn't seem to allow for "January" to be the biggest word so some fine-tuning was needed: I reduced the frequency of the year by changing it to 2014:2 and hey presto!

Jimjams - January 2014 with Tagxedo for Project Life

Once you have played for hours (or is that just me?) and found a combination that makes you smile, Save it and have fun printing it out for use in your projects!

The images you make can be used in lots of ways: Project Life cards perhaps, a title block, a strip of background paper, a sentiment for a greetings card ... Child No.3 has just used Tagxedo to make a heart shaped image full of words about me to print on a mug as my Christmas gift - clever, creative girl!!
In the past I've even used Tagxedo  to help me plan out Word Art before creating it myself with alphas (take a look here to see what I made).

There are other tutorials from the Master Forgers over at the Counterfeit Kit Challenge Blog today - why not pop over and see.

Saturday, 14 December 2013

Tagxedo New Year

Jimjams - Tagxedo Happy New Year cards Today over at the Counterfeit Kit Challenge Blog I have a post about making VERY quick Tagxedo New Year's cards

If you like Tagxedo as much as I do you may want to play around with it to produce something a little more complicated.

I searched for multi-lingual versions of "Happy New Year" and plugged them into Tagxedo to produce this multi-lingual card:

Jimjams - Tagxedo Happy New Year card

Ring the changes with a different colour-way and layout:

Jimjams - Tagxedo Happy New Year cards

Or change the shape:

Jimjams - Tagxedo Happy New Year cards 

I used the following words for all three cards:
Gelukkig~Nieuwjaar Bonne~Année Buon~Anno
Ein~Guten~Rutsch Feliz~Ano~Novo Gott~Nytt~År
Feliz~Año~Nuevo Blwyddyn~Newydd~Dda Onnellista~Uutta~Vuotta
Mutlu~Yıllar Godt~Nyttår
Sretna~Nova~Godina Boldog~Új~Évet

Gelukkig~Nieuwjaar Bonne~Année Buon~~~Anno
Ein~Guten~~Rutsch Gott~Nytt~År
Feliz~Año~~Nuevo

Happy~~~New~Year:20:@0:#ff0000
The tilde (~) characters keeps associated words together, twice (~~) will stop them from being on separate lines, thrice {~~~) will force a line break.  The text in red is the RGB code to make the words "Happy New Year" appear in red!  The 20 forces "Happy New Year" to be the biggest phrase and the @0 apparently forces it to be horizontal (though I'm still not convinced)!

The other settings are the defaults apart from:
Respins:
Shape = Oval / Star
Theme = Pi Palette / Quiet Morning / Citrus Wasabi
Font = Euphorogenic
Orientation = H/V

Word:
Remove Common Words = No
Combine Related Words = No
Combine Identical Words = No

Layout:
Max Word Count = 50
Normalize Frequency = Yes
Hard Boundary = Yes
Allow Replication = No
You do need to respin the layouts and colours a few time to find a design you're happy with - but it doesn't take long to save, crop and print once you've found it.  Have fun!

P.S. Use this link to see all my Tagxedo card ideas 

Sunday, 7 October 2012

Blue, I Love You #2

If you're looking for my Counterfeit Kit for October you need to go to the next post here - or you could stay a while and read my story for the first Sunday of October - part of Siân's Storytelling Sundays - why not join in yourself?  Everyone is welcome to tell a tale.

Now I was going to tell a tale of dressing up as per Siân's prompt ... but then I was working on my counterfeiting and a song started playing in my head.  A song that I've listened to again and again during the last 14,978 days.  A song that was the title track of the very first album I owned.  On cassette.  For my brand new tape player.  A song that I made into a layout last year.

Layout - Blue - Jimjams
Lots of Tagxedo use with the lyrics!
Thank you, big brother, for giving me such enduring listening pleasure for my birthday all that time ago.

And here it is for YOU to listen to - enjoy!


P.S. Come back next month to see me in Fancy Dress!!!
P.P.S.  Now go over to Siân's for some proper Fancy Storytelling

Wednesday, 1 August 2012

Blogiversary #2

I nearly missed it - my second Blogiversary!  Last year I was very organised and had an anniversary blog hop; this year I only remembered because I spotted an up-coming Blogiversary over at Beverly's place.  Ooops!!!

Tagxedo #2

To celebrate, here is a Taxedo made from the recurring words on my blog ... lots of counterfeiting, numbers, stories, books, children and a fair bit of scrapping!

Thank YOU

to all of you who have left me interesting comments (2973 comments - not sure how many different commenters), those of you who have become followers (76), my many silent visitors who add their flags at the bottom of the page (8495 visitors from 74 countries) and all of you lovely fellow bloggers that have kept me company, encouraged me and inspired me during the last two years :o)

Friday, 23 March 2012

Flower Power

200th blog post with Tagxedo flowers - Jimjams

A while back I shared Ten Cards on the Tenth and some of my readers admired the flower-powered 21st birthday card (see below) which I'd made with Tagxedo.
In honour of my 200th blog post here are some pointers to help you get started:

First of all the flowers are from Saru's Flower Ding Font available free from dafont here.
You will need to download it to your computer then add it to Tagxedo from the Font menu.
Then you need to choose the flowers you like - by their letter equivalents - and load those letters into Tagxedo.  Don't worry if nothing shows up yet there are a few settings that need tweaking.

I loaded the following letters corresponding to flower shapes I liked:
A B C D G H I L M O V W X o p x y
I repeated them a few times each and added a heart character as well:
♥:50:@0
A A A B B B B B B B B B B C C C C D D D D D
G G G G G G G G H H H H H H H H H I I I I I I I I L L L L L L L L
M M M M M O O O O O O O O O O V V V V V V V V V V V V V W W W W W W
X X X X X X X X o o o o o o o p p p p p x x x x x x x x x y y y y y y
The 50 forces the ♥ to be the most frequent character and the @0 forces it to be horizontal.

I chose a number as my Tagxedo shape in the ChunkFive font (a nice thick shape to fill with flowers).  There's a new option on Tagxedo to invert the shapes now so I inverted one of the zeros for a different look.

All settings are the defaults apart from:
Respins:
Theme = Limeade On Ice / Tibetan Monk / Shades Of Red
Font = Saru's Flower Ding (must be added to the available fonts before you can select it)
Orientation = Any
Options:
Shape = 2 / 0 inverted / 0
Word:
          Punctuations = Yes (this allows the to show)
          Remove Common Words = No
          Combine Related Words = No
          Combine Identical Words = No
Layout:
          Max Word Count = 150 (stops the flowers getting too small - for printing out reduce it further)
          Normalize Frequency = Yes (smooths out the variation in word frequencies between 3 & 50)
          Hard Boundary = Yes (makes the shape seem more defined)
Hopefully these settings will help you get started - you can keep altering options until you see something you like and the History Option is worth looking at if you preferred an earlier version - just click on it to reload it.
Of course, my colour themes have a black background for a snazzy blog post - for printing on card you need to choose one with a white background to save on ink!

21st Birthday Card with Tagxedo flowers - Jimjams
My 21st card uses the Happy Brights colour theme

Friday, 10 February 2012

Ten on the Tenth: Cards

I started out post-parenthood crafting as a card-maker but found it dispiriting to give away all my creations.  I would make two of each card: one to send away and one to keep for myself in reserve!  Then I discovered scrapbooking and practically stopped making cards.  Some of my card-making tools & supplies have been used in my layouts, but just recently I have been dabbling in card-making again ... with my scrapbooking tools & supplies!

Cards for all sorts of occasions ...

New Baby Card
Birthday Flowers
Civil Partnership Card (made with Tagxedo.com)
Thank You cards (from my guest post over at the Counterfeit Kit Challenge Blog):
Merry Christmas (see this post for Tagxedo help)
Get Well Soon
To say "Hello ... I love you!"
 ... and most recently, a card to celebrate my dear friend Hilary's 50th birthday:
Bunting - YAY!   ;o)
It is still tempting to make an extra card to keep ... but so far that little habit is helping me get organised with cards ready for next month's occasions!
Well that's my Ten on the Tenth for this month ... there will be lots more tens over at Shimelle's place (later) today!

Wednesday, 28 December 2011

Thank You

Two little words - but so important!  Here in the blogging world I often come across people who strive to add a little "Today I am grateful for ..." sentence to the end of their posts.  Some of you spend a whole month displaying a really keen attitude of gratitude.  It's good to reflect on what we have rather than want we think is missing (most of which we could manage without).

Today it's my 2nd Guest Post over at the Counterfeit Kit Challenge Blog and it's all about saying "Thank you" - or rather it's about sending gratitude in a Thank You card!  Over there I've shared some card inspiration to make things a little more interesting (without eating up too much of my/your precious time) - and I also linked from there back to here because I wanted to help make this card:


It's made using Tagxedo which regular readers will know that I love ... but if you have spent less time fiddling with it than I have, you may need some short-cuts to making a similar card (no point in re-inventing the wheel eh?!).

I loaded the following words:
merci danke~schön arigato tack~så~mycket muchas~gracias
спасибо dziękuję obrigado grazie toda~raba mahalo~nui~loa
kiitos bedankt ευχαριστίες takk diolch salamat
merci danke~schön arigato tack~så~mycket muchas~gracias
спасибо dziękuję obrigado grazie toda~raba mahalo~nui~loa
kiitos bedankt ευχαριστίες takk diolch salamat
merci danke~schön arigato tack~så~mycket muchas~gracias
спасибо dziękuję obrigado grazie toda~raba mahalo~nui~loa
kiitos bedankt ευχαριστίες takk diolch salamat
thanks:200:@0:#ff0000
The tilde (~) characters keeps associated words together and the text in red is the RGB code to make the word "thanks" appear in red!  The 200 forces "thanks" to be the biggest word and the @0 apparently forces it to be horizontal (though I'm not convinced)!

All settings are the defaults apart from:
Respins:
Theme = Shades of Grey
Font = Euphorogenic
Orientation = H/V
Options:
Shape = Heart (the 5th variation - above the 2nd horse!)
Word: (I wanted some repetition of words other than thanks)
          Remove Common Words = No
          Combine Related Words = No
          Combine Identical Words = No
Layout:
          Max Word Count = 50 (stops the words getting unreadably small)
          Normalize Frequency = Yes (smooths out the variation in word frequencies between 3 & 200)
          Hard Boundary = Yes (makes the shape seem more defined)
Hopefully these settings will help you get started - you can keep altering options until you see something you like and the History Option is worth looking at if you preferred an earlier version - just click on it to reload it.  Have fun and THANK YOU for stopping by!

Sunday, 18 December 2011

Seasons' Greetings

Card detail - Tagxedo Xmas - Jimjams
At last they're done.
Presents and Christmas cards that is.
And delivered (or at least posted ... we shall see how well the Royal Mail does now that there's been half a dozen flakes of snow ...).
So now I can feel less guilty whenever I hear the clunk of the letterbox and the thud of mail hitting our doormat ... but some of my crafty friends are not making it any easier for me by sending gorgeous, clever, crafty hand-made cards ... as I have only sent out shop bought ones!


Take a look at these lovelies from Tracie, K, Mel, Alexa and Claire:

Photos - cards I received
A special thank you to K for the yummy extra in my card
(possibly slightly tempting to someone en route
as both the card and the envelope were ripped!)
Thank you so much for finding the time my friends ... if I had known you in 2005 you'd have definitely received a hand-made card, but having overdosed by making over 100 that year, I only ever make a handful these days!

Regular readers will know that I love to play with Tagxedo - and have whiled away several hours with it to help me make scrapbook pages (here & here) and blog posts this year (here & here).  Lately, I've been playing around with it for card-making and this is the most recent result:

Tagxedo Christmas cards - Jimjams

If you want to know exactly how to selectively colour your text you can check out the Tagxedo blog ... or, alternately, pop back here between Christmas and New Year for my next Counterfeit Kit Challenge post!

Friday, 22 July 2011

Five on Friday #2 (Favourite Pages)

It's been a while since I did my first "Five on a Friday" and so far I haven't blogged any of the pages I made specifically for the various rounds of the UKS Scrap Factor Competition.  So I thought I'd share five of my favourite pages.  As it makes for a photo heavy post, you'll have to go to my UKS Gallery if you want more details about the pages and supplies used (you have to be a registered member, but it's quick & easy & free to join).

Week 3: "This week your layout shall be lyrical. Take inspiration from a favourite song and scrap away with the lyrics, title, or wherever your creativity takes you!"

At that time my favourite on-line tool was Tagxedo and I used it twice to create the background and titling for a BOM page celebrating the first album cassettes I owned - given to me by one of my (step-)brothers.  Still love the music now too.
     

    Week 5: "Create a layout with just ONE photograph. How will you give that image the special treatment?"

    Having recently found our wedding album and several envelopes of photographs languishing in our attic I have a gold-mine of old, old photos ready for scanning and scrapping.  I'd used one wedding photo for the auditions and thought I'd do a page about the adventures that lead to our engagement on the steps of the Sacre Couer in Paris.  The whole sorry tale was part of a Sunday Storytelling here.


    Week 6: "This week choose any theme and style you like, but you must include multiple photos! We challenge you to find unique ways to showcase additional pictures."

    I decided to use a collage method taught to me by Tracie to make the paper for a page showing how No.1 Son has evolved changed over the years.  It was a steep hybrid-learning curve making the overlay that week too.


    Week 8: "This week your layout should be inspired by film or television. How you interpret that is up to you: in visual design, quotation, a literal theme or something else entirely!"

    An opportunity to scrap some photos from 2006 when my three were still building things with Duplo despite having boxes and boxes of Lego available: Child No.3 had built a roller-coaster from the first episode of a crazy Aardman claymation series called Rex The Runt - the title is one of Vince's catchphrases that often gets shouted here as an argument closer!  I had fun with an on-line bar-code generator for this page.


    Week 10: "This week, patterned papers are OFF-LIMITS. Use plain cardstock or solid colours to create a layout that is still true to your style."

    I love bright colourful pages and so a rainbow of textured tissue papers seemed like a way to meet the challenge of having no patterns.  I  used a different technique for each line of colour and word paths to trace my journalling about our day in Chester around the various photos.


    Phew - a long post with a lot of photos - thanks for sticking with me this far :D

    If you do pop over to UKS you can see the final pages of the Scrap Factor Competition from the two remaining contestants Katherine & Nic - voting is still open until Sunday if you haven't yet made a decision. 

      Friday, 10 June 2011

      Ten on the Tenth: Scrapbooking & Blogging

      Shimelle has issued a little challenge over on her blog - to list 10 things on the 10th of each month and everyone is welcome to join in ... listing 10 songs, photos, foods, views, books, people, traits, films ... anything!!!

      So what to do with no daylight for photos, just time to type ... or Google ... or play online ...

      Created from my blog feed with Tagxedo.com
      1. The number of posts to go before I hit my blogging centenary!
      2. The number of teams I am in on UKScrappers (Scrappycats & Scrapadoodledivas)
      3. The number of Shimelle's on-line courses I have done (JYC, LSNED, BFS)
      4. The number of months I have played along with the Counterfeit Kit Challenge Blog (Feb, Mar, Apr & June)
      5. The number of years that I have been scrapbooking
      6. The number of months I have joined in with Storytelling Sunday this year
      7. The number of categories I use within Google Reader to separate out my 65 blog subscriptions
      8. The number of weeks I have taken part in the UKS Scrap Factor competition (so far?!?!)
      9. The number of 12x12 albums on my shelf that are partially filled with layouts
      10. The number of complete months I have been adding to this blog!
      So there you have it - a random list of 10 things to do with my scrapbooking/blogging ... why not pop over to see what other things have been listed here.

        Sunday, 17 April 2011

        Alphanumeric Blog Hop

        Welcome! 
        Are you here for the blog hop? From Jinnag's place?  If so, you're in just the right place.
        If not, please stay a while anyway!

        One of my blog buddies Mel invited a few classmates from Blogging For Scrapbookers to join in with her Alphabetic Blog Hop - quite a few more than 26 people wanted in and so it became Alphanumeric.


        Each participant was assigned a letter or a number ... to make a blog post with.  I was delighted to find that I got the letter ....


        As you can see from the text at the bottom of my picture, I have been having fun creating shaped word clouds over at Tagxedo.  Click on the pic for a closer look at ALL the words beginning with J that I selected!  In fact it was playing around at this site that gave me the idea for my non-photo page shared here.  I have a few more pages in the pipeline using my Tagxedo creations.

        In the words of Porky Pig "That's All Folks!" - it's time to hop on over to K's Crafty Corner - have fun!

        And if you weren't hopping but want to join in - you can start at the very beginning - it's a very good place to start: I Speak Melsh.