Welcome!
If you are hopping along with UKScrappers you should have reached me from
Ifa, but the hop started
here if you have no idea what I'm talking about (there are prizes available for commenting along the way by midnight BST tonight)!
Last year I decided to make a MAXI version of my
Lean Mean Mini-Book with the Mystery Kit from
UKScrappers Now We Are Ten Cybercrop.
Using just 2½ sheets of decent quality double-side paper and 3 sheets of cardstock, it's an eleven page, 5" square mini-book with room for 21 3"x4" photos! I blogged the pages of the book
here and today I am sharing the instructions for the inner pages. It's a photo heavy post, but hopefully all will be clearer that way!
The Inner Pages
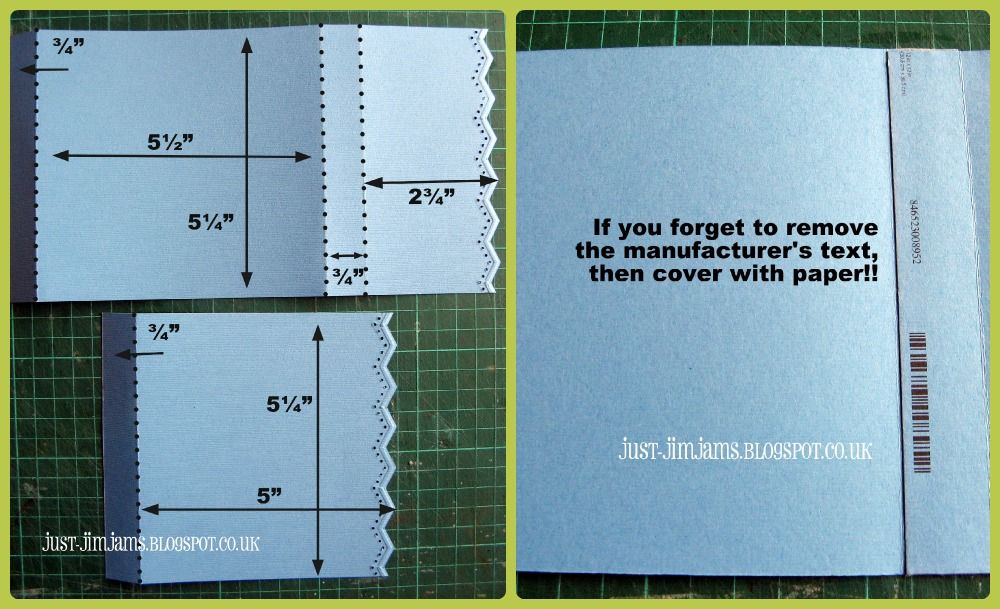
Trim 2" from one edge of two of the patterned papers and cut the remaining sheet into a 6"x12" rectangle (I used Fancy Pants About A Boy Peace, Vivid and Wild Child).
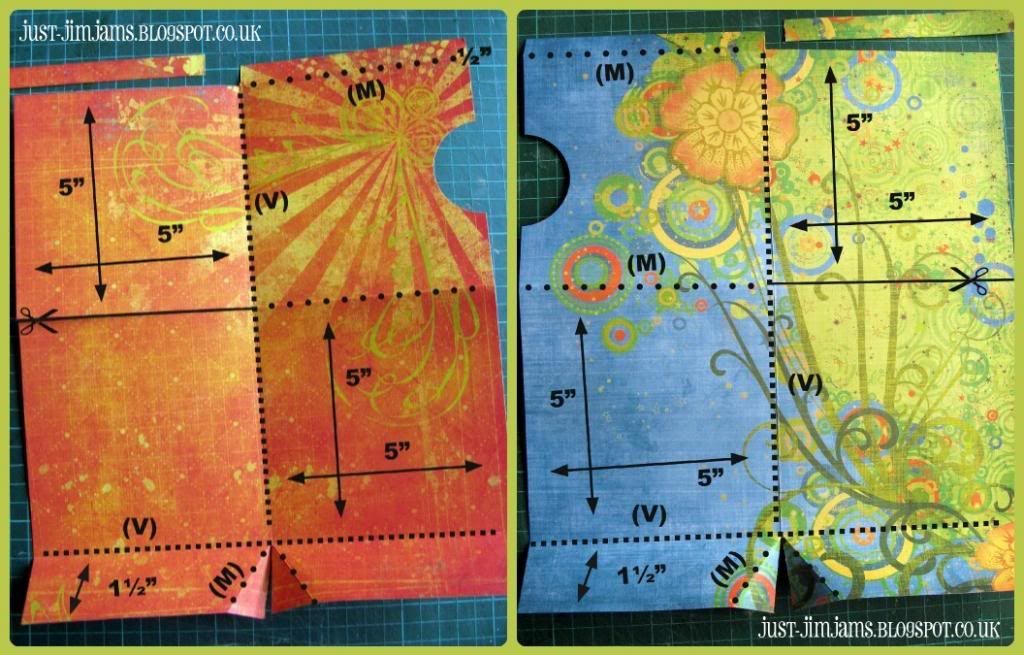
Score the two sheets of 10"x12" paper along the long centre line (5") and score three times across the width (½", 5½" and 10½"). These two sheets form the front and rear sections of the mini-book and are
cut as
mirror images of each other.
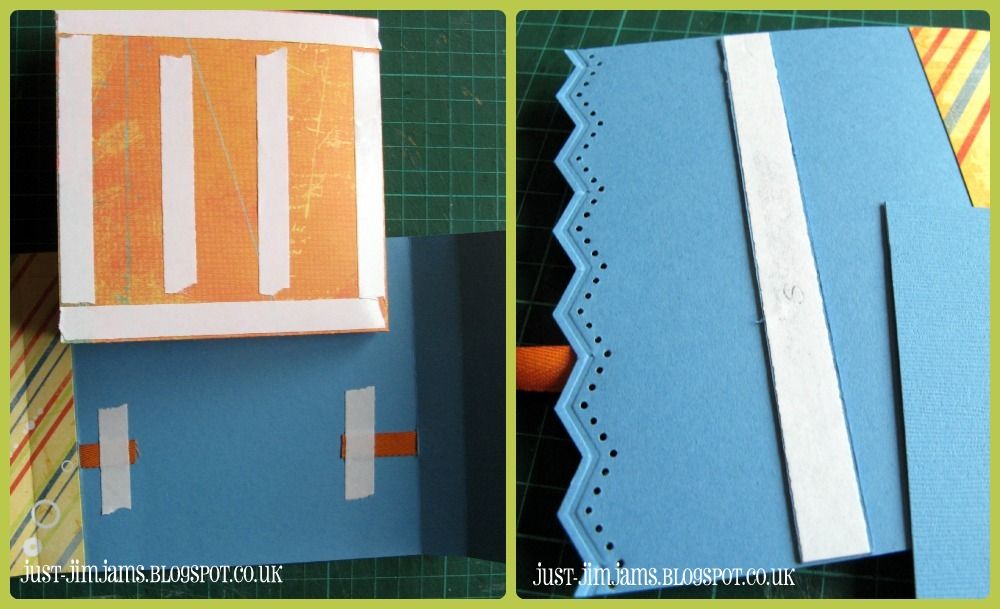
Remove a ½"x5" rectangle from one end of each sheet by cutting along the first width-ways score line to the central score line. Cut a semi-circle from the edge which is still intact to provide a pull-out space for a tag. Cut 5" along the middle width-ways score line
on the opposite side to the semi-circle. Cut 1½" along the central score line to the third score line and fold back the corners as shown in the photo. Crease all score lines as shown in the photo.
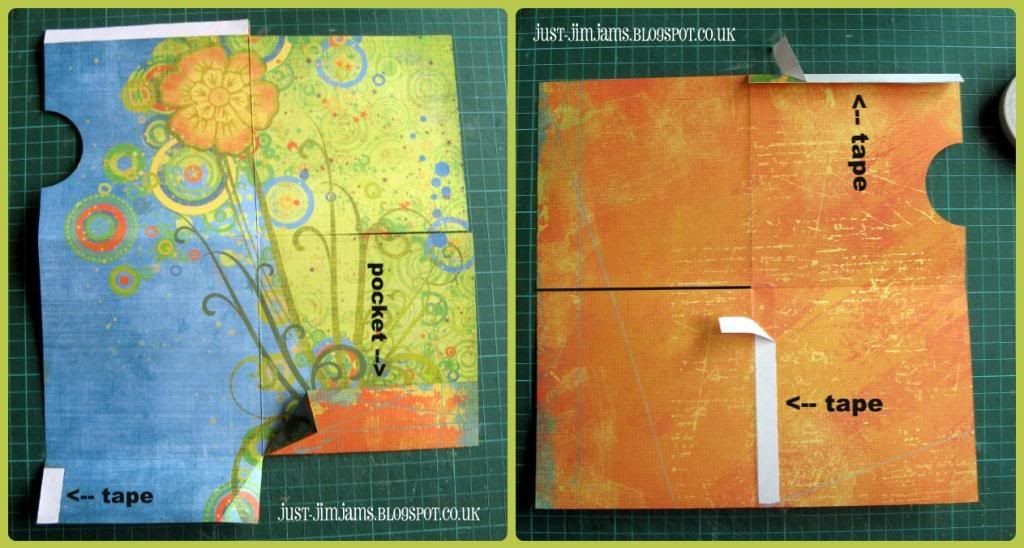
Apply adhesive (I've used double-sided tape) along the small flap at the top of the sheet. Apply adhesive to the outer edges of the bottom flaps and fold upwards to create pockets. Turn the sheet over and apply tape to the same side of the central score line as the top flap & punched semi-circle. Fold the sheet in half (from top to bottom) to form a concealed pocket with a semi-circular cut-out.
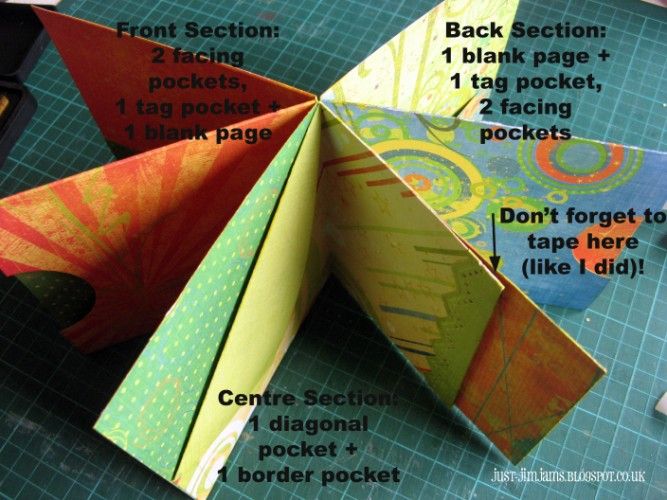
This completes one set of pages for the mini-book (the back pages of mine): containing a plain page, a pocket page with semi-circular cut-out and a double page with facing pockets.
Repeat with the other scored & cut sheet (remembering that you are working on the
mirror image) to form another set of pages: a double page with facing pockets, a pocket page with a semi-circular cut-out and a plain page.
Each of the six pockets have room for tags measuring 4"x4½".
The half sheet of patterned paper is used to join these sets of pages together.
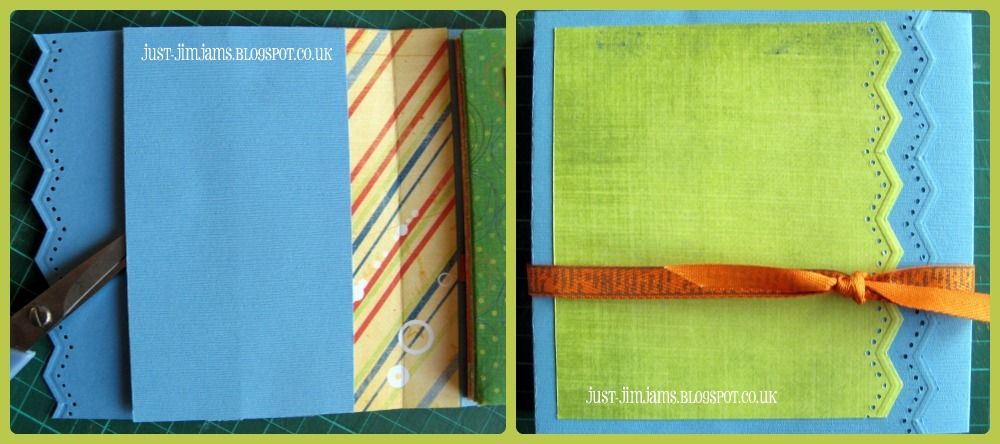
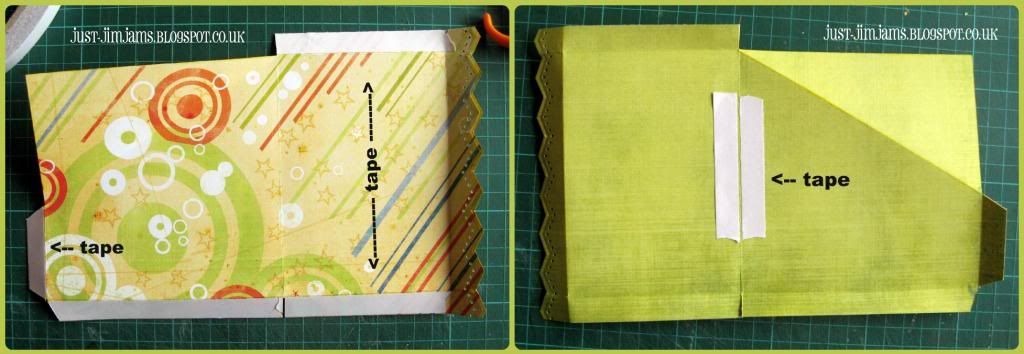
Punch a decorative border along one short edge. Trim the sheet so that it measures 6"x9¾". Score along both long edges of the sheet (½"). Score three times across the short width (½", 5½" and 9").
Trim away excess paper as shown on the photo. Cut in ½" from the bottom edge along the "central" (valley!) score line. Score a diagonal line across from the top centre to a point 3" down the un-punched edge. Crease all score lines as shown in the photo.
Apply adhesive to the ½" flaps as shown in the photo. Turn the sheet over and apply some adhesive either side of the central fold line to seal the rear of the pockets which will be formed in the next step.
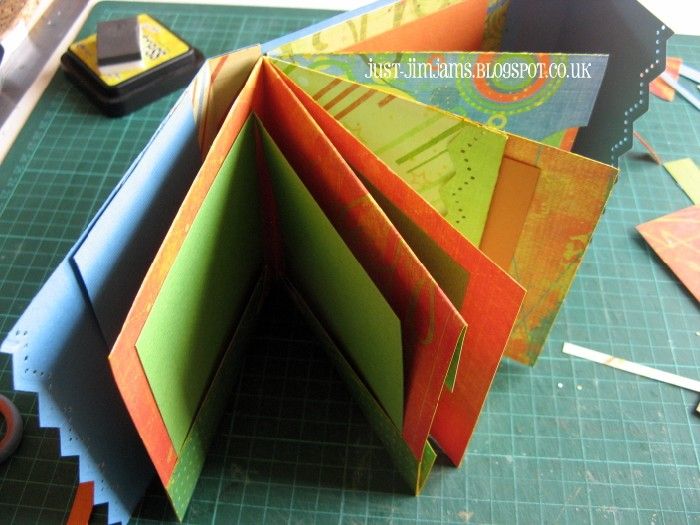
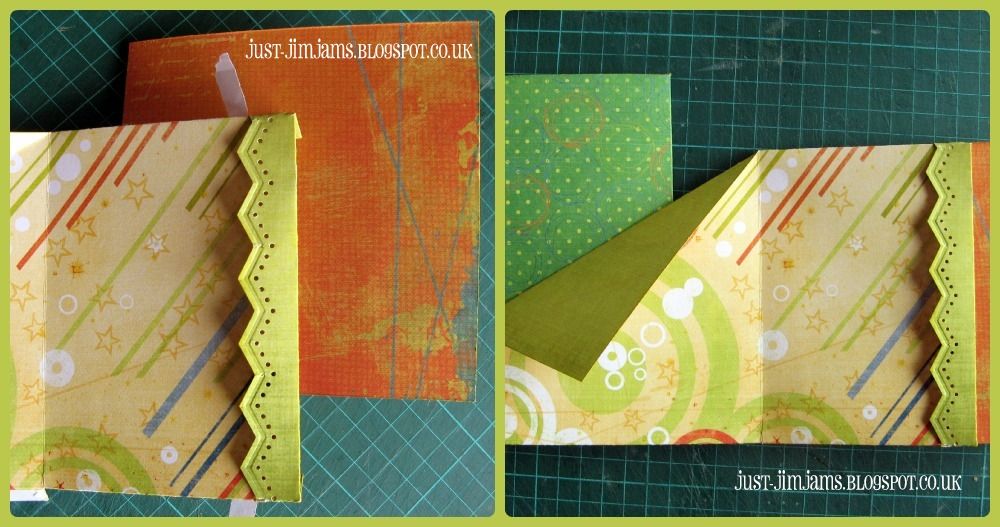
Fold back the punched border and adhere the right hand section to the back of the plain page of the rear set of pages. NB: You will need a little extra adhesive on the flaps where the border folds back
(see photo below)!
Adhere the left-hand section to the back of the plain page of the front set of pages.
The two central pockets have room for tags measuring 4"x4". The inner pages are now complete:
Phew! Well done for sticking with me this far! Tomorrow I'll share the instructions for the cover.
ETA - the cover post is here!
In the meantime, please hop on over to
Kathy to see what she has to share with you today (
but remember to leave a comment, including your UKS name, before midnight tonight in order to be eligible for a prize from UKScrappers).
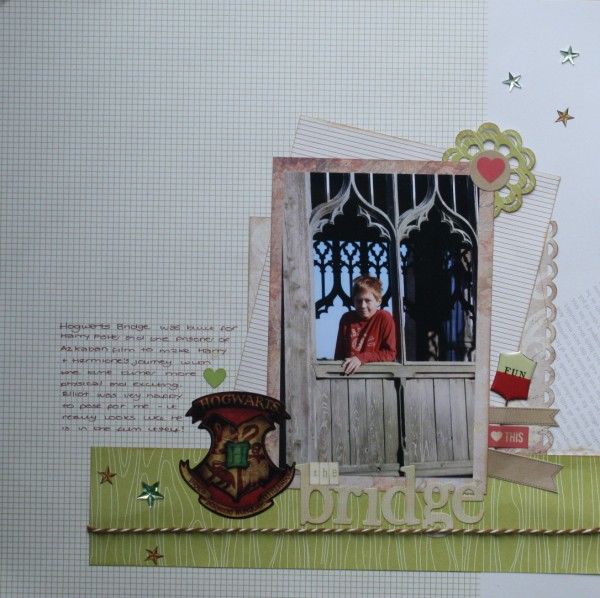
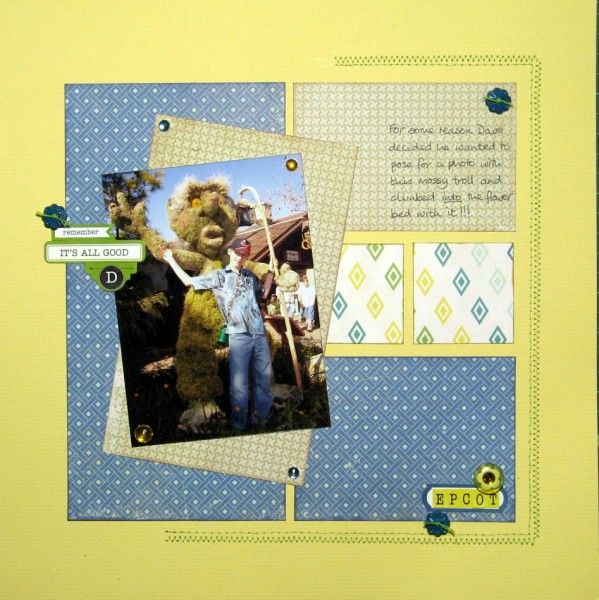
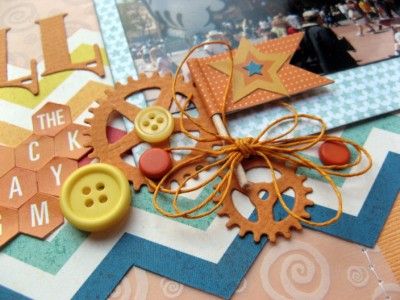 My lovely friend Julie (aka JSquared) is celebrating her 2nd Blogiversary today and is marking it with a Pass the Page. She collected a baker's dozen of us together to each scraplift a page in turn. The person before me in the chain was my very good friend Ruth (if she sent you here then you're on track, if not, you might like to start at the beginning with Julie here). Ruth is currently scrapping photos from her visit to the Harry Potter Studios so it seemed extra appropriate for me to use her page as inspiration for a photo of another magical place (as well a gears & cogs cut from her dies at our Bloggers' Retreat).
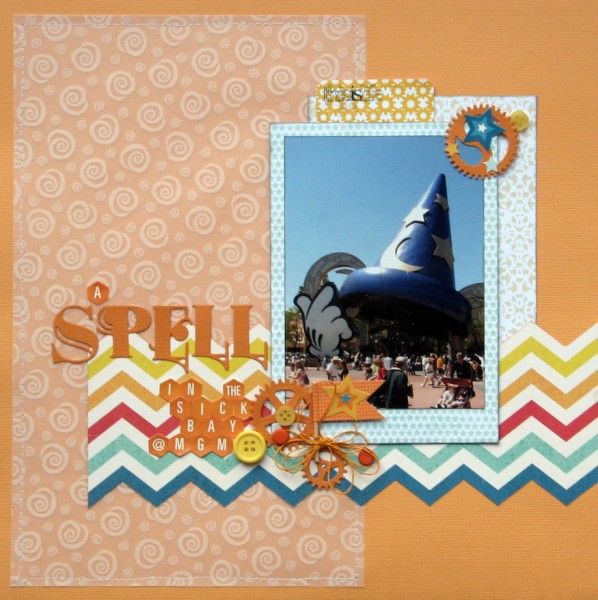
.jpg)