Wednesday 29 February 2012

29 Days Later

During January I went public with my goals for 2012 and it's only fair that I come clean with how well (or badly) I am doing:

Click here to read more
Februaries (!) in numbers
I've managed more pages for my BOM, all of which are in the album (although not organised in chronological order - that's something for 2013 perhaps?)!  I've de-cluttered our under stairs pantry after tipping over a bottle of wine, which smashed on the tiled floor, emptying its 70cl all over the floor and under quite a lot of "stuff" that shouldn't have been there.  The bedroom, started last month is, unfortunately, still ongoing!  I've forgotten three birthdays and remembered two (with home-made cards).  I've been busy with some Guest DT work and plenty of other scrapping, including my page for my January in numbers and, without further ado here are February's numbers:

12 = marbled cup cakes made on the 2nd attempt - it would seem that I have been remiss in teaching Child No.3 (and her friend) how to cream butter, sugar and eggs together without curdling the mixture!

50 = key words in the programming language that Hubby studied during much of his 5 days off - he tries to share with me when he finds something interesting or annoying, but that's all I have remembered!

2 = the number of decades celebrated by No.2 Son with a trip to visit No.1 Son for a Skrillex concert.  Hours he spent in cars, coaches and trains to get there and back: 12


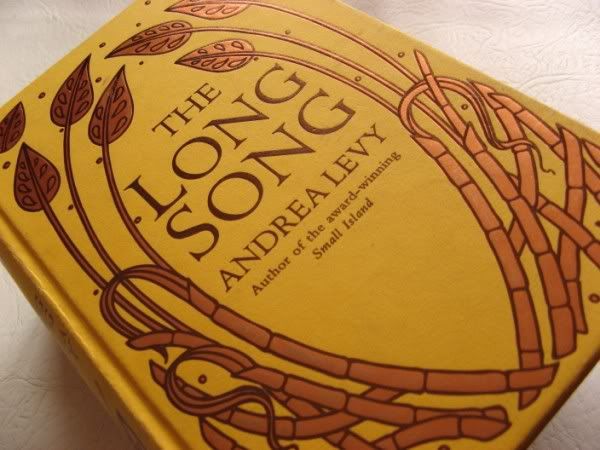
4 = books read this month - "Ours are the Streets" by Sunjeev Sahoter - a very interesting tale of life for a Sheffield Muslim lad as he before and after he becomes radicalised, counting down the days until his suicide mission.  Not an easy read at times, but thought provoking to the end.  "The Passage" by Justin Cronin was bought for Hubby as an emergency birthday present last year, but he loved it and insisted I read it too.  Set in the (not too distant) future it tells an apocalyptic tale of the human struggle against vampire-like zombies!  Lots of excitement and adventure with believable and all to frail and frightened characters, it's the first in a trilogy and I'd like to read more.  My friend from Book Club recommended "The Prison of Perspective" by Rudolf Bader but I can't say I enjoyed this one. It describes the lives of each main character entirely from their own perspective and perhaps because of this, I found them equally selfish and self-centred and ultimately unsympathetic.  Thankfully this month's official choice was great: "The Long Song" by Andrea Levy which was a witty, rollicking tale of the trials and tribulations of slaves (and their white owners) in Jamaica during and after the abolition.

1 = an exercise bike exchanged, 2 months after the on-board computer broke, just 3 months after No.3 child chose it instead of a rabbit!

1 = also how many new recipes I tried - roast duck - and it worked pretty well: juicy, tender, perhaps not quite crispy skinned nor pink enough; there's room for improvement when I try again soon!

10 = days turn-around for 2 new passports which was a relief as there are now just 19 and 27 days to go before they will be needed.

73,392 = worldwide target for geocaches to be logged on February 29th - I did my bit and found 1 :o}

Tuesday 28 February 2012

Between The Lines

A final contribution to
Julie's Month of Sunrays
The third of the Counterfeit Kit Challenge Blog monthly challenges is to get colouring.  I've been borrowing Child No.3's Promarkers a lot recently and decided to see what would happen if I used her extra fine nibs with the pretty patterns to be found inside business envelopes.  I picked out a lovely hexagon pattern and had fun making some sunny flowers.  A few scraps from my February Kit and a card was born.

I'm not certain that colouring in each hexagon individually was worth it, but I do like that the pattern shows on the punched leaves & circles: free, recycled, subtly patterned papers coloured to match perfectly!!

Saturday 25 February 2012

Lost?

Hubby and I often go out for a walk at the weekend.  We tend to tread the same routes around our village, adding variety by going anti-clockwise sometimes ... and whenever we see a sign for a footpath going across the fields we remember we forgot to study the Ordnance Survey map in advance and therefore have no idea where the path will lead! 
We had to laugh last weekend when we were out enjoying the chilly sunshine:

Sometimes too much help is no help at all!

Wednesday 22 February 2012

Hello Doily

The latest challenge over at the Counterfeit Kit Challenge Blog is to use doilies ... not my favourite scrapping resource, but having dipped out of the first challenge this month, I felt obliged to have a go.  Actually it was easier than I thought after spotting this page by Kirsty where she'd made a real statement with her doily by painting it black!  (The page I made with a black doily is here)
For today's page I used Child No.3's Promarkers to add colour to a small doily, picking out the blue in the striped border I used to make chevrons for my page.

I blogged my first Month in Numbers at the end of January and here it is, down on (Scenic Route's double-sided Sonoma patterned) paper:


My doily had 12 sections to it, so after colouring,  I removed 6 of them to see if there was a snowflake vibe to it ... that would be a "No!" ... so I cut it into two sections and layered them to make a dimensional semi-circle.  The chevrons are cut from a striped border from Cosmo Cricket's The Boyfriend Collection.  My numbers were cut with Sizzlit Ducky Wucky dies from my Kraftcore cardstock, sanded and inked to help the numbers stand out.  I added some buttons and a title made from all sorts of random chipboard alphabets pulled from my stash, coloured with black ink to match each other.

In an effort to be ready for February's numbers (and create a facing page for my album), I have half-prepared a page with the same supplies and another border strip from my February Kit along with another Promarker coloured doily - a heart of course!


I'm doubt I will continue with this page design (and doily use LOL) for the rest of the year as I'll get bored, but I'll definitely use matching designs and base colours for each pair of pages - that will work well and save effort!

Monday 20 February 2012

A Story Scrapped

Do you enjoy the Sunday Stories that you read here and via Siân's Blog?  I do - but one of my 2012 goals was to get more of my stories down on paper i.e. into my scrapbooks!  So here is a page from last August's Sunday Storytelling with the memories hidden away on those two pull-out tabs:


The flowers were in my Christmas embellishment swap - thanks Susanne! - and I was inspired to try colouring a doily by this page by Kirsty.  The tiny alpha stickers are by Adornit and come in a mix of colour combinations dominated by black, red and white.  Unfortunately the printing (on my sheet?) isn't quite true so some of the letters end up with a black or grey (or white) strip along one edge which is annoying once the stickers are off the sheet.  I guess that's the trouble with buying my supplies on-line - I have no idea if it's a one-off or a general problem with this range! 


My layout is based on my Just One Sketch sketch - rotated as per prompt 2 of the class - yes I am a little very behind as we just had prompt 11 yesterday!  It's also not square as the page is for my BOM which is 8½"x11" and I've changed the shape behind the photos to a circle and there's no border!  In fact, as usual, I have deviated quite a lot from the sketch - but then I always see sketches as a starting point rather than something to stick to rigidly!  Do you like sketches?  Are they recognisable by the time your page is done?

Saturday 18 February 2012

Brightening My Day

It doesn't take an awful lot to put a really big smile on my face: 

Watching a blackbird pecking at the halved apple I put out near the bushes
The unbidden arrival of a hot, steaming mug of tea
Cherry blossom falling like pink snow
Listening to giggles upstairs
An unexpected hug

And most recently, spotting this month's Reading Group book on the library shelf which means I don't have to order it in specially, and nor do I pay the £1 reservation fee.  On top of that bit of luck I was quite taken aback at how beautiful this particular copy is: a bright sunny yellow cover, embossed front, back  and spine with a bronze design and lettering, with decorated end papers and chapter heading illustrations.  It's not even an old book; published in 2010, the people of Headline Review obviously understand that we readers still appreciate a good cover, even if we don't necessarily judge the book by it!

On the subject of books ... I'm to be a World Book Night Giver ... Hurrah!  Watch this space as some of those books will be given out right here!

P.S. These little rays of sunshine have brightened my day - if you pop over to Julie's blog she has a whole month of sunrays going on!

Wednesday 15 February 2012

Half-Term Hiatus Here

Our plans to go travelling this half-term holiday went out the window, but there are a million and one other things that have been occupying Hubby, Child No.3 and myself - DIY, revision, cinema trips, shopping, clubs, sleepovers, cake-making, reading, de-cluttering, appointments - but sadly not as much crafting as I would have liked.  Hopefully there will be some time for that in the next day or two.  In the meantime here is a page I made earlier:


The photos are from Child No.3's sketch sitting on Las Ramblas in Barcelona last Easter - at least she had a chair to sit on (and an umbrella to shelter under) - Hubby and I  had to stand there for nearly two hours while we first queued for the artist she'd picked out and then watched in fascination as her portrait took shape on the paper.  Made with various papers from my February Counterfeit Kit, with the addition of a scrap of red card and Boys Will Be Boys Sizzlit dies, for a sketch-based challenge over on UKScrappers but also tying in with ATDML's Thirsty Thursdays T challenge for Turquoise and the passage of Time :o)

Friday 10 February 2012

Ten on the Tenth: Cards

I started out post-parenthood crafting as a card-maker but found it dispiriting to give away all my creations.  I would make two of each card: one to send away and one to keep for myself in reserve!  Then I discovered scrapbooking and practically stopped making cards.  Some of my card-making tools & supplies have been used in my layouts, but just recently I have been dabbling in card-making again ... with my scrapbooking tools & supplies!

Cards for all sorts of occasions ...

New Baby Card
Birthday Flowers
Civil Partnership Card (made with Tagxedo.com)
Thank You cards (from my guest post over at the Counterfeit Kit Challenge Blog):
Merry Christmas (see this post for Tagxedo help)
Get Well Soon
To say "Hello ... I love you!"
 ... and most recently, a card to celebrate my dear friend Hilary's 50th birthday:
Bunting - YAY!   ;o)
It is still tempting to make an extra card to keep ... but so far that little habit is helping me get organised with cards ready for next month's occasions!
Well that's my Ten on the Tenth for this month ... there will be lots more tens over at Shimelle's place (later) today!

Wednesday 8 February 2012

Tiddly-om-pom-pom

The Basic Grey Felt Pompoms in this month's kit-to-copy from Scrapbook Circle's Note To Self kit are beautiful but, not having any in my stash, I set out to find a way of counterfeiting them.

This tutorial from Sara at Craft Snob was the nearest I could find but wasn't that close to the BG original.  However with a couple of minor adaptations I have come up with what I think is a pretty close approximation for the pompoms in the kit.


For a 1½" (38mm) wide pompom you need a strip of felt measuring 3½" (9cm) long by ... well that depends!!
{I'm too lazy to get out my glue gun or my needle and thread, so I used sticky tape!  Ideally it should be nice and thin (⅛"/3mm), but if you don't have any, you can use "standard" (½"/1cm) tape instead, though it is more wasteful of the felt!}
The width of your strip of felt needs to be twice the width of your roll of double-sided tape plus 1" (2.5cm).  So with a narrow tape (⅛") the strip measures 1¼" and with a wider one (½") it measures 2".

1. Stick the tape along one long edge of the felt.  Fold it in half lengthways so that the long edges meet and a tube of sorts is formed.  Stick another strip of tape along the long edge (but don't remove the backing paper yet).


2. Make lots of  ½" (13mm) cuts into the folded side of the strip (stopping at the edge of the tape) - these will form the loopy bits of the pompom.  Mine are about ⅛" (3mm) wide.

3. For the coloured string I used the spare string from a parcel tag and coloured it with one of Child No.3 's Promarkers.  Embroidery thread would work too ... or thin yarn ...  My parcel tag string was 10" (26cm) long.

4. If you've used wider tape you can now trim your felt strip along the taped edge so that the tape strip is about ⅛" (3mm) deep.  This will help to reduce the height of the finished pom pom.


5. Stick the coloured string to the exposed tape in loops about 1" (2.5cm) in from one end of the felt strip.

6. Roll the felt strip up tightly, starting at the end with most string stuck to it.

7. Using some fast-drying liquid glue (Superglue, Diamond Glaze, Glossy Accents) stick the whole shebang to a small scrap of card and you're done!

These are super-quick to make - I decided I needed a smaller pompom than my kit samples for a page I was making at my crop on Saturday and it took maybe 2 minutes to make one with a 2" (5cm) strip of felt (though I didn't add the contrasting threads).

Some memories from my days as Girl Guide in the Swallow patrol
as told here.
Of course, I've used papers and card from my February Counterfeit Kit (with the addition of a MS deep lattice punch, a QK texture folder, Man Oh Man Sizzlit dies and some punched butterflies) and have based this on a vertically challenged version of my Just One Sketch sketch.  It also fits rather nicely with this week's UKScrappers' challenge and Julie Kirk's Month of Sunrays too :o)

Monday 6 February 2012

Note To Self

Welcome to my regular readers, welcome fellow counterfeiters from Helens's blog or the Counterfeit Kit Challenge Blog and of course welcome to anyone else who has stumbled across me in their surfing - take a seat and have a look at what I was up to last week:
 

Crop Circle's Note To Self is the kit-to-copy over at the CKCB this month (well actually there is a choice of two to copy but I've avoided the pink one LOL).  I loved the bright mish mash of patterns, colours and journalling spots in the alternative kit, but where to start with the counterfeiting?


I noticed that there were lots of letters featured on the papers and searched through my stash for colourful examples ... but found only numbers.  Ever one to change things up, I grabbed them and started matching other parts of the kit ...
  • colourful circles √
  • multi-coloured stripes √
  • chevrons - I'll make them from the stripes √
  • semi-circles for borders and patterns - I grabbed some circular punches √
  • journalling spots in a mix of colours √ plus stamps to make more if required √
  • lots of words and phrases to embellish with √
  • tiny alphas in various shades and fonts √
  • index cards & file tabs - another punch and a Sizzlit die will do the honours here √
  • felt pompoms - I adapted an on-line tutorial and counterfeited my own √
Mmmm - I'm not entirely convinced that anyone would
mistake the two kits as twins - distant cousins perhaps?!
Supplies:
Scenic Route's Sierra Place Sonoma (red & cream numbers on the reverse),
Create and Enjoy from Basic Grey's Colour Me Silly collection (will it never end?) along with Demerit, Home Room and monograms from their Recess line
Daidy D's Beacon Hill Stripe
Art Appreciation, Study Hall, borders & journalling cards from Cosmo Cricket's The Boyfriend collection
Bits & Pieces and High 5 from Clubhouse by Dream Street Papers (journalling spots & brown on their reverse sides)
MLS Blackberry Mini Alphas, Websters Pages Storytellers alphas, Adornit Tiny Whoopsy Teal alphas, American Crafts Peacock Mini Marks rub-ons
Scraps of Seaglass by K&Co for the word-fetti

Various tools to help me counterfeit have been made ready, and I'll be adding some embossing folders to make up for the lack of corrugated card!
There was no mention of cardstock in the kit list, but I can't manage without it for matting, journalling, titles etc so I added some sheets of yellow, green, orange and some new (to me) teal coloured kraft-core cardstock from Core'dinations.

Please come back in a couple of days for my pompom tutorial.  In the meantime, do pop over to Jen to see her interpretation of the kits-to-copy!

Sunday 5 February 2012

Carry On Camping

Having joined in with each and every month's Sunday Storytelling during 2011, I was a little miffed with myself for missing the very first one in 2012.  Hey ho - never mind - here I am with some tent tales for February.

In my quest to make pages for my BOM I was looking through old photos and found yet another photo of me stood by the apple tree in our front garden.  It seemed to be the place to stand - I have a variety of photos of me with every length of hair, wearing new school uniforms, trouser suits, emerald green hotpants, yellow T-shirt and matching knee length socks (nope never going to share that one!) and also me in my Guide gear:

Me in a 70s girl guide uniform

I loved being a guide and worked towards several badges for baking, local history, path-finding, sewing etc.  I remember one of the most exciting things about our weekly meetings was being in the school building in the evenings! It had such a different atmosphere at night: all those echoing corridors and tempting cupboards!  The really brave amongst us even peeped into the boys' toilets!

Guiding also gave me the opportunity to go camping.  My family had long ago decided that they preferred proper beds, rain-proof roofs and indoor flushing toilets so I had never been camping before.  I went away with them for a weekend camp first to make sure that I could cope with life in the wild and happily signed up for a week long camp near East Grinstead (my friend Claire may well be revisiting the very same site this year with her Guide troop).  Back in the day there were fewer rules and regulations about health and safety and so some of us were transported, along with tents, cooking equipment, food and bags in the back of a furniture removal van!  We all thought it was very exciting but my present day self is aghast at the thought of it!

The high spot of the week for me was falling asleep under the stars when it was our patrol's turn to sleep outside the tent.  I also enjoyed tying sticks together to build "tables" and "shelves" for inside the tent - they generally collapsed if you walked too close to them or lashed out an arm in the middle of the night but it was something to rebuild during the enforced post-lunch rest hour: we didn't have to sleep but were to stay in our tents off our feet!  The latrines were at the other end of the field and, while not off-limits during this time, crawling across the field was a bit of a nightmare as the cows had only recently vacated, leaving surprise packages here and there!  Wellington boots were required footwear as they didn't let the ooze anywhere near your skin and were quickly rinsed clean if you missed a step.

Less happy memories include the rain coming into our tent on the first night - nobody had told us NOT to touch the inside surface and we thought it was strange that the more we touched the bigger the drips of water ... until it was practically raining inside the tent and we had to decamp (literally) into the First Aid tent for the rest of the week.  The weather improved, allowing us to sleep out, get stung by wasps that crawled inside our wellies and dried off the top of the cow pats making them less gooey to tread on.  Unfortunately that also meant that they could be picked up (exposing the still oozy, smelly under-surface) and flung at other people, sometimes rather too accurately - I never have quite forgiven a certain "friend" for aiming at my head instead of my boots!  YUK!
 
Want a less filthy tale?  Have something smutty sunny to share yourself?  Pop over to Siân's place for more memories.

P.S. The page prompted by the photo is already done, but has to wait a while as it's using the only-just-announced-outside-the-Master-Forgers February Counterfeit Kit!

P.P.S, It's now up on my blog here!

Friday 3 February 2012

Five on Friday #3 (Fonts)

Reviewing my blog posts from the beginning of last year I came across one where I had hand-cut my stamped title (always less scary than stamping directly onto a nearly finished page) and where I admitted to suffering occasional pangs of electronic cutting machine envy: all I have is a Sizzix Sidekick and a few second-hand or sales alphabet dies.  As I said at the time, I soon get over it when I remember that I have free fonts, a printer and a something to cut with!  I then promised to share the computer fonts that I love to hand-cut for titles ... the following week!
HA!
I'm afraid that didn't happen, but I'm here today to resurrect my (also long neglected) "Five on Friday" theme and hereby present to you:

Five Fonts I Like to Hand-Cut


This is the same font as the Banana Frog stamps from the aforementioned page and it's great to print out directly onto your card or patterned paper.  There are no fiddly middle holes of letters to worry about so it's easy peasy to do.


This also comes with a bold version that is the inverse i.e. coloured dots on a clear letter (with a coloured outline).  Upper case only and you could just cut around the outside edges and leave the "holes" in place on letters like A B D O P Q R and even G.

The next three fonts can be printed out onto the front of your card or paper, but I tend to reverse them using my printer settings (or flipping them if they are in a suitable word processing package) and print them on the back of the paper or card, preferably in draft or outline mode to save on ink. 


This uni-case font is a pretty close match to the one used by Basic Grey for many of their alpha stickers - great for adding a monogram to match.


I love the flicks and curves on this font, but it's easier to cut if you choose upper case letters only.  I'm told that cutting with a craft knife on a glass mat is the best way to cope with the more difficult fonts, but I generally manage with a combination of my Fiskars fingerblade on a normal cutting mat and the occasional use of curved detail scissors.  Slow and steady wins the race - and if you snip a tiny bit too much off you can always reprint or stick a flower over the join (see below)!

I have the Banana Frog stamps to match this one too.  The vowels come in upper and lower case variants with the rest of the letters being a mix of both.  Cutting it out is a bit of a labour of love to be honest, but I do love it so I'm happy to labour!  Make your title BIG & BOLD & SHORT to minimise your pain!


    These fonts are all free from various sites: Steelfish Outline, Budmo Jiggler, Cafe Rojo, Tennessee Heavy SF, Pharmacy.  Only three of them have the £, $, ¥ and  € signs as well as the important punctuation marks like !, ?, ", &, and various brackets - I hate it when I choose a font, only to discover that half the characters I might need are missing - but for titles I can generally cope without the currency signs!

    Do you like to hand-cut your titles?  What fonts would you recommend?