 ♣ Happy St Patrick's Day ♣
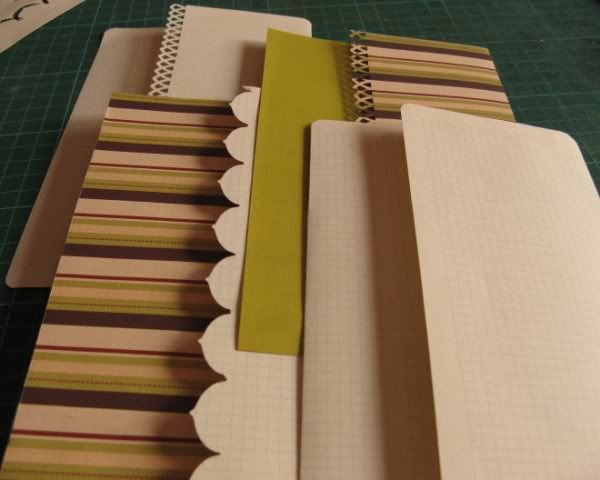
Part of March's Counterfeit kit-to-copy featured some KI 5” x 10” ledger pockets (in the Studio Calico Babbling Brook Add-on Kit) which have side gussets to allow them to hold more “stuff” - several tags, tickets, pieces of ephemera, photos etc. Yet another item in the kit that I don't have in my stash. So, in the spirit of the CKCB I decided to have a go at counterfeiting rather than just substituting an ordinary envelope.
I had a couple of false starts but that’s how you learn right?! In case you wish to learn from my mistakes here's a step by step guide.
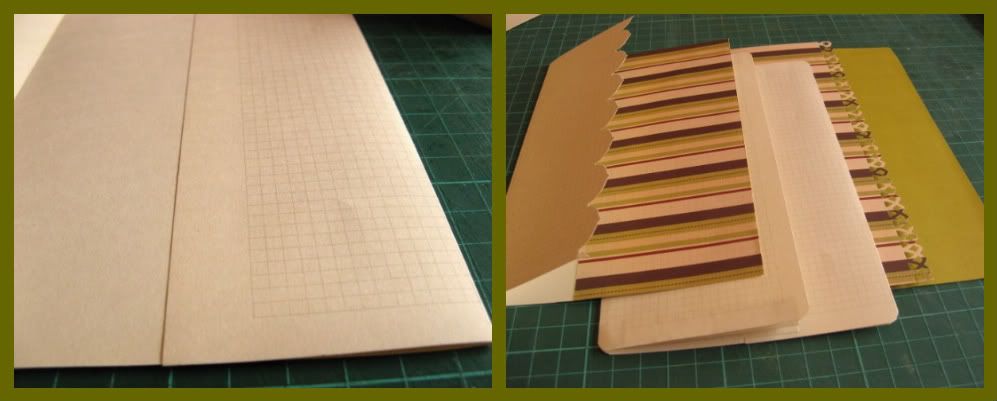
Instead of ledger paper, I used some blank pages saved from a childhood stamp album. They measure approximately 22cm x 26½cm (8½” x 10”), have a grid on one side and are plain on the other. The finished pockets measure around 11½cm x 18cm (4½” x 7”) with the actual pocket being 8cm (3”) deep, but that was largely determined by the grid pattern - the method can be adapted to any size of paper though.
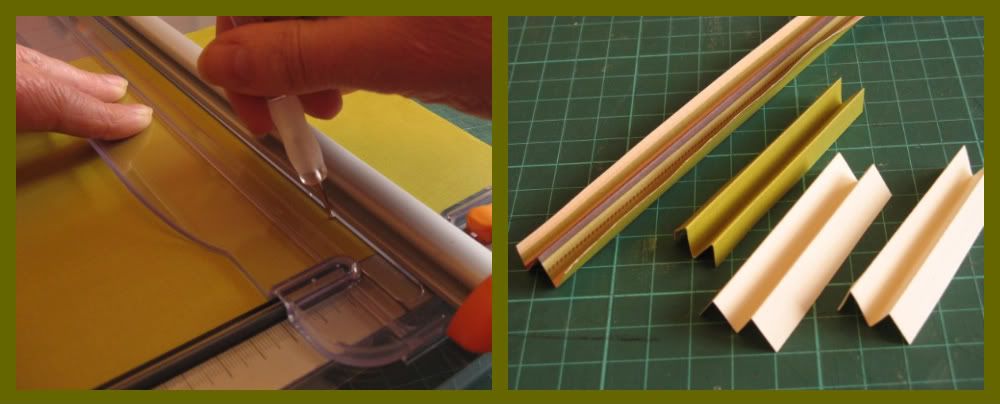
To make the gussets first score 1cm (⅜”), 2cm (¾”) and 3cm (1⅛”) in from the long edge of a piece of paper measuring around 4cm x 15cm (1½” x 6”). NB: I scored along the spare long edge of my stamp album paper, and then trimmed it off.
I ran a scoring tool along the cutting edge of my trimmer - a scoring blade or scoring board would work too, or just measure with a ruler and score along that.
Fold along the score lines to make a zig-zag profile and crease well. Trim this strip to make two gussets which are just slightly less than the depth of the actual pocket, taking account of any borders you intend to cut.
For the actual pocket score 8cm (3”) up from the short side of the remaining paper.
The next step depends on whether you use single or double sided papers.
For double-sided papers: Trim the paper to measure 19½cm (7½”). Decide which pattern you want to be at the back of the pocket and fold along the score line accordingly.
For single-sided papers: Score again around 11½cm (4½”) away from the previous score line. Fold the paper along this score line (wrong sides together) so that the plain back of the paper is concealed and glue down. Fold along the remaining score line to form the pocket and concealing the plain back of the paper.
 |
| Folding plain sides together to cover the pocket back Single- & double-sided papers give different effects |
An alternative for single-sided papers is to use the double-sided paper method and cover the plain back of the pocket with a sheet of matching or contrasting paper the same width as your pocket and around 6cm (2½”) deep.
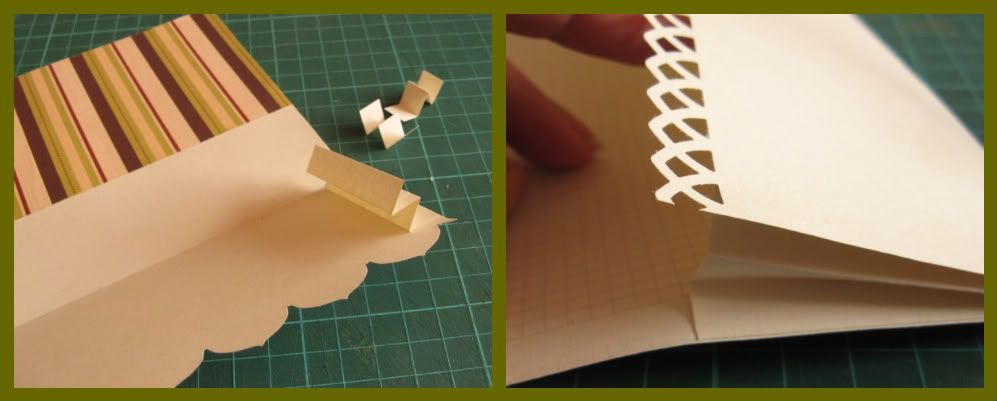
If you want to use border or corner punches on the pocket flap, now is the time to do it!
Stick the gusset strips to the underside of the pocket flap along both the left and right edges.
Apply glue/tape to the other side of each gusset and stick the pocket flap to the back of the pocket. Round some/all of the four remaining corners and you’re done!
KI make these pockets in lots of different sizes: 12x12, 10x5, 5x5 and 3x3, with some fabulous colour combos and border styles ... I can see I shall be doing lots more counterfeiting; after all imitation is the sincerest form of flattery!


9 comments:
Thanks Jemma this is great, have now made a pocket to take some very small photo that Danny took with my camera
These are fab - anything with pockets works for me because I really like hiding extra bits to find on my pages.
Your tutorial seems very thorough. Can't wait to try this out. Thanks for sharing!
They look great...cann't wait to try them!
Oh, thanks for this - they look fab! xx
These are great looking. Thanks for the tutorial.
Ang
Love your pockets!
Way cool - thanks for sharing!
Hi Jemma- I'm so glad I just found your tutorial. It turned out great and it's just what I need for something I was thinking for next month. Thank you!
Post a Comment