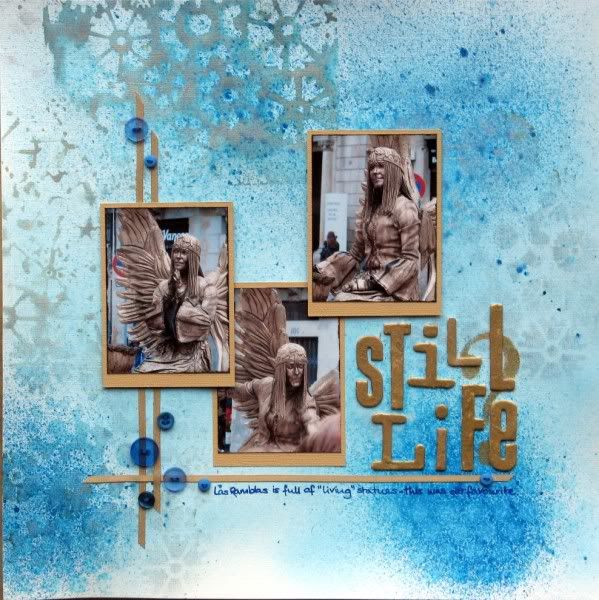
Here's another page from my Green Button Retreat last weekend - from a misting and masking class by Ali. She generously shared dozens of misting inks, masks and templates so that we could all have a few goes with her techniques. This was my third (and final) attempt!!
It was all a bit random and uncontrolled for my mathematically ordered brain - but once I stopped trying to control the spray and allowed myself to "go with the flow" I really enjoyed myself. Thank you Ali for your generosity - perhaps I'll put some mists on my birthday list!
I used Ali's cogs and sequin waste masks plus two colours of blue and a lovely delicate shimmery mist to tone perfectly with No.3 Child's photos of a street artist we'd seen in Las Ramblas in Barcelona.
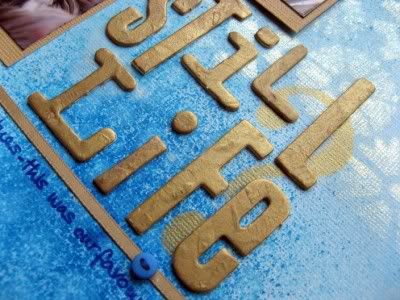
I used gold acrylic paint to stencil through the waste from a chipboard question mark and painted a variety of chipboard letters with a thick and lumpy layer of paint for my title. I don't know what I'd do without chipboard alphas in my supplies - I buy white or plain and cover them with paint, paper, embossing powder to go with my projects - they are so versatile!! Do you like chipboard? Why not check out what other people have been doing with chipboard here at Scrapbookers Anonymous. I'm also playing along with ATDML's A-Z challenge - with C for Cosmic Shimmer!
Thursday, 29 September 2011
Tuesday, 27 September 2011
Shared Stamping
Welcome to my post for the CKCB Master Forgers' Blog Hop - you may have joined me from Kim, or just happened by - in which case, feel free to catch up with previous hops by starting at the Counterfeit Kit Challenge Blog. This month's hopping is sponsored by one of the Master Forgers, Sherri, and her Etsy Shop selling Ippity Stamps.
I've just returned from the most brilliant weekend away: scrapping with friends old and brand new!! My UKScrappers team is part of a "house" and a bunch of the girls from our "house" teams got together for a meet up near Birmingham. A few of us had done classes & challenges to share and the weekend was packed full with creativity, chat and chocolate ... plus 3 meals a day with NO washing up to do! Heaven!!!!
One of the classes was given by my good friend Claire K. I knew in advance that it would be perfect for this post as she was sharing a stamping technique which is surprisingly quick and easy to do and creates a really effective decorative frame for your page! I saved some of my September Counterfeit Kit especially for this and, with Claire's permission, I took photos of my page as the class progressed so that I could share with you.
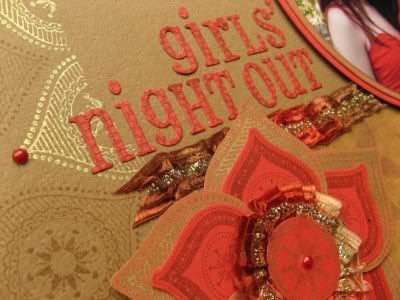
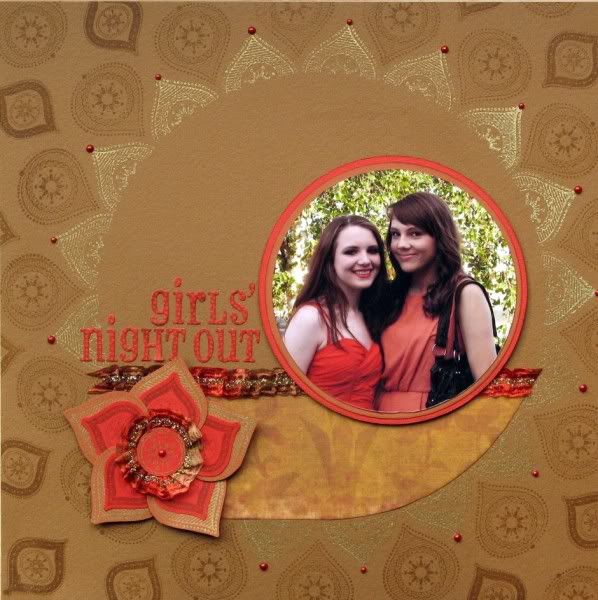
As you can see I got carried away with another bauble stamp on my background and also used it to help make layered petals for my "flower". I toned down the Quickutz Blossom die-cut title lettering by overstamping with an Artemio dotted circle stamp.
Many, many thanks to Claire for a great technique (and allowing me to share it today) and a special thank you to a class-mate, Karelyn, who lent me her circle-cutting system for my photo mats. Aren't scrappers just the best, most generous people?!?!?!
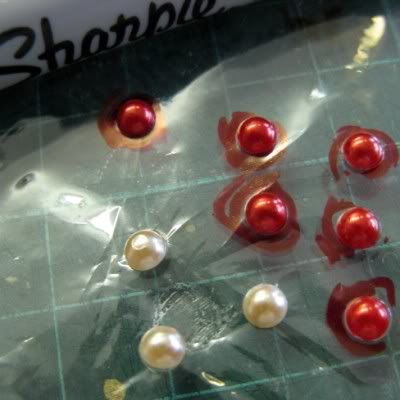
The keen eyed amongst you may notice that I have supplemented my September Counterfeit Kit supplies with red cardstock and fancy ribbon ... but those pearls were in my kit, honest! I just attacked them with a red Sharpie pen!
Oh and I have one more stamping thing to share with you before you hop over to Margie for more stamping surprises ... a free e-zine of The Best of 2010 from Craft Stamper - a seriously lovely UK stamping magazine. Hurry though, as you only have until October 1st to download it!
ETA: Challenge combining as ever .... this is loosely based on Kaisercraft September Sketch #3, ties in with A Trip Down Memory Lane's "D" for Daughter and fits in with Scrapbookers Anonymous' stamping challenge - how many birds have I killed with this page? :P
I've just returned from the most brilliant weekend away: scrapping with friends old and brand new!! My UKScrappers team is part of a "house" and a bunch of the girls from our "house" teams got together for a meet up near Birmingham. A few of us had done classes & challenges to share and the weekend was packed full with creativity, chat and chocolate ... plus 3 meals a day with NO washing up to do! Heaven!!!!
One of the classes was given by my good friend Claire K. I knew in advance that it would be perfect for this post as she was sharing a stamping technique which is surprisingly quick and easy to do and creates a really effective decorative frame for your page! I saved some of my September Counterfeit Kit especially for this and, with Claire's permission, I took photos of my page as the class progressed so that I could share with you.
- Choose a decorative CLEAR stamp, ink, a photo and base card or lightly patterned paper.
- Decide what shape you want your stamped frame to be: circular, square, oval ... or something else entirely??? Cut the shape from scrap paper (I used the back of some unloved old stash but others used the inserts from page protectors).
It's worth practising the next steps on some scrap paper before you try it on your decent stash ... or have a go on the back of your page first!
I've used Kaisercraft Christmas Bauble stamps from their Silly Season line
- Lay your scrap paper shape into position and keep it there with repositionable glue/sticky tak/paper clips/magnetic posts/paperweights/a third hand.
- The stamping around the shape will almost certainly leave a gap or an overlap, so work out where you can conceal this with an embellishment cluster, title letters or a journalling block. Start stamping from this point, around the edge of the scrap paper shape - with part of the stamped image on the scrap paper and part on your background paper or card.
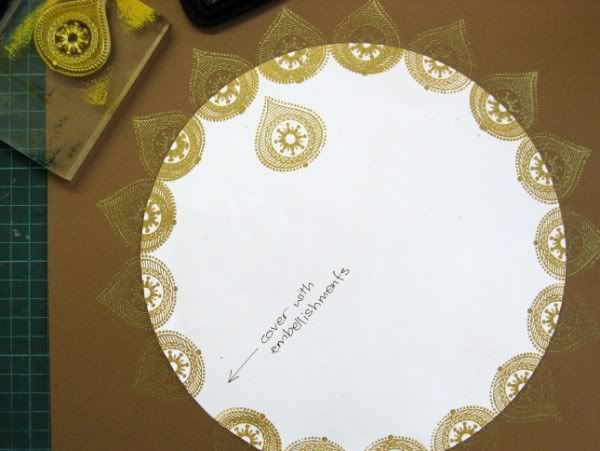
- Remove the scrap paper shape to reveal a crisp outline frame.
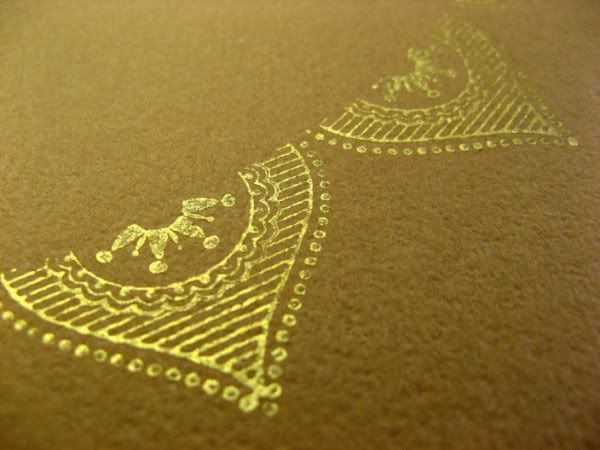
Gold Stazon (lent by Claire) was really effective on my cardstock - You can now use the paper shape as a template to cut patterned paper to fill the centre of the frame if you wish. (I decide to mix it up and just use a partially curved strip of paper across the bottom of my circle)
- Place photo, title, embellishments journalling blocks etc onto your page, not forgetting to conceal that gap/overlap in the stamped frame.
![]() |
| I lined up the centre of the bauble along the edge of the circle with adjacent images just about touching. It didn't always work exactly, but nobody but me will really care! |
As you can see I got carried away with another bauble stamp on my background and also used it to help make layered petals for my "flower". I toned down the Quickutz Blossom die-cut title lettering by overstamping with an Artemio dotted circle stamp.
Many, many thanks to Claire for a great technique (and allowing me to share it today) and a special thank you to a class-mate, Karelyn, who lent me her circle-cutting system for my photo mats. Aren't scrappers just the best, most generous people?!?!?!
The keen eyed amongst you may notice that I have supplemented my September Counterfeit Kit supplies with red cardstock and fancy ribbon ... but those pearls were in my kit, honest! I just attacked them with a red Sharpie pen!
Oh and I have one more stamping thing to share with you before you hop over to Margie for more stamping surprises ... a free e-zine of The Best of 2010 from Craft Stamper - a seriously lovely UK stamping magazine. Hurry though, as you only have until October 1st to download it!
ETA: Challenge combining as ever .... this is loosely based on Kaisercraft September Sketch #3, ties in with A Trip Down Memory Lane's "D" for Daughter and fits in with Scrapbookers Anonymous' stamping challenge - how many birds have I killed with this page? :P
Monday, 26 September 2011
100 Years of Company
I have worked on a voluntary, casual and, more recently, part-time basis at my local theatre for ten years and at the beginning of the month, the theatre celebrated its centenary: 100 years of plays, concerts, magicians, ballets, operas, comedians, films, boxing matches, circuses and entertainment of all kinds. As part of the celebrations Illuminos created a stunning light show which was projected onto the outside of the building telling the story of the theatre's history. You can see the lion that attacked one of its trainers, the fire that ravaged the building, the ghosts that haunt backstage, the bus that was pulled through the streets by the circus strong man, and many famous faces that appeared there over the years including Charlie Chaplin and Stan Laurel. The live show was brilliant so I'm really glad that Illuminos have recorded it so that I can share.
Best watched in Full Screen mode (and for some reason it goes black for a couple of seconds, 3 minutes in)
Labels:
Random
Friday, 23 September 2011
September Stamping
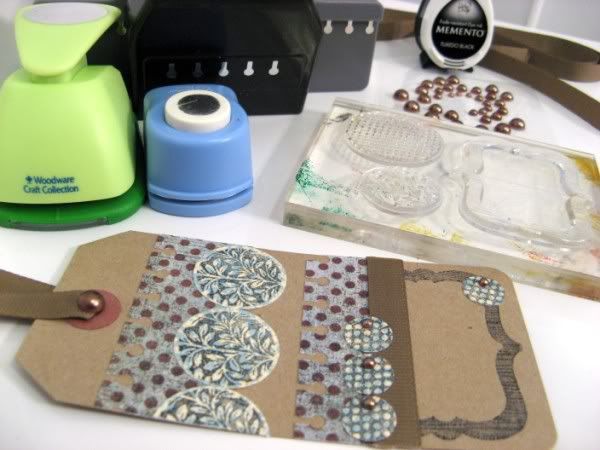
Over at the Counterfeit Kit Challenge Blog this month has been all about stamping - thanks to Sherri (a fellow Master Forger) and her Etsy Shop selling Ippity Stamps. Sherri is sponsoring this month's Blog Hops (on the 26th & 27th). Challenge #3 was to create an embellishment with stamps. I decided to take a plain manilla tag and see what I could do with a few scraps from my Spetember Counterfeit Kit.
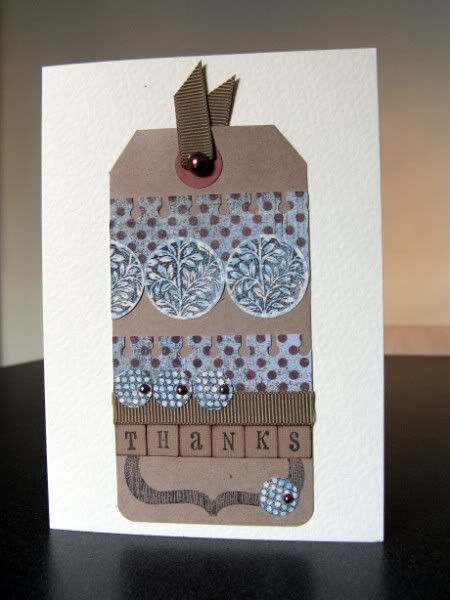
I stamped a wood-grain frame directly onto the tag and added strips of patterned paper after running them through my EK Success border punch. I then stamped the leafy circle (by Artemio) three times onto blue & white patterned paper and punched the images out with a 1" circle punch. Finally I stamped the large dotty circle (also Artemio) once onto the same patterned paper and punched four tiny circles out of it. A little ribbon and some brown pearls and it was ready for a project. The scraps are from the page I made here for Scrapbookers Anonymous.
I'm away on a scrapbooking retreat this weekend and I wanted a quick card to give to the organiser ... a quick trim of the ribbon, a fold of some cardstock and the addition of some stamped letter tiles and ... hey presto! ... a card was created! I can see me making a lot more of these tags - they are a great way to use up scraps and can fit equally well on a page or a card.
I stamped a wood-grain frame directly onto the tag and added strips of patterned paper after running them through my EK Success border punch. I then stamped the leafy circle (by Artemio) three times onto blue & white patterned paper and punched the images out with a 1" circle punch. Finally I stamped the large dotty circle (also Artemio) once onto the same patterned paper and punched four tiny circles out of it. A little ribbon and some brown pearls and it was ready for a project. The scraps are from the page I made here for Scrapbookers Anonymous.
I'm away on a scrapbooking retreat this weekend and I wanted a quick card to give to the organiser ... a quick trim of the ribbon, a fold of some cardstock and the addition of some stamped letter tiles and ... hey presto! ... a card was created! I can see me making a lot more of these tags - they are a great way to use up scraps and can fit equally well on a page or a card.
Wednesday, 21 September 2011
The Traveller Has Returned!
It all seems a very long time ago.
Actually it's two months since No.1 Son left on his travels to India, Cambodia, Vietnam and Bali. And two weeks since he returned - safe and sound! Some of you may remember my extra worries about his well-being following a mis-adventure while celebrating his exam results. His injuries did impact his journey - long coach and train journeys were even more uncomfortable than they might have been and trekking had to be contained in days trips. I was less than happy to hear about motor cycle "taxis" being used, especially as No.1 Son's dreadlocks didn't fit well into the supplied riding helmet!! But he has survived, with dozens of great tales to tell, hundreds of photos, several new culinary skills and a desire to do it all again!
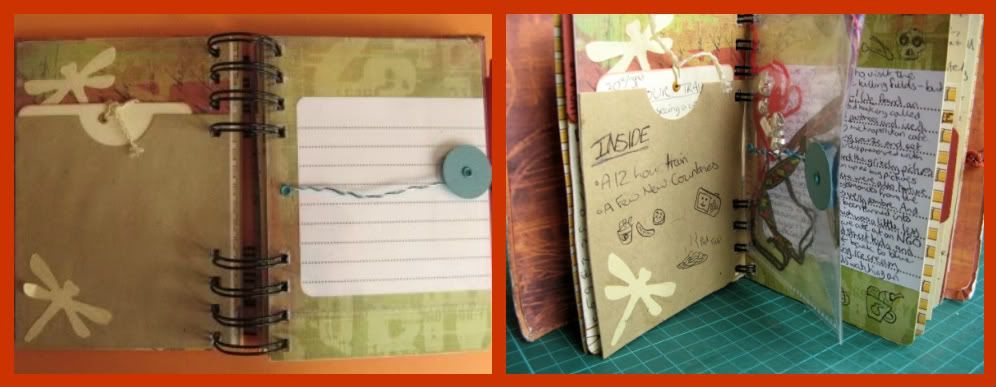
I sent him off with a home-made travel themed smash book, but I honestly expected it to have more of an impact on his girlfriend; No.1 Son has never managed to keep a travel journal before. Imagine my delight to find that it was nearly full of his jottings and drawings and small trinkets. Apparently he would have filled it completely but for their total exhaustion during their seventh and final week - they simply sat reading books in the shade by the beach every day!! It has taken a bit of a battering and got "slightly" wet at least once, but it is bursting with details of places, names of new friends, dates of excursions, prices and exchange rates, warnings of scams, journey times and recipes, ...
No.1 Son is no longer on daily pain medication, which is good, but the corset has stretched beyond usefulness in the tropical heat, which is bad. He's back to university at the weekend and hopefully a full check-up at the hospital very shortly after that. Phew ... I just can't stop worrying can I?
Actually it's two months since No.1 Son left on his travels to India, Cambodia, Vietnam and Bali. And two weeks since he returned - safe and sound! Some of you may remember my extra worries about his well-being following a mis-adventure while celebrating his exam results. His injuries did impact his journey - long coach and train journeys were even more uncomfortable than they might have been and trekking had to be contained in days trips. I was less than happy to hear about motor cycle "taxis" being used, especially as No.1 Son's dreadlocks didn't fit well into the supplied riding helmet!! But he has survived, with dozens of great tales to tell, hundreds of photos, several new culinary skills and a desire to do it all again!
I sent him off with a home-made travel themed smash book, but I honestly expected it to have more of an impact on his girlfriend; No.1 Son has never managed to keep a travel journal before. Imagine my delight to find that it was nearly full of his jottings and drawings and small trinkets. Apparently he would have filled it completely but for their total exhaustion during their seventh and final week - they simply sat reading books in the shade by the beach every day!! It has taken a bit of a battering and got "slightly" wet at least once, but it is bursting with details of places, names of new friends, dates of excursions, prices and exchange rates, warnings of scams, journey times and recipes, ...
![]() |
| Before & After |
Labels:
Mini Books,
Photos
Monday, 19 September 2011
Wet & Wild
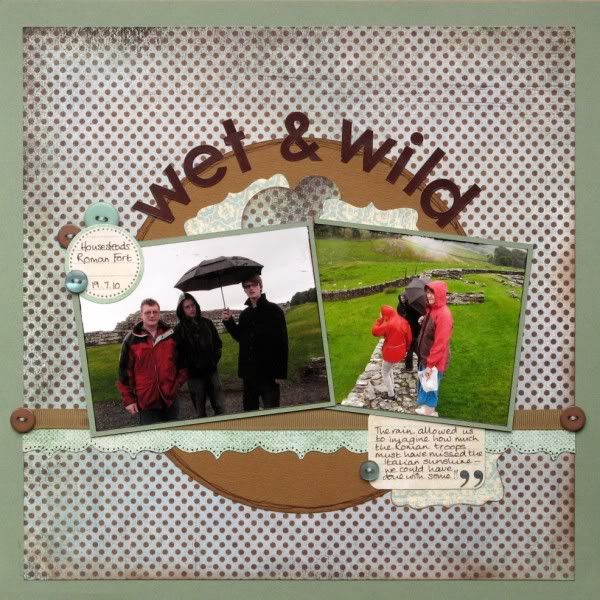
Over on UKScrappers last week there was a fun challenge to use an advertising slogan as your title - and of course my mind went totally blank!!! I get this when I answer surveys too - no matter how hard I think, I can neither recall the product when told the slogan, nor remember the slogan when faced with the product. Yet while I'm watching the advert I'm usually irritated because I've seen/heard the combination so many times. Marketing budgets are wasted on my butterfly brain!
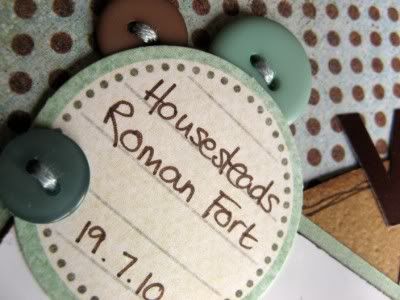
Thankfully Google pointed me in the right direction and I eventually found a 7-up slogan from 1965/66 that fitted these rainy pictures from last July (please note the typical British summer holiday weather) when we visited Hadrian's Wall at Housesteads Fort. I've used my September Counterfeit Kit along with a sketch from Sarah's Cards.
I think No.3 Child is responsible for getting rain droplets onto the camera lens and chopping off my feet ... don't we all look like we're having a grrrrreat time .... aha, now that reminds me of a slogan I can link to the product - Tony the Tiger and his Frosties!
I also visited Housesteads in August 2009 - it poured then too!! One day I'd like to walk the length of Hadrian's Wall, but given my track record, I'd better invest in some decent waterproofs first!
P.S. As I love combining challenges, this page also fits in with Scrapbookers Anonymous' "B" challenge as I've used Basic Grey paper and Buttons!
Thankfully Google pointed me in the right direction and I eventually found a 7-up slogan from 1965/66 that fitted these rainy pictures from last July (please note the typical British summer holiday weather) when we visited Hadrian's Wall at Housesteads Fort. I've used my September Counterfeit Kit along with a sketch from Sarah's Cards.
| The rain allowed us to imagine how much the Roman troops must have missed the Italian sunshine - we could have done with some ourselves!! |
P.S. As I love combining challenges, this page also fits in with Scrapbookers Anonymous' "B" challenge as I've used Basic Grey paper and Buttons!
Labels:
CKCB,
Layouts,
Sarah's Cards,
UKS
Monday, 12 September 2011
Cracking On At My Crop
Every month I attend a local crop.
Every month I prepare to take full advantage of 6 hours of uninterrupted scrapping time.
Every month I print dozens of new photos.
Every month I take along my latest Counterfeit Kit (& often the remains of the previous kit too).
Every month I spend the first hour or so unpacking, admiring pages & purchases ... and chatting.
Every month I spend the next hour or so pushing paper around, eating cake ... and chatting.
Every month I spend the final hour or so wondering where the time's gone, sticking stuff down ...
... and (you guessed it!) chatting!
Every month I come home with two 90% complete pages & at least a dozen un-scrapped photos!
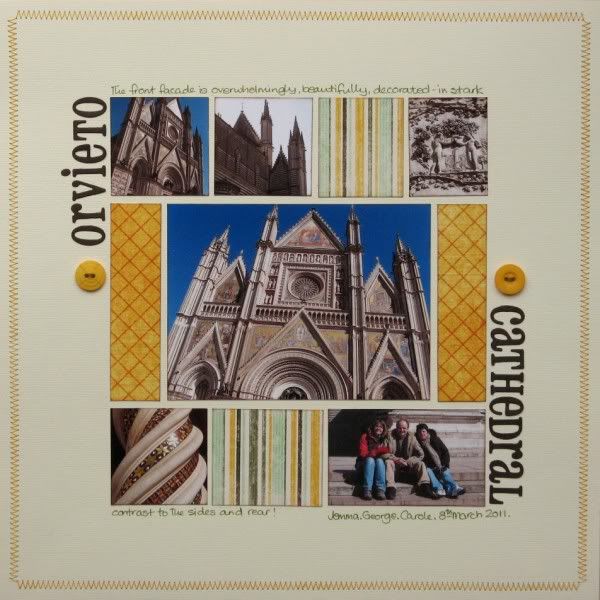
Sometimes I use the photos during the month, sometimes they get taken (along with the newly printed photos) to the next month's crop. I have had some ready-trimmed photos from a March trip, to Orvieto Cathedral, sitting in my crop bag since May or June ... and despite printing new photos for last Saturday's crop, I decided enough was enough and these pics deserved to make it onto a page!
The weekly challenge over at UKScrappers provided a lovely sketch fromAli Edwards' Cathy Zielske's (thank you Dawn!) Make It Mondays which was unfussy - a prefect foil for the luscious decoration on the front of the cathedral. I've never been inside, though Hubby tells me that it is relatively plain with black & white striped walls - but the outside is absolutely overwhelming - I find it quite stunning that so much effort has been put into the facade which can't really be appreciated by us mortals on the ground.
Do you have photos that keep getting neglected when you are choosing what to scrap with? Have you made a start with September's Counterfeit Kit? Do you have a better crop chatting to scrapping ratio than me?
Every month I prepare to take full advantage of 6 hours of uninterrupted scrapping time.
Every month I print dozens of new photos.
Every month I take along my latest Counterfeit Kit (& often the remains of the previous kit too).
Every month I spend the first hour or so unpacking, admiring pages & purchases ... and chatting.
Every month I spend the next hour or so pushing paper around, eating cake ... and chatting.
Every month I spend the final hour or so wondering where the time's gone, sticking stuff down ...
... and (you guessed it!) chatting!
Every month I come home with two 90% complete pages & at least a dozen un-scrapped photos!
Sometimes I use the photos during the month, sometimes they get taken (along with the newly printed photos) to the next month's crop. I have had some ready-trimmed photos from a March trip, to Orvieto Cathedral, sitting in my crop bag since May or June ... and despite printing new photos for last Saturday's crop, I decided enough was enough and these pics deserved to make it onto a page!
The weekly challenge over at UKScrappers provided a lovely sketch from
Do you have photos that keep getting neglected when you are choosing what to scrap with? Have you made a start with September's Counterfeit Kit? Do you have a better crop chatting to scrapping ratio than me?
Subscribe to:
Posts (Atom)